

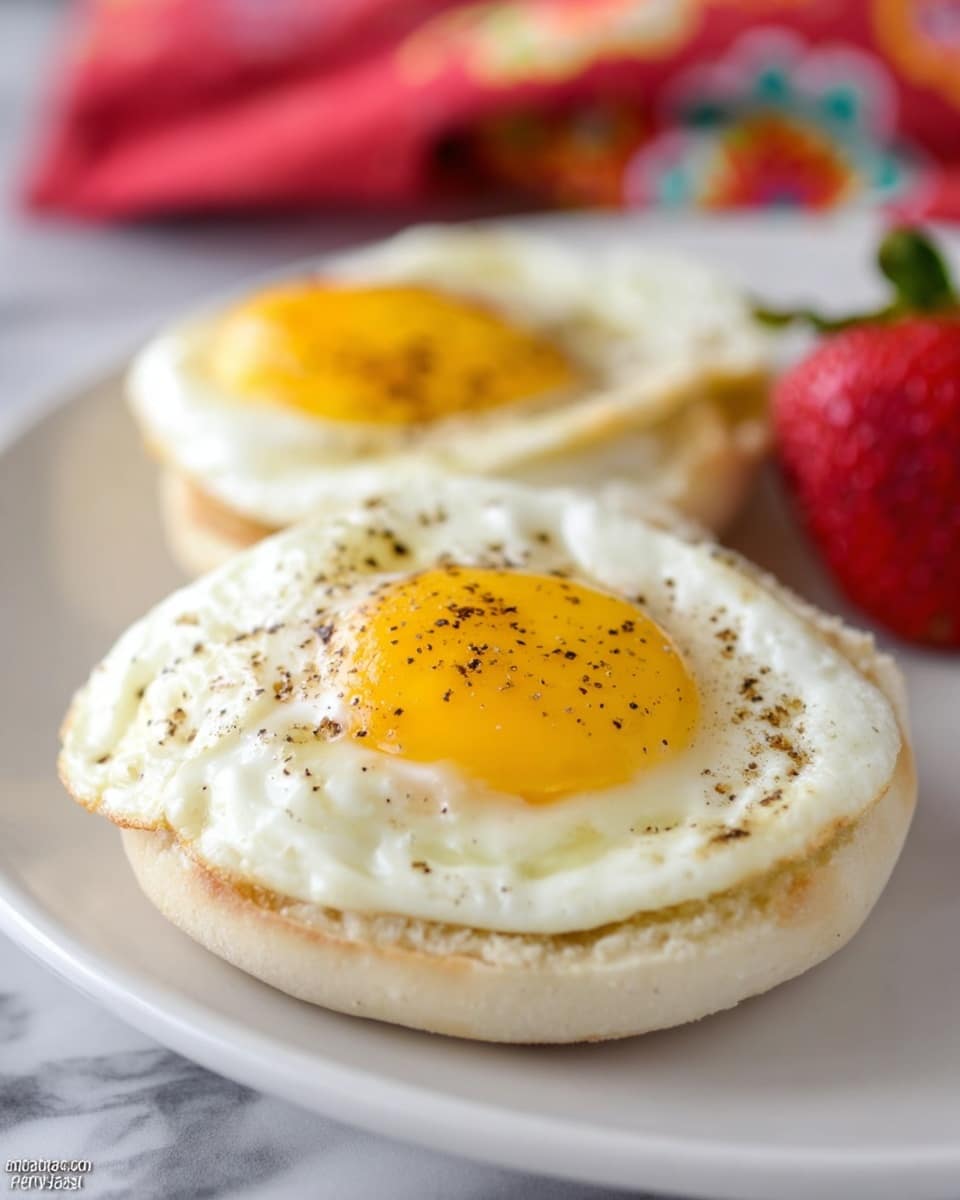
I absolutely love how simple and clever this Mason Jar Lid Baked Eggs Recipe is. When I first tried this, I was surprised at how easy it is to make perfectly shaped eggs without any mess or fuss. Whether you’re looking for a fun breakfast idea or a quick protein-packed snack, this method never fails to impress — especially if you want your eggs neat and portion-controlled.
You’ll find that this recipe works beautifully when you’re cooking for breakfast guests or just for yourself on a lazy weekend. The mason jar lid acts like a tiny skillet, giving you perfectly round eggs that are baked gently in the oven. It’s a hands-off approach that frees you up to do other things while breakfast is cooking, plus cleanup is a breeze!
Why You’ll Love This Recipe
- Simplicity: Minimal ingredients and steps make it perfect for busy mornings.
- Perfect Portions: Each egg bakes in its own tidy little “jar lid pan” for easy serving.
- Customizable Cooking: You control how runny or firm your eggs turn out with baking time.
- Easy Cleanup: Non-stick lids mean eggs slide right out — no scrubbing pans afterward.

Ingredients You’ll Need
You only need two simple ingredients for this Mason Jar Lid Baked Eggs Recipe, which is a big part of why I keep coming back to it. Using good-quality eggs really shines here, and a touch of non-stick spray or butter helps everything come out perfectly every time.
- Eggs: Fresh eggs work best — they hold together nicely and give great flavor.
- Non-stick spray (or butter): Essential for making sure your eggs slide right off the mason jar lids without sticking.
Variations
I like to customize this Mason Jar Lid Baked Eggs Recipe in a few fun ways depending on my mood or what I have on hand. Feel free to get creative — this recipe is a fantastic base that you can tweak easily to suit your taste or dietary preferences.
- Cheesy Twist: Sprinkle a little shredded cheese on the egg before baking — my family goes crazy for that gooey, melty finish.
- Veggie Boost: Add finely diced bell peppers, spinach, or mushrooms to the lid before cracking the egg in for extra flavor and nutrition.
- Herb Infusion: Fresh herbs like chives or parsley mixed in post-bake add a fresh burst that brightens up the dish.
- Diet-Friendly: For a lower-fat option, use cooking spray instead of butter and consider adding egg whites instead of whole eggs.
How to Make Mason Jar Lid Baked Eggs Recipe
Step 1: Preheat and Prep Your Lids
Start by preheating your oven to 325°F — this temperature is perfect for gently baking eggs without turning them rubbery. While the oven heats, grab your mason jar lids and give them a good spray of non-stick cooking spray or a thin layer of butter. This little step makes all the difference because it helps the eggs slide out flawlessly once baked.
Step 2: Arrange and Crack
Place the greased mason jar lids upside down on a baking sheet — I like to line mine with parchment paper to catch any drips. Crack one egg carefully into the center of each lid. Take your time here so the yolks don’t break unless that’s your style.
Step 3: Bake Until Just Right
Bake the eggs for 10-15 minutes. If you like runny yolks, stick closer to 10 minutes. For fully set whites and a firmer yolk, give them the full 15 minutes. Keep an eye on them the first time you try so you can dial in exactly how you like it.
Step 4: Cool and Remove
Once the eggs start to bubble and look set, carefully take the baking sheet out of the oven and let it sit for a minute to cool just enough to handle. Using oven mitts, gently slide a butter knife around the edge of any eggs that are hesitant to release from the lids — usually, they pop right out onto your plate!
Pro Tips for Making Mason Jar Lid Baked Eggs Recipe
- Use Fresh Eggs: Fresh eggs hold together better and taste surprisingly better when baked like this.
- Oven Temperature: I learned that 325°F offers the perfect balance between cooking thoroughly and keeping the yolk tender.
- Non-Stick Prep: Don’t skip the butter or cooking spray on the lids—this ensures a smooth release every time.
- Timing Trial: Test your preferred baking time the first time around so you know exactly when to pull your oven timer.
How to Serve Mason Jar Lid Baked Eggs Recipe
Garnishes
I always sprinkle a pinch of flaky sea salt and fresh cracked black pepper on top before serving — those little additions really highlight the egg’s natural flavor. If I’m feeling fancy, a bit of chopped fresh chives or parsley adds a lovely pop of color and freshness.
Side Dishes
These baked eggs pair beautifully with toasted sourdough or crusty bread, avocado slices, or even a fresh green salad for a light meal. When I want to bulk up breakfast, I throw together some roasted potatoes or sautéed greens on the side to round things out.
Creative Ways to Present
For brunch parties, I like to serve these eggs still in the mason jar lids, lined up on a tray with dill sprigs and mini toast points. It’s a fun visual and keeps things casual yet charming. You can also top with smoked salmon or a dollop of crème fraîche for extra wow factor.
Make Ahead and Storage
Storing Leftovers
If you have leftovers (which is rare in my house!), store them in an airtight container in the fridge for up to 2 days. I recommend sliding parchment paper between layers to keep the eggs intact and easy to reheat.
Freezing
I’ve tried freezing baked eggs before and while you can freeze them, the texture changes a bit and can become watery once thawed. For best results, I suggest eating them fresh or within a couple of days refrigerated.
Reheating
To reheat, I pop the eggs in a warm oven at 300°F for just 5 minutes to avoid overcooking. You can also microwave them briefly on low power, but watch carefully to prevent rubbery whites.
FAQs
-
Can I use any size mason jar lids for this recipe?
You can use standard wide-mouth mason jar lids, which are about 3 inches across and work perfectly for single eggs. Smaller lids might be too tight for the egg to cook evenly, and larger lids may spread the egg too thin. I find wide-mouth lids give the best results for this baked egg method.
-
How do I get the eggs out easily without breaking the yolk?
Coating the lids generously with non-stick spray or butter is key to eggs sliding out easily. After baking, let the eggs cool slightly, then run a butter knife gently around the edge of the egg to loosen it if needed. I usually find the eggs pop right out, yolk intact, with just a little wiggle.
-
Can I add ingredients like cheese or veggies directly on the eggs before baking?
Absolutely! Adding a sprinkle of cheese or some finely chopped veggies is a delicious way to mix things up. Just be mindful of moisture-heavy veggies like tomatoes, which can release water and affect the baking process—pat them dry or sauté them briefly if using.
-
What if I want runny yolks? How long should I bake?
If runny yolks are your thing, bake the eggs closer to 10 minutes and keep an eye on them toward the end. Remember, ovens vary, so it may take a little experimentation to get your perfect timing.
Final Thoughts
This Mason Jar Lid Baked Eggs Recipe has become one of my go-to tricks for fuss-free, fun breakfasts that impress every time. I love sharing it with friends because it’s so intuitive and adaptable—you’ll enjoy how effortless and tasty it is. Give it a try next time you want breakfast with a twist, and I promise you’ll find it as charming and delicious as I do!
Print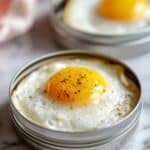
Mason Jar Lid Baked Eggs Recipe
- Prep Time: 5 minutes
- Cook Time: 10-15 minutes
- Total Time: 15-20 minutes
- Yield: 1 egg per mason jar lid
- Category: Breakfast
- Method: Baking
- Cuisine: American
Description
This Mason Jar Lid Eggs recipe offers a clever and simple way to bake perfectly shaped eggs using mason jar lids. Perfect for a quick breakfast or brunch, the eggs come out tender and can easily be customized to your preferred doneness. Baking eggs this way ensures minimal cleanup and a fun presentation.
Ingredients
Ingredients
- Eggs (as many as needed)
- Non-stick spray or butter (for greasing the mason jar lids)
Instructions
- Preheat Oven: Preheat your oven to 325°F (163°C) to create the perfect temperature for gently baking the eggs.
- Prepare Mason Jar Lids: Lightly spray or butter the flat side of each mason jar lid to prevent the eggs from sticking.
- Arrange Lids on Baking Sheet: Place the mason jar lids upside down on a baking sheet, ensuring they are stable and spaced out.
- Crack Eggs Into Lids: Carefully crack one egg into each prepared mason jar lid.
- Bake the Eggs: Bake in the oven for 10-15 minutes. For runnier yolks, check around 10 minutes; for fully cooked yolks, bake closer to 15 minutes or until the eggs start to bubble.
- Cool Slightly: Remove the baking sheet from the oven and let the eggs cool for about a minute to firm up slightly.
- Remove Eggs: Wearing oven mitts, gently slide the eggs out of the lids. If needed, run a butter knife around the edge to help release the egg.
Notes
- For runny, sunny-side-up style yolks, bake the eggs for less time, approximately 10 minutes.
- For fully cooked eggs, bake closer to 15 minutes until the yolks are firm.
- Use a butter knife to gently loosen eggs that don’t slide out easily from the mason jar lids.
- You can easily scale this recipe depending on how many eggs you want to prepare.
- This method provides a clean, easy way to cook eggs without needing extra pans.
Nutrition
- Serving Size: 1 egg
- Calories: 70
- Sugar: 0.2g
- Sodium: 70mg
- Fat: 5g
- Saturated Fat: 1.5g
- Unsaturated Fat: 3g
- Trans Fat: 0g
- Carbohydrates: 0.5g
- Fiber: 0g
- Protein: 6g
- Cholesterol: 185mg


