

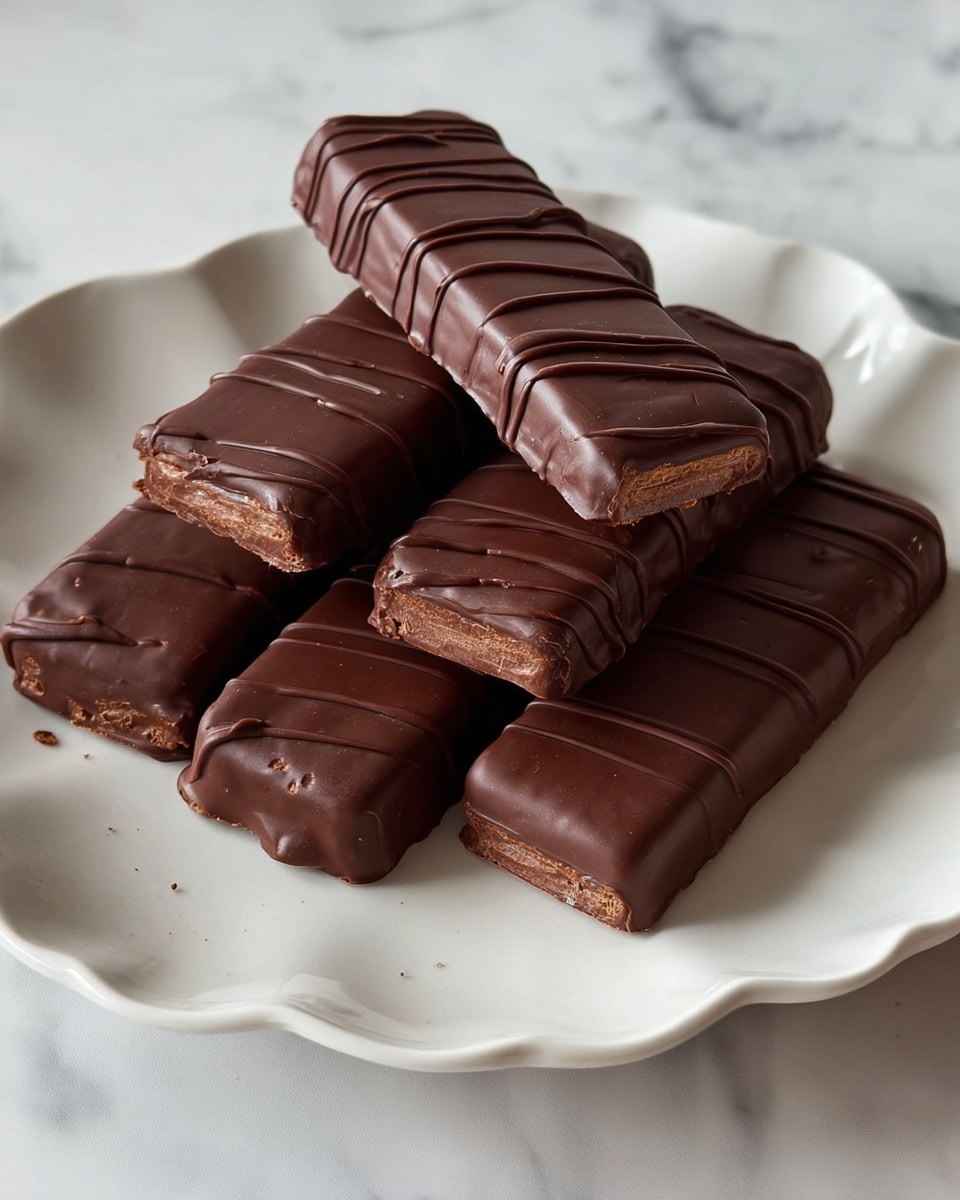
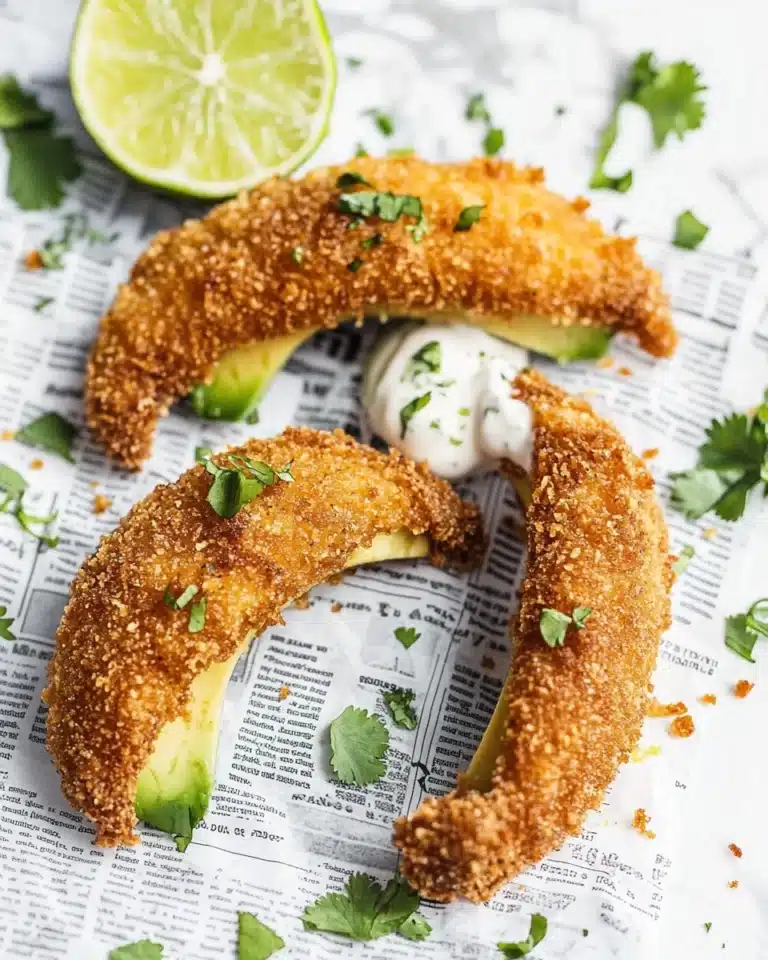
I absolutely love sharing this Healthy Twix Bars (Gluten-Free) Homemade Recipe because it’s the perfect mix of indulgence and nourishment. These bars satisfy that sweet tooth without leaving you feeling guilty, thanks to wholesome ingredients like almond flour and natural sweeteners. Every time I make them, my family goes crazy — they’re rich, chewy, and have just the right crunch.
What makes this recipe special is how easy it is to pull off at home, even if you’re not a baking pro. Plus, it’s naturally gluten-free, making it a friendly option for those avoiding gluten without compromising flavor. Whether it’s a treat for a special occasion or a daily dose of chocolatey goodness, these bars really hit the spot.
Why You’ll Love This Recipe
- Gluten-Free & Wholesome: Made with almond flour and natural sweeteners for a healthier twist on a classic snack.
- Simple & No Fuss: Straightforward steps that anyone can follow – great even if you’re new to baking.
- Customizable Layers: You can tweak the caramel or chocolate for your preferred flavors or dietary needs.
- Perfect Make-Ahead Treat: Stores well in the fridge or freezer, ready whenever you need a sweet pick-me-up.

Ingredients You’ll Need
Each component in this Healthy Twix Bars (Gluten-Free) Homemade Recipe works in harmony to recreate that classic caramel, crunch, and chocolate combo—only healthier. Choosing quality ingredients really shines through here.
- Almond Flour: A gluten-free alternative to regular flour that gives the shortbread base a tender, nutty flavor.
- Butter: Melted butter binds the shortbread and adds richness—make sure it’s unsalted for better flavor control.
- Maple Syrup: Natural sweetener that adds moisture and a subtle caramel note.
- Vanilla Extract: Elevates the overall flavor with warm, cozy hints.
- Salt: Balances sweetness and enhances all the flavors.
- Creamy Peanut Butter: Smooth and rich, it’s key to achieving that luscious caramel texture.
- Chocolate Chips: Use high-quality for the best melt and taste.
- Coconut Oil: Helps the chocolate coating set firmly and makes dipping easier.
Variations
I love how versatile this Healthy Twix Bars (Gluten-Free) Homemade Recipe is, so I often switch up ingredients depending on what I have on hand or who I’m cooking for. Don’t hesitate to experiment and make it your own.
- Nut-Free Version: Swap the peanut butter for sunflower seed butter if you’re avoiding nuts – it works surprisingly well!
- Dairy-Free Option: Use coconut oil or vegan butter instead of regular butter to keep it fully plant-based.
- Chocolate Variety: Try dark chocolate or even white chocolate chips for different flavor profiles.
- Add Crunch: Sprinkle some crushed nuts or gluten-free crackers on the caramel layer for extra texture.
How to Make Healthy Twix Bars (Gluten-Free) Homemade Recipe
Step 1: Prepare and Bake the Shortbread Base
First, preheat your oven to 350°F (175°C). Line an 8×8 inch pan with parchment paper, making sure it covers the edges well—that’s key to lifting out your bars easily later. Then, grab a large bowl and mix almond flour, melted butter, maple syrup, vanilla extract, and salt. Press this dough firmly and evenly into the pan; take your time to get it nice and compact. Bake for 10-12 minutes until the edges turn a light golden color. Once baked, set it aside to cool completely while you move on to the caramel.
Step 2: Make the Creamy Caramel Filling
In a separate bowl, stir together creamy peanut butter, maple syrup, vanilla extract, and almond flour until smooth. When your shortbread base is cool to the touch, spread this caramel mixture evenly over it. This step always feels so satisfying to me—the smooth topping contrasts beautifully with the crumbly base. Pop the whole pan into the freezer for at least 1 hour to let everything set nicely before moving on.
Step 3: Prepare the Chocolate Coating
Now for the fun chocolate part! Melt your chocolate chips and coconut oil together. I usually do this by microwaving in 30-second bursts and stirring in between to prevent burning. Alternatively, use a double boiler method by placing the bowl over a pot of simmering water. You want it silky smooth and shiny—perfect for coating the bars.
Step 4: Assemble and Coat the Bars
Remove the pan from the freezer and gently lift out the block using the parchment paper. Transfer it to a cutting board and slice into 16 bars—for me, cutting clean edges is easier if you use a sharp, slightly warm knife. Then, dip each bar fully into the melted chocolate, give it a gentle tap to remove excess, and set it on a parchment-lined tray. If you love a little extra flair like I do, drizzle any leftover chocolate over the bars and sprinkle with flaky sea salt before returning them to the freezer for about 10 minutes to harden. And voilà—your healthy, gluten-free Twix bars are ready to enjoy!
Pro Tips for Making Healthy Twix Bars (Gluten-Free) Homemade Recipe
- Firm Pressing: When pressing the shortbread base, use the back of a spoon or a flat-bottom glass to get an even thickness and solid crust.
- Smooth Caramel Layer: Make sure the caramel filling is spread evenly and cools fully before freezing to avoid mixing layers.
- Chocolate Tempering: Stir chocolate often while melting to keep it smooth and shiny; burnt chocolate can ruin the coating.
- Cut with Care: Use a sharp knife and wipe it clean between cuts for neat bars without crumbly edges.
How to Serve Healthy Twix Bars (Gluten-Free) Homemade Recipe
Garnishes
I love adding just a sprinkle of flaky sea salt on top of the chocolate—it really makes the sweet flavors pop and adds a lovely crunch. Sometimes, I also drizzle a bit of extra melted dark chocolate over the bars for an elegant finish. If you want to get fancy, chopped toasted almonds or a dusting of cocoa powder look great too!
Side Dishes
These bars are a fantastic treat on their own, but I’ve found they pair beautifully with a cup of hot tea or coffee. For a more substantial snack, serve them alongside fresh fruit like sliced apples, berries, or even some tangy Greek yogurt to balance the sweetness.
Creative Ways to Present
For parties or special occasions, I like to arrange the bars on a pretty tiered tray or in little cupcake liners for easy grabbing. Wrapping individual bars in parchment paper tied with a ribbon also makes a lovely homemade gift. You can get playful by layering crushed peppermint or edible gold dust on the chocolate coating for holiday flair.
Make Ahead and Storage
Storing Leftovers
Because these bars are rich and moist, I store leftovers in an airtight container in the fridge. This keeps them fresh for up to a week, but honestly, they rarely last that long in my house!
Freezing
If I want to keep these bars longer, freezing works beautifully. I wrap individual bars in parchment or plastic wrap, then place them in a freezer-safe container. They can last up to 3 months this way, perfect for prepping treats ahead of time.
Reheating
When I’m ready to enjoy a frozen bar, I let it thaw in the fridge overnight for the best texture. If I’m in a hurry, a few minutes at room temperature works too. Avoid microwaving directly as the chocolate might soften too much and the layers could get messy.
FAQs
-
Can I substitute peanut butter for almond butter in this recipe?
Absolutely! Almond butter or any other nut or seed butter works great as a substitute in the caramel layer, just make sure it’s creamy and well stirred to get that smooth texture.
-
Is this Healthy Twix Bars (Gluten-Free) Homemade Recipe suitable for vegan diets?
Yes, with a few tweaks. Use vegan butter or coconut oil instead of regular butter, ensure your chocolate chips are dairy-free, and you’ll have a delicious vegan-friendly version.
-
How do I get the shortbread base firm without it crumbling?
Press the almond flour mixture firmly and evenly into your pan before baking, and be sure to let it cool completely after baking; handling while warm can cause it to break apart.
-
Can I make the bars sugar-free?
Using pure maple syrup is already a natural sweetener, but you can try swapping it for a low-glycemic syrup like monk fruit or stevia-based alternatives—just keep in mind it might affect texture slightly.
Final Thoughts
This Healthy Twix Bars (Gluten-Free) Homemade Recipe is one of those gems that never fails to impress both family and friends while feeling nourishing and homemade. I love how easy it is to make yet how luxurious it tastes, satisfying any craving without the overwhelm. If you’re looking to treat yourself without straying from your health goals, I really recommend giving these bars a try—you’ll thank me later!
Print
Healthy Twix Bars (Gluten-Free) Homemade Recipe
- Prep Time: 15 minutes
- Cook Time: 12 minutes
- Total Time: 2 hours 15 minutes
- Yield: 16 bars
- Category: Dessert, Snack
- Method: Baking
- Cuisine: American
- Diet: Gluten Free
Description
These Healthy Twix Bars are a delicious homemade treat that combines a gluten-free almond flour shortbread base with a creamy peanut butter caramel filling, all coated in rich chocolate. Sweetened naturally with maple syrup and made with wholesome ingredients, these bars offer a healthier twist on the classic candy bar, perfect for satisfying your sweet tooth guilt-free.
Ingredients
Shortbread Base:
- 1 ½ cups Almond Flour
- 3 tablespoons Butter, melted
- 1 ½ tablespoons Maple Syrup
- ½ teaspoon Vanilla Extract
- ¼ teaspoon Salt
Caramel Filling:
- 1 cup Creamy Peanut Butter
- ⅓ cup Maple Syrup
- 1 teaspoon Vanilla Extract
- ¼ cup Almond Flour
Chocolate Coating:
- 1 cup Chocolate Chips
- 1 ½ tablespoons Coconut Oil
Instructions
- Preheat Oven and Prepare Pan: Preheat your oven to 350°F (175°C). Line an 8×8 inch baking pan with parchment paper, ensuring the edges are well covered for easy removal later.
- Prepare the Shortbread: In a large mixing bowl, combine almond flour, melted butter, maple syrup, vanilla extract, and salt. Stir until fully incorporated to form a dough. Press this mixture firmly and evenly into the prepared pan. Bake for 10-12 minutes until edges turn golden brown. Set aside to cool.
- Make the Caramel Filling: In a medium bowl, mix creamy peanut butter, maple syrup, vanilla extract, and almond flour until smooth. Once the shortbread base is cooled, spread this caramel mixture evenly over it. Place the pan in the freezer for at least 1 hour to set.
- Prepare the Chocolate Coating: Melt chocolate chips and coconut oil together in a shallow bowl over boiling water or in the microwave in 30-second intervals, stirring until smooth and fully melted.
- Assemble the Bars: Remove the pan from the freezer. Using the parchment paper, lift out the set shortbread and caramel block. Place on a cutting board and slice into 16 bars by cutting in half, then slicing each half into 8 even bars.
- Coat the Bars: Dip each bar into the melted chocolate, covering entirely. Tap off excess chocolate and place bars on a parchment-lined tray. Repeat with all bars.
- Final Touch: Optionally, drizzle remaining melted chocolate over the bars and sprinkle flaky sea salt on top. Return the tray to the freezer for about 10 minutes until the chocolate hardens.
- Enjoy and Store: These healthy Twix bars are ready to enjoy! Store leftovers in an airtight container in the refrigerator or freezer.
Notes
- Ensure the parchment paper covers the pan edges well to lift the bars easily after setting.
- For best results, use creamy peanut butter to achieve a smooth caramel filling.
- You can substitute almond flour with another gluten-free flour blend if preferred but texture may vary.
- Store bars in the fridge to maintain firmness, especially in warmer climates.
- Flaky sea salt on top enhances the flavor contrast but can be omitted for a fully sweet bar.
Nutrition
- Serving Size: 1 bar (approx. 50g)
- Calories: 210 kcal
- Sugar: 9 g
- Sodium: 45 mg
- Fat: 17 g
- Saturated Fat: 5 g
- Unsaturated Fat: 10 g
- Trans Fat: 0 g
- Carbohydrates: 10 g
- Fiber: 2 g
- Protein: 5 g
- Cholesterol: 10 mg


