
If you’re looking for a seriously fun and delicious treat to wow your friends (or just spoil yourself), this Oreo Eyeball Truffles Recipe is exactly what you need. I absolutely love how these little eyeball truffles turn out—creamy, sweet, and downright spooky perfect for Halloween or anytime you want a quirky dessert. Plus, they’re surprisingly simple to make, and I’ll walk you through every step so you nail it on your first try!
Why You’ll Love This Recipe
- Super Simple Ingredients: You probably already have golden Oreos and cream cheese on hand—it’s that easy.
- Spooky Fun Presentation: These eyeballs are perfect conversation starters at parties or Halloween get-togethers.
- Rich & Creamy Texture: The cream cheese gives these truffles a dreamy melt-in-your-mouth feel.
- Customizable & Creative: You can mix candy melt colors and sprinkle designs to match your theme or mood.

Ingredients You’ll Need
The ingredients for this Oreo Eyeball Truffles Recipe combine creamy and crunchy textures with fun decorative elements that make each truffle pop. Each component plays a role in flavor and appearance, so grabbing the right ones really helps.
- Golden Oreos: These give the truffles a lighter color that’s perfect for showing off the candy eyes later.
- Cream Cheese: Room temperature is key here—it blends smoothly and brings a rich tang that balances the sweetness.
- Colored Candy Melts: Pick shades that match your vibe; bright colors bring these eyeballs to life.
- Color-Matching Sprinkles: These act as the “hair” for your eyeballs and add a whimsical texture.
- Large Candy Eyes: The star of the show! If you can’t find these, I’ll share some tricks below.
Variations
I love making this Oreo Eyeball Truffles Recipe my own by switching up colors and decorations to fit different occasions. You can absolutely get creative and personalize it anyway you like—trust me, it makes the process just as fun as the result!
- Use Dark or White Chocolate Melts: When I experimented with white chocolate melts, the truffles looked so elegant yet spooky with black candy eyes.
- Different Sprinkles: Mixing spooky sprinkles like mini bats or black sanding sugar adds extra flair during Halloween season.
- Non-Dairy Cream Cheese: If you need a dairy-free option, I swapped in a plant-based cream cheese with success—just make sure it’s soft at room temperature.
- DIY Candy Eyes: Once I ran out of candy eyes, so I piped little white and black melts onto parchment, popped them in the fridge, and used those—super easy and adorable!
How to Make Oreo Eyeball Truffles Recipe
Step 1: Crush the Golden Oreos
First things first, you want those golden Oreos nicely crumbled but not powdery. I love using my food processor because it makes quick work of it, breaking the cookies down perfectly. If you don’t have one, no worries—pop the Oreos into a Ziploc bag and smash them with a rolling pin. Just make sure the cream filling stays inside—it adds that magic flavor to your truffles!
Step 2: Mix in Cream Cheese
Once your Oreos are all crushed, add your softened cream cheese and pulse a few times until everything blends into a dough-like consistency. You’ll notice the mixture start to stick together nicely. This is where the truffle magic really happens: smooth, creamy, and rich—the perfect base.
Step 3: Scoop & Chill
I find using a 1 ½ tablespoon cookie scoop helps keep these uniform and easy to handle. Scoop out the dough and roll into balls with your hands—it’s messy but fun! Place these little guys on a parchment-lined baking sheet, then pop them in the fridge for 15 to 30 minutes. This chilling step firms them up nicely before dipping.
Step 4: Melt Candy & Dip Truffles
Now for the colorful part! Melt your candy melts in a microwave-safe bowl, heating for 45 seconds at first and stirring well. Continue microwaving in short 10-20 second bursts until smooth. I’ve learned patience is key here—too hot, and the candy clumps; too cold, and it’s lumpy. Dip each chilled truffle carefully, cover it completely, and place them on fresh parchment. Press a candy eye onto the front right away before the coating sets—it sticks best when the candy is still wet.
Step 5: Add Sprinkles & Chill Again
Once the eyes are secure, sprinkle some of your color-matching sprinkles on top to create “hair”—it adds a playful, eerie vibe that really makes these eyeballs pop. Finally, set your decorated truffles in the fridge for about 30 minutes or until the coating has completely hardened. Then, enjoy your creepy-cute, delicious creation!
Pro Tips for Making Oreo Eyeball Truffles Recipe
- Softened Cream Cheese Matters: I used full-fat cream cheese because it blends smoother and tastes richer than the low-fat versions.
- Crushing Without a Processor: Crushing the cookies in a bag with a rolling pin works great—just keep the cream filling inside for that perfect flavor combo.
- Candy Melt Consistency: Keep stirring as you microwave your candy melts to avoid clumps and get that perfect smooth dip coating.
- Don’t Skip Chilling: Chilling the truffle balls before and after dipping helps maintain shape and ensures the candy sets firm and neat.
How to Serve Oreo Eyeball Truffles Recipe
Garnishes
For garnishes, I usually stick to colorful sprinkles that match the candy melt color—this adds fun “hair” texture to each eyeball. I’ve even used edible glitter to give them a spooky shimmer. If you’re feeling adventurous, tiny candy shards or edible googly eyes can amp up the creep factor perfectly.
Side Dishes
These truffles are mini bites, so pairing them with something light and simple works best. A chilled glass of milk or hot cocoa is my go-to. For parties, I’ve served them alongside fruit platters or simple vanilla cupcakes to balance those rich chocolatey eyeballs.
Creative Ways to Present
I love placing these eyeball truffles on a bed of dry ice for an eerie smoky effect at Halloween parties. Another fun idea is arranging them inside clear glass jars lined with dark shredded paper or moss for a creepy “monster eye collection” that’s as eye-catching as the truffles themselves!
Make Ahead and Storage
Storing Leftovers
I keep leftover truffles in an airtight container in the fridge, where they stay fresh for up to a week. When I’m ready to enjoy, I let them sit out for about 15 minutes to take off the chill—it really lets all the flavors shine through.
Freezing
These Oreo Eyeball Truffles freeze beautifully! I’ve frozen them in a single layer in a freezer-safe container for 2-3 months. When thawing, just move them to the fridge overnight and then to room temperature before serving for the best texture.
Reheating
Since these are no-bake truffles, reheating isn’t necessary. Just bring leftovers to room temperature, and they’ll have that perfect creamy consistency. Avoid microwaving so the candy coating doesn’t melt and get messy.
FAQs
-
Can I use regular Oreos instead of golden Oreos for this recipe?
Absolutely! Regular Oreos will work great and will give a darker base for your truffles. Just keep in mind that the color of the candy melts and sprinkles will look different against the chocolate base, so you may want to choose contrasting colors for your decorations.
-
What if I don’t have a food processor to crush the cookies?
No food processor? No problem! Place the Oreos in a sturdy zip-top bag and smash them with a rolling pin or heavy pan until well crumbled. Just be sure to include the cream filling, as it adds moisture and sweetness essential for the truffle texture.
-
How do I make my own candy eyes if I can’t find large candy eyes in stores?
I’ve done this myself by melting white candy melts and piping small circles onto parchment paper, then adding a black dot with melted dark chocolate or food coloring once they set. Let them harden fully, then use these homemade eyes just like store-bought ones.
-
Can I use a different type of cream cheese?
You can swap in reduced-fat or dairy-free cream cheese if needed, but full-fat cream cheese gives the best texture and flavor. Just make sure whatever you use is softened to room temperature for smooth mixing.
-
How long do these Oreo Eyeball Truffles last?
Stored properly in an airtight container in the fridge, these truffles stay fresh for up to one week. They also freeze well, lasting up to 2-3 months in the freezer.
Final Thoughts
I truly enjoy making this Oreo Eyeball Truffles Recipe because it combines simplicity, fun, and deliciousness all in one little bite. Whether you’re prepping for a party, Halloween, or just craving a playful treat, these eyeball truffles never disappoint. I’d definitely recommend giving them a try—you’ll have a blast decorating and an even better time eating them!
Print
Oreo Eyeball Truffles Recipe
- Prep Time: 30 minutes
- Cook Time: 0 minutes
- Total Time: 1 hour 15 minutes
- Yield: 22 truffles
- Category: Dessert
- Method: No-Cook
- Cuisine: American
Description
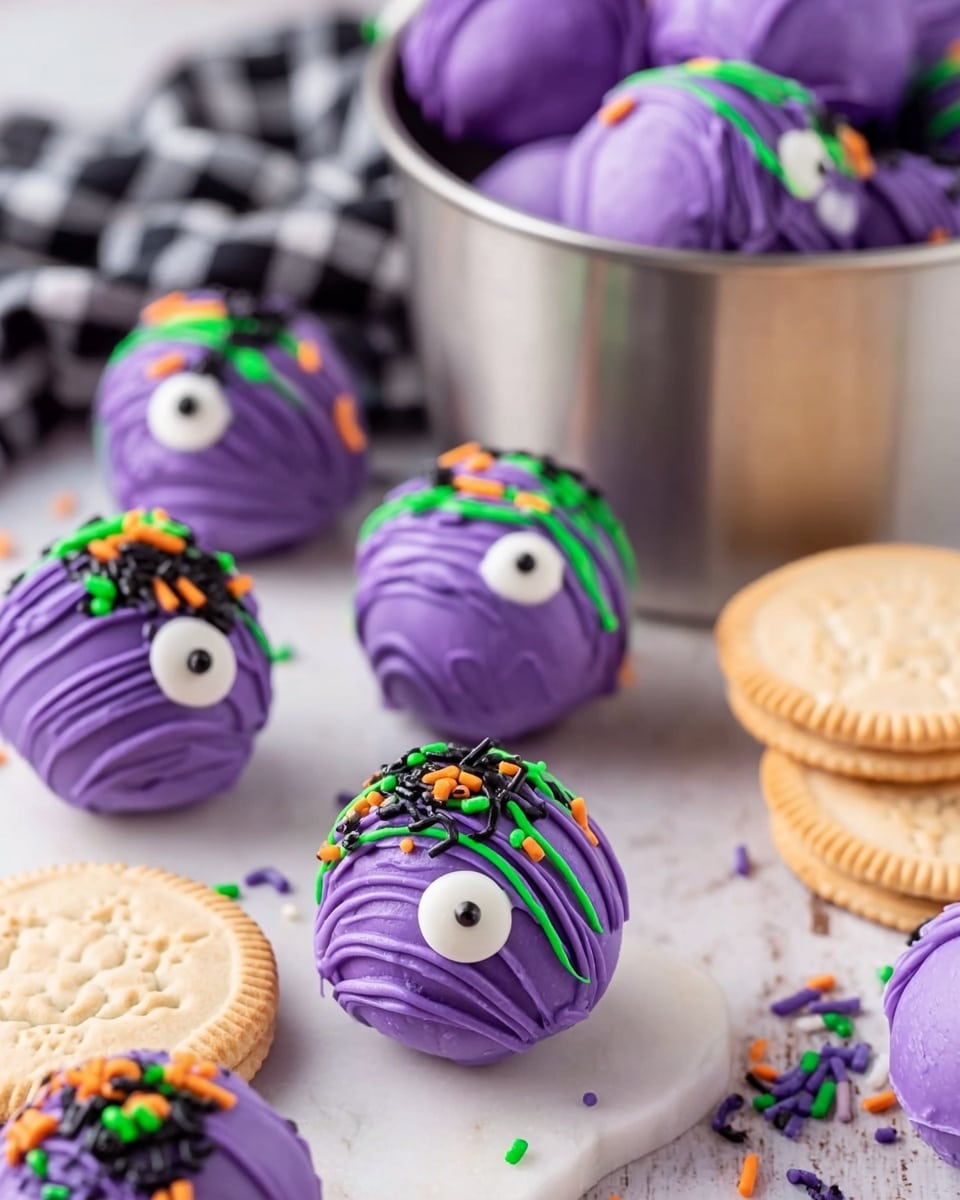
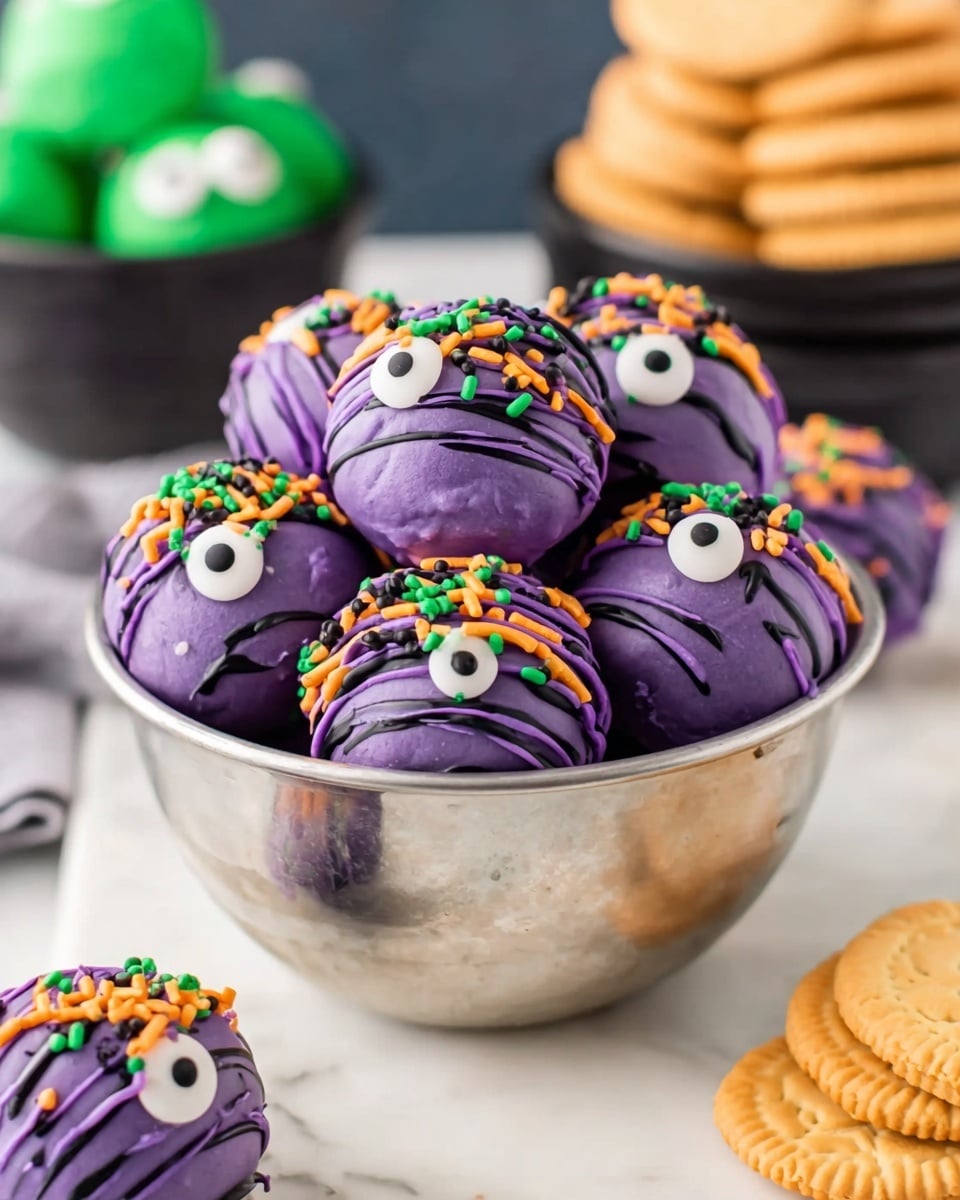
These Oreo Eyeball Truffles are a fun and spooky treat perfect for Halloween or any monster-themed party. Made with crushed golden Oreos and creamy cream cheese, then coated in colorful candy melts and decorated with large candy eyes and sprinkles, they’re as delightful to eat as they are to look at. They require no baking and come together quickly, making them an easy and festive dessert option.
Ingredients
Base Ingredients
- 19.1 ounces family-size package of golden Oreos
- ¾ package (8-ounce) cream cheese, room temperature
Decorations
- 12 ounce bag of colored candy melts
- ½ cup color-matching sprinkles
- 24 large candy eyes
Instructions
- Crush Oreos: Place the golden Oreos in a food processor and crush until they form fine crumbs.
- Mix with Cream Cheese: Add the room temperature cream cheese to the crumbs and pulse in the food processor until the mixture is well combined and forms a dough-like consistency.
- Form Truffles: Using a 1½ tablespoon cookie scoop, portion out the dough and roll each portion into smooth balls.
- Chill Dough Balls: Place each truffle ball on a large cookie sheet lined with parchment paper. Refrigerate for 15-30 minutes, or up to one hour, to allow them to firm up.
- Melt Candy Coating: When ready to decorate, melt the colored candy melts in a medium mixing bowl in the microwave. Heat for 45 seconds, stir well, then continue heating in 10-20 second increments, stirring after each, until smooth.
- Dip Truffles: Working in batches, dip each chilled truffle into the melted candy to fully coat it. Place dipped truffles on a fresh parchment-lined hard surface to set.
- Decorate: Immediately press a large candy eye onto the front of each truffle. Sprinkle the tops with color-matching sprinkles to mimic hair or other monster features.
- Set Coating: Allow the decorated truffles to set in the refrigerator for at least 30 minutes or until the candy coating hardens.
- Serve and Enjoy: Once set, serve your spooky Oreo eyeball truffles and enjoy!
Notes
- Storage: Store the truffles in an airtight container in the refrigerator for up to one week. Bring to room temperature before serving for best texture and flavor.
- Freezing: Freeze the truffles in a freezer-safe container for 2-3 months. Thaw in the refrigerator before serving.
- Cream Cheese: Use full-fat cream cheese for the best flavor and richness. Reduced fat cream cheese can be used but will be less rich.
- Crushing Without Processor: If you don’t have a food processor, place Oreos in a Ziploc bag and crush with a rolling pin, including the filling.
- Candy Melts: Use any color or mix colors for the candy melts to create unique looks. White or dark chocolate melts can also be used.
- Decorations: Sprinkles of any color and shape can be used to customize your monster truffles.
- Alternative Eyes: If large candy eyes are unavailable, use smaller ones or craft your own by piping candy melts onto parchment and letting them set. Other candies like gummy worms or chocolate chips can be used to decorate.
Nutrition
- Serving Size: 1 truffle
- Calories: 130
- Sugar: 12g
- Sodium: 75mg
- Fat: 7g
- Saturated Fat: 4g
- Unsaturated Fat: 2g
- Trans Fat: 0g
- Carbohydrates: 15g
- Fiber: 0.5g
- Protein: 1.5g
- Cholesterol: 15mg


