

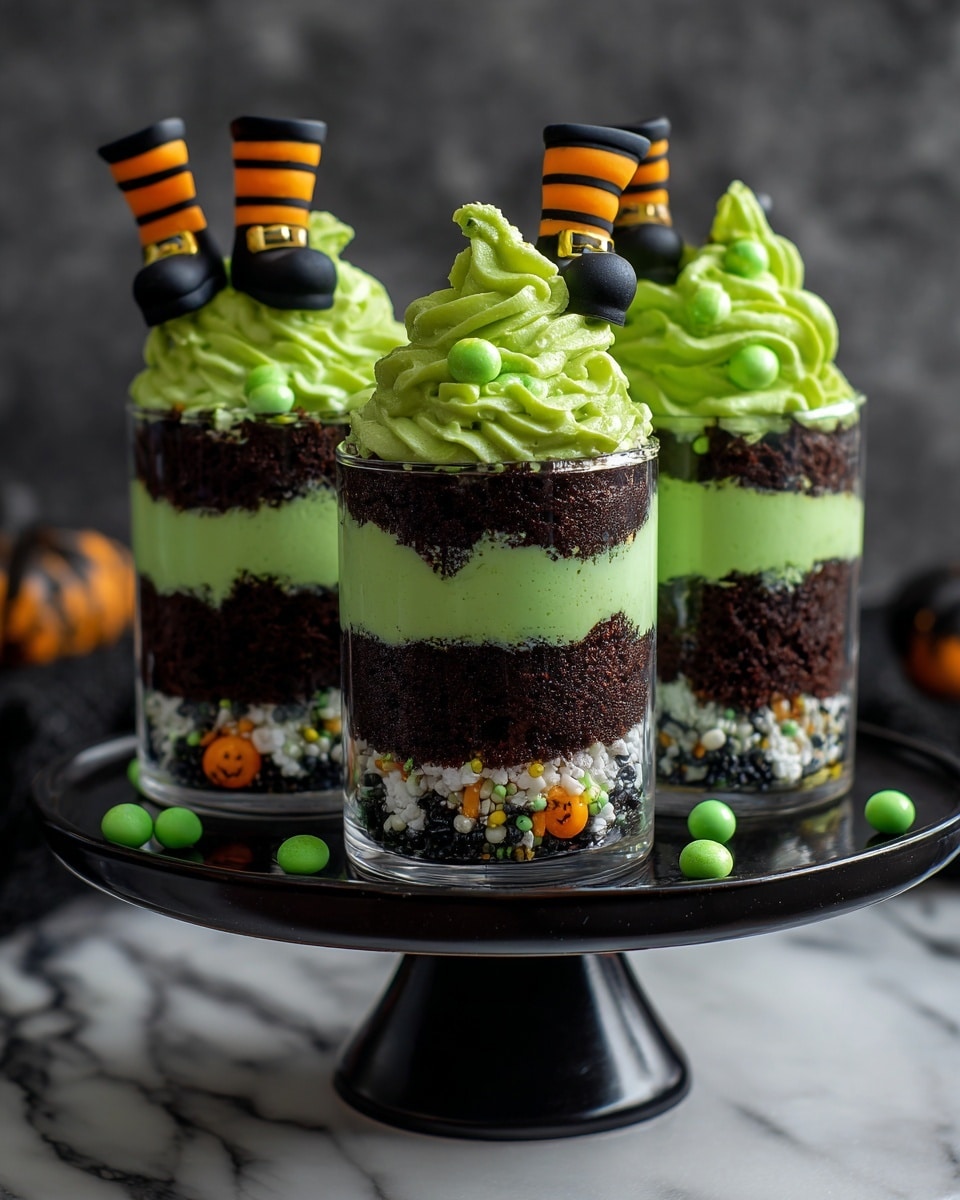
Hey friend, if you’re itching to make something truly magical and festive this Halloween, then you’re going to absolutely adore this Witches Brew Halloween Cake Jars Recipe. It’s not just a treat, it’s a whole spooky spectacle in a jar—layers of rich black cocoa cake, bright green buttercream, and those whimsical witchy fondant legs that just steal the show! Trust me, once you try this, these jars become the centerpiece at every Halloween party, and you’ll want to make them year after year.
Why You’ll Love This Recipe
- Fun and Festive Presentation: Nothing beats the charm of personal-sized cake jars topped with adorable witch legs that wow your guests.
- Moist, Fluffy Cake: The black cocoa chocolate cake is soft, rich, and perfectly balanced—not your average Halloween cake.
- Learn Fondant Decorating: You’ll pick up some pretty cool skills making the witchy legs and shoes, turning you into a mini cake magician.
- Great Make-Ahead Option: These cake jars and decorations can be prepped in stages, making your party prep stress-free and enjoyable.

Ingredients You’ll Need
All the ingredients come together to build this spooky delight—from the luscious black cocoa cake to the vibrant green buttercream and the fun fondant accents. Here’s what you need, plus some handy tips on why each is essential to perfecting this recipe.
- Self-raising flour: This keeps the cake wonderfully light and rises beautifully without the fuss of separate leavening.
- Granulated sugar: Sweetens the cake just right and helps with a tender crumb.
- Butter: I recommend salted for the frosting to add depth and richness, but unsalted is fine for the cake itself.
- Eggs: They bind everything, and I always use room temperature eggs to help the cake rise evenly.
- Unsweetened black cocoa powder: The secret for that deep, almost eerie dark color and intense chocolate flavor.
- Baking powder: Makes sure the cake is fluffy, not dense.
- Salt: Just a pinch balances the sweetness and enhances flavor.
- Milk: Adds moisture and keeps the cake soft; any regular milk you have works perfectly.
- Vanilla extract: Brings warmth and rounds out the flavors in both cake and frosting.
- Powdered sugar (icing sugar): For that silky smooth buttercream without any grit.
- Electric green food coloring: This makes the frosting look like a bubbling witch’s brew—you only need a few drops!
- Orange and black fondant: For sculpting the iconic witch legs and shoes—this is where your creativity shines!
- CMC powder: This little trick keeps your fondant from getting sticky and helps your legs dry nice and firm.
- Sprinkles: Adds that extra festive sparkle and fills in the jars with playful color.
Variations
I love how versatile this recipe is—you can really make it your own depending on your tastes or dietary needs. Don’t be shy, mix it up or simplify as you like!
- Gluten-Free: When I tried swapping self-raising flour for a 1:1 gluten-free blend, the cake turned out just as moist, so feel free to customize for gluten sensitivity.
- Dairy-Free Buttercream: You can easily replace butter with coconut oil and use powdered sugar to whip up a dairy-free green buttercream—still creamy and festive.
- Different Flavors: I once added a hint of cinnamon to the cake batter for a spiced twist that paired amazingly with the chocolate and green frosting.
- Simple Decoration: If fondant isn’t your thing, piping green and orange buttercream “legs” or using gummy candy can be a fun alternative.
How to Make Witches Brew Halloween Cake Jars Recipe
Step 1: Craft the Witches’ Black and Orange Fondant Legs
Okay, this is where the magic begins and the fondant witch legs take shape! Knead a little CMC powder into the orange fondant until it’s soft and pliable—you’ll notice it’s easier to work with and won’t stick to your fingers as much. Roll the fondant into thin strips about 5mm in diameter, then cut into 10 cm lengths—you want 18 legs for your jars. Keep these covered while you work so they don’t dry out. Next, roll black fondant into thinner strips about 2-3mm to make the stripes. Use a damp brush (just barely wet!) to “glue” the stripes onto the orange legs, spacing them as you go. Patience is key here; the stripes need to look neat and make those legs really pop up visually. It’s a bit of a process, but it’s so worth the wow factor.
Step 2: Shape the Black Fondant Shoes
Next, knead more CMC into the black fondant to make it pliable for shaping little shoes. Roll into 2cm balls and then form each into short sausages. Pinch one end to form a heel and curl the opposite end into a fancy point—the classic witch shoe silhouette. You can use a small tool or just your finger to make the opening where the leg will go. Then lightly dampen the inside, attach to the orange leg, and set them upright for drying overnight. This part takes some practice, but I promise you’ll get quicker and the results are irresistibly charming.
Step 3: Bake the Deep Black Cocoa Cake
Preheat your oven to 170℃ and prep a 9-inch square pan by greasing and flouring it well. Cream together the butter and sugar until fluffy—this lightens the cake and makes it tender. Beat the eggs in two at a time for even mixing. In a separate bowl, whisk together your dry ingredients including black cocoa and baking powder before sifting them into the butter mixture in batches, alternating with milk. Fold in vanilla last. Bake for about 45-50 minutes but start testing at 40—insert a skewer in, and when it comes out clean, you’re golden! Let it cool completely before you try to slice because warm cake can crumble easily.
Step 4: Whip Up Electric Green Buttercream
To make the buttercream, soften butter until it’s creamy and easy to whip. Add powdered sugar gradually, mixing a little before using your electric mixer to avoid a sugar cloud explosion. Then blend in vanilla and a few drops of electric green food coloring—start small, and add more if needed to get that glowing witches’ brew look. If it seems too stiff, a tablespoon or two of milk or cream loosens the texture perfectly.
Step 5: Assemble Your Halloween Cake Jars
After levelling your cake layers, use a round cutter the size of your jars to cut out cake circles—nine from each layer. Start each jar by dropping sprinkles at the bottom (this also fills in uneven jar bases!). Then layer cake, pipe buttercream from sides to center, add more sprinkles on the sides, top with another cake circle, and finish with a large swirl of bright green buttercream. Sprinkle generously on top, then poke two holes in the buttercream with a skewer and add your witch legs. Doesn’t that just feel like a mini Halloween party in a jar?
Pro Tips for Making Witches Brew Halloween Cake Jars Recipe
- Fondant Handling: Adding CMC powder is a game changer in humid climates—it keeps your fondant from sagging and sticking.
- Cake Batter: Be gentle folding in flour and milk to keep your batter light and prevent a dense cake.
- Buttercream Color: Start with a tiny drop of green food coloring and build up to avoid overly vibrant, unnatural hues.
- Cutting Cake Circles: Plan your cuts before using the cutter to maximize your cake and avoid scraps.
How to Serve Witches Brew Halloween Cake Jars Recipe
Garnishes
I love topping these cake jars with colorful sprinkles—you get juicy pops of color through the glass, and they add a fun crunch to each bite. Sometimes I add tiny edible glitter or candy eyeballs for a quirky touch that kids adore. The witch legs aren’t just decoration; they invite everyone to reach in and have a playful moment with their dessert.
Side Dishes
These cake jars are a sweet treat on their own, but if you’re having a whole Halloween spread, they pair beautifully with light bites like spiced apple cider, candied nuts, or caramel popcorn. I like serving them alongside pumpkin soup or autumn-themed charcuterie for a fun, seasonal vibe.
Creative Ways to Present
For a Halloween party, I arranged these jars on a black tiered cake stand surrounded by dry ice fog for a witchy cauldron effect (super dramatic!). You could also tie small recycled jars with orange and black ribbons or nestle them in a hay bale centerpiece for outdoor spooky charm.
Make Ahead and Storage
Storing Leftovers
Keep your assembled cake jars refrigerated in airtight containers. I find they stay moist and fresh for up to three days. If you plan on enjoying them the next day, just make sure to cover them well to prevent the fondant legs from drying out.
Freezing
I’ve frozen the cake layers without any fuss—wrap them tightly in plastic wrap and foil. The fondant legs don’t freeze well, so make those fresh before assembly. When ready, thaw cake layers overnight in the fridge before building your jars.
Reheating
I usually serve this cake cold but if you want to warm a slice, microwave a piece (without fondant) for about 10 seconds—just enough to soften but not melt your gorgeous green buttercream. The jars themselves aren’t meant for heating.
FAQs
-
Can I make the Witches Brew Halloween Cake Jars Recipe vegan?
Great question! You can swap out the eggs for flax eggs or a commercial egg replacer and use dairy-free butter and milk alternatives for the cake and frosting. Using vegan fondant or similar decorations will help keep the whole recipe plant-based, but be sure to check ingredient labels!
-
How long should the fondant legs dry before assembling?
I like to let them rest overnight—at least 8 to 12 hours—so they become firm and less likely to bend once inserted into the frosting. If your kitchen is humid, consider using CMC powder as recommended to help them dry solid.
-
Can I prepare the cake jars ahead of time?
Absolutely! You can bake the cake layers and make the fondant legs a day or two in advance. Assemble the jars a few hours ahead and keep them refrigerated until serving—they’ll look just as stunning and taste fresh.
-
What if I don’t have black cocoa powder? Can I substitute regular cocoa powder?
You can, but black cocoa has a unique deep color and less acidity, which means darker cake and a smooth flavor. Using regular cocoa will result in a lighter color and slightly different taste, so if color is a big part of your spooky vibe, black cocoa is worth the investment.
Final Thoughts
Honestly, this Witches Brew Halloween Cake Jars Recipe quickly became one of my favorite Halloween projects because it’s part baking, part crafting, and all fun. It’s such a cool way to impress friends and family with something homemade that feels extra special yet approachable. Whether you’re a fondant pro or a beginner eager to try, you’ll enjoy how these jars come together and become the talk of your spooky celebration. So go ahead, grab your fondants and whip up some bewitching treats—you won’t regret it!
Print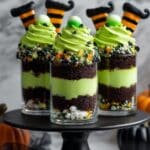
Witches Brew Halloween Cake Jars Recipe
- Prep Time: 20 minutes
- Cook Time: 50 minutes
- Total Time: 3 hours 10 minutes
- Yield: 9 jars
- Category: Dessert
- Method: Baking
- Cuisine: Western
Description
Witches Brew Halloween Cake Jars combine rich, moist chocolate cake layered beautifully with creamy buttercream frosting dyed an eerie electric green. These festive treats are creatively assembled in jars, adorned with whimsical handmade fondant witch legs and shoes, making them perfect for a spooky celebration or Halloween party.
Ingredients
Cake
- 330 g self raising flour
- 360 g granulated sugar
- 360 g butter
- 6 eggs
- 30 g unsweetened black cocoa powder
- 1½ teaspoon baking powder
- ½ teaspoon salt
- 90 ml milk
- 2 teaspoon vanilla extract
Buttercream Frosting and Decoration
- 400 g salted butter
- 800 g powdered sugar (icing sugar)
- 1¼ teaspoon vanilla extract
- 2 tablespoon milk or cream (optional; if the buttercream is too stiff)
- Electric green food coloring (a few drops)
- 250 g orange fondant
- 200 g black fondant
- 1 tablespoon CMC powder
- Sprinkles
Instructions
- The Witches’ Black and Orange Fondant Legs: Knead half a tablespoon of CMC powder into the orange fondant until it becomes soft and pliable. Roll it into long strips about 5mm in diameter, then cut into 10 cm lengths to make 18 witch legs. Keep covered to prevent drying. Next, roll black fondant into thin 2-3mm strips without CMC, cut into 25-30 cm lengths. Using a damp cake decorating brush, apply water to the orange legs and attach five black stripes evenly spaced on each leg, trimming excess and smoothing as needed.
- The Black Fondant Shoes: Knead the remaining half tablespoon of CMC into the black fondant until soft. Make 18 balls roughly 2 cm in diameter, roll each into short sausages, and shape by pinching ends to form heels and curled toe tips. Create an opening on the side of each shoe using a small rounded tool big enough to insert the leg.
- Attaching the Shoes to the Legs: Lightly moisten the shoe openings with a damp brush, then gently attach each shoe to a leg and press lightly to secure. Stand the assembled leg and shoe upright on a flat surface and allow to dry overnight until firm.
- The Cake: Preheat oven to 170℃. Grease and flour a 9-inch square cake tin. Cream butter and sugar on medium speed for about 2 minutes until light and fluffy, scraping halfway. Add eggs two at a time, beating well after each. Whisk flour, baking powder, cocoa powder, and salt; sift into creamed mixture in thirds alternating with milk, folding gently. Fold in vanilla extract. Pour batter into tin and bake 45-50 minutes. Test doneness with a skewer; it should come out clean. Cool cake completely after removing from the tin.
- Buttercream Frosting: Cream butter until smooth. Gradually add sifted powdered sugar and mix with a spatula before whipping to avoid sugar fly. Add vanilla extract and beat till smooth. Add milk if buttercream is stiff. Add a few drops of electric green food coloring and mix well. Transfer to a piping bag fitted with a large star tip (1M).
- Assembling the Halloween Cake Jars: Level the cake top and slice horizontally into two layers. Use a round cutter to cut 9 circles from each layer. Optionally, place sprinkles at the jar bottoms and press to the sides for visibility. Insert one cake circle per jar, pipe green buttercream around the sides and center, add sprinkles around sides, then add another cake circle. Top with a final swirl of buttercream, more sprinkles covering the top. Use a long wooden skewer to make two holes in each jar’s frosting top and insert the witch legs to complete the decoration.
Notes
- You need 18 fondant legs (9 pairs) prepared at least a day ahead to harden and prevent bending.
- Using a fondant smoother instead of hands helps create strips free of dents or marks.
- In humid conditions, add CMC powder to help fondant firm; working in an air-conditioned room also helps. Alternatively, wrap fondant around dampened lollipop sticks for support.
- Dampen the brush lightly to avoid soggy fondant and color bleeding when applying water for stripes and assembly.
- Keep fondant balls covered while forming shoes to prevent drying; re-knead if dry.
- The first fondant shoe takes longer, but speed improves with practice.
- Start buttercream coloring with a small amount and add gradually for desired shade; gel colors are concentrated.
- Plan cuts carefully to maximize 9 cake circles per layer.
- Adding sprinkles at jar bottoms fills gaps if jars are uneven and adds visual interest but is optional.
Nutrition
- Serving Size: 1 jar
- Calories: 550 kcal
- Sugar: 45 g
- Sodium: 150 mg
- Fat: 35 g
- Saturated Fat: 20 g
- Unsaturated Fat: 12 g
- Trans Fat: 0 g
- Carbohydrates: 55 g
- Fiber: 2 g
- Protein: 6 g
- Cholesterol: 110 mg

