

If you’re looking for a fun and festive treat this Halloween (or anytime you want a cute, spooktacular snack), I’ve got just the thing for you. These little guys are adorable, easy to make, and downright delicious—I’m talking about my Mummy Cake Balls Recipe. Once you try them, you’ll see why my family goes crazy for these bite-sized Halloween delights; they’re creamy, sweet, and so simple that even baking newbies can pull them off.
Why You’ll Love This Recipe
- Totally Kid-Friendly: These cake balls are cute and fun for the little ones, and they love helping roll and decorate them.
- No Baking Experience Needed: Using store-bought cake mix and almond bark makes these super easy—and they taste homemade.
- Make-Ahead Friendly: You can prep these in advance and freeze them, which is great for busy schedules.
- Impressively Festive Look: The mummy design is adorable and perfect for parties or Halloween classroom treats.

Ingredients You’ll Need
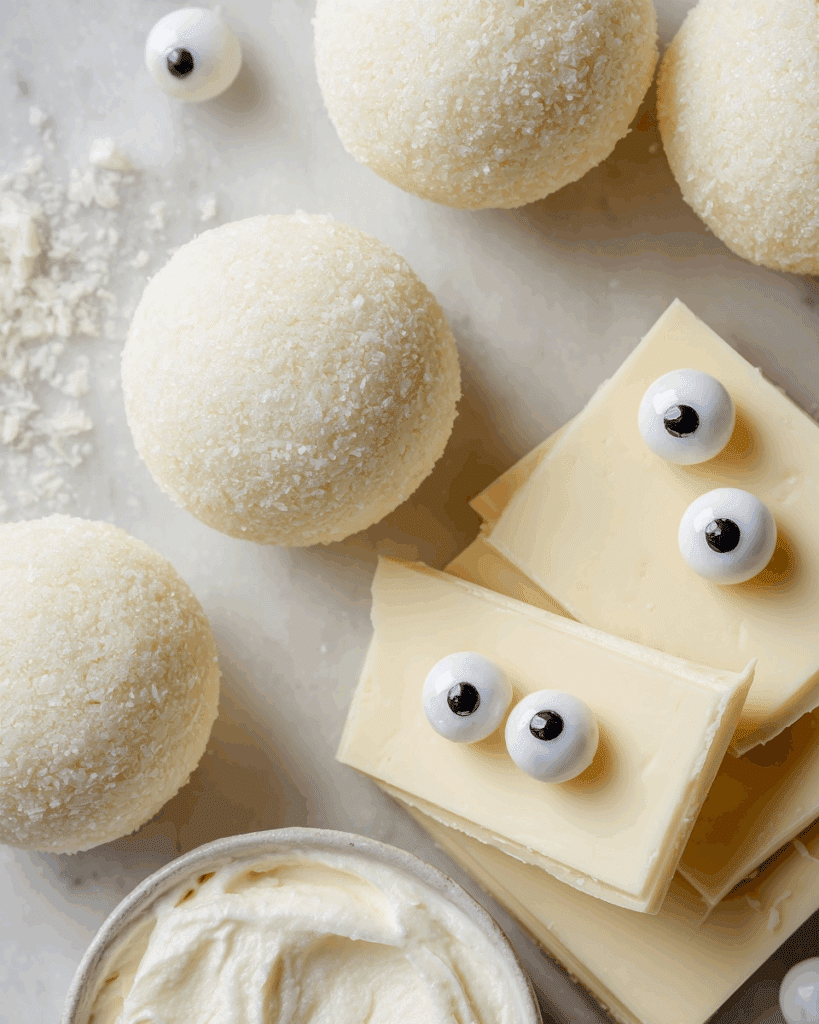
These ingredients are straightforward, and you can usually find them at any grocery store. I love that the cream cheese adds just the right tang to balance the sweet cake, and the vanilla almond bark creates a smooth coating for that perfect mummy look.
- White cake mix: Choose your favorite brand; I often pick one with a subtle vanilla flavor to keep the taste light and festive.
- Cream cheese: Make sure it’s softened to room temperature—it mixes better and gives the right consistency for rolling the balls.
- Vanilla almond bark: This melts down smoothly for dipping and hardens quickly—if you can’t find almond bark, white chocolate can be a good alternative.
- Candy eyes: These add the perfect spooky touch; you can find them near the baking aisle or online seasonally.
Variations
I love experimenting with this mummy cake balls recipe to fit different occasions or dietary needs. Once you get the basic version down, feel free to make it your own—you’ll find there’s a lot of room to get creative here!
- Chocolate Lover’s Version: Swap out the white cake mix for chocolate cake and use a chocolate candy coating to make spooky dark mummy balls; my kids adore this twist.
- Allergy-Friendly: Use dairy-free cream cheese and vegan white chocolate coating to make it nut-free and suitable for dairy sensitivities; I’ve tested this successfully when hosting kids with allergies.
- Mini Mummy Cake Balls: Roll smaller balls for bite-sized treats perfect for party trays or lunchbox surprises.
- Decorating Fun: Add edible glitter or colored candy drizzle to give your mummies a fun twist beyond the classic white wrap look.
How to Make Mummy Cake Balls Recipe
Step 1: Bake and Cool Your Cake
Follow the directions on your white cake mix box and bake the cake in a standard pan. When it’s done, be patient and let it cool completely—warm cake will make it a nightmare to crumble properly, trust me, I’ve learned that the hard way!
Step 2: Crumble and Mix with Cream Cheese
Once cooled, crumble the entire cake into a large mixing bowl. Add your room-temperature cream cheese, then mix with an electric mixer until smooth and fully combined. This step makes the magic happen because the cream cheese binds everything perfectly without being greasy.
Step 3: Roll the Mixture into Balls
Using about two tablespoons of the cake mixture, roll into balls with your hands. Try to keep them as uniform as possible so they bake and set evenly. Place these on a parchment-lined baking sheet.
Step 4: Chill in the Freezer
This step isn’t 100% necessary, but I can’t stress enough how much easier dipping the chilled balls in melted almond bark is compared to soft ones. Freeze for 30 minutes so they firm up nicely and won’t fall apart during dipping.
Step 5: Dip and Decorate
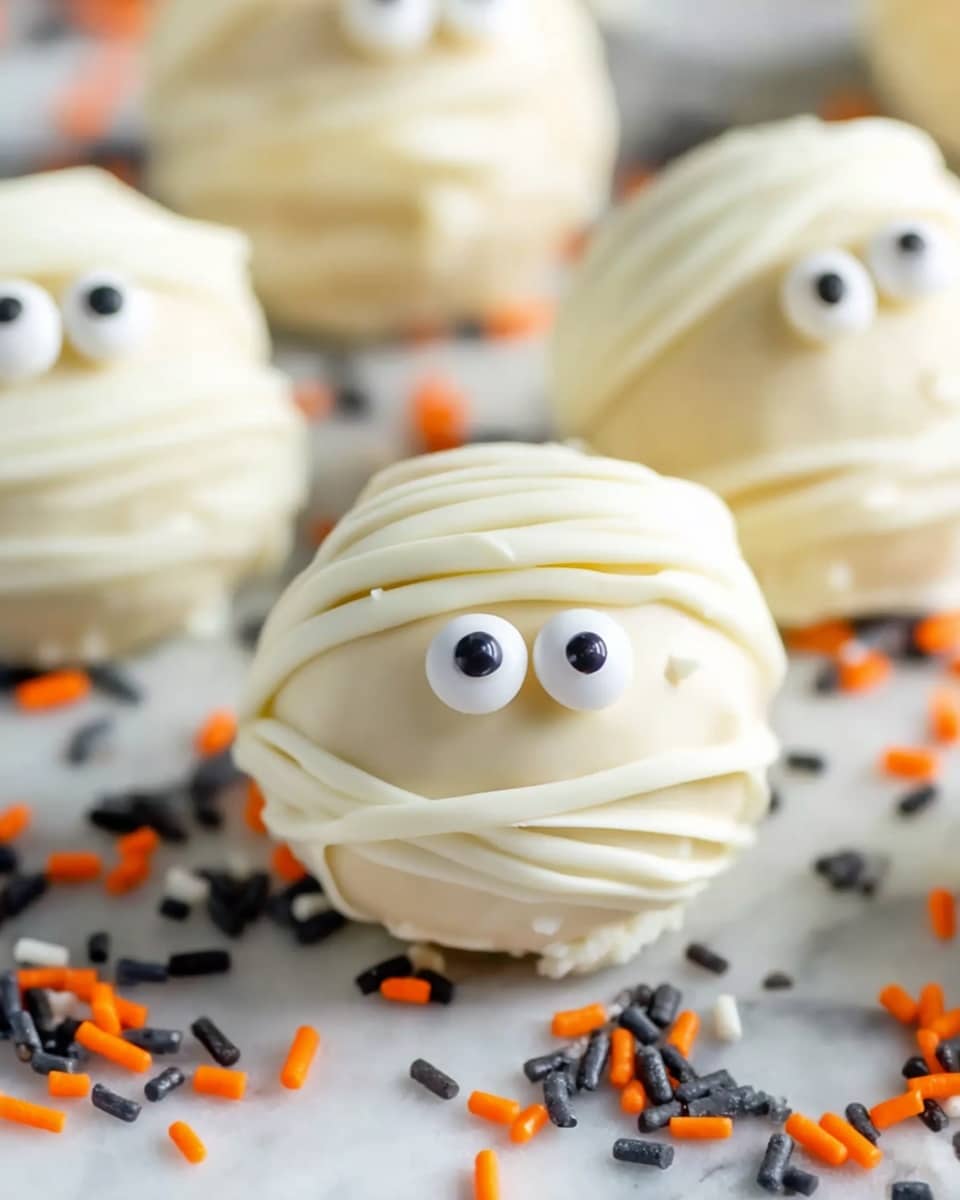
Melt your vanilla almond bark according to package directions, then dip each chilled cake ball, ensuring it’s completely coated. Before the coating hardens, press two candy eyes into each ball—this step brings the mummy to life! Once set, drizzle more almond bark over the balls to create that authentic mummy bandage look.
Pro Tips for Making Mummy Cake Balls Recipe
- Room Temperature Cream Cheese: It blends in so smoothly when softened, which means no lumps—your balls will be silky perfect.
- Freeze Before Dipping: It’s a game changer! You’ll have less mess and even coating without crumb fallout.
- Use a Fork or Dipping Tool: For dipping, using a fork helps any excess coating drip off evenly for a neat finish.
- Press Eyes Before Setting: Make sure to add candy eyes while coating is still wet so they stick well and look just right.
How to Serve Mummy Cake Balls Recipe
Garnishes
I like to keep it simple with just the candy eyes and white drizzle for the mummy look—it’s classic and adorable. But if I’m feeling fancy, a tiny sprinkle of edible glitter or black sanding sugar adds a spooky shimmer that guests love.
Side Dishes
These cake balls pair well with a glass of cold milk or a hot cup of cocoa. For Halloween parties, I serve them alongside a bowl of pumpkin seeds or some colorful fruit to balance the sweetness.
Creative Ways to Present
For special occasions, I arrange the mummy cake balls on a black slate platter with fake spider webs and mini plastic spiders for a creepy-cute vibe. Another fun idea is to stick them on lollipop sticks and wrap individually for easy grab-and-go treats—kids always get a kick out of that!
Make Ahead and Storage
Storing Leftovers
I usually store leftover mummy cake balls in an airtight container in the fridge where they keep fresh for up to 5 days. Just remember they’ll firm up nicely but soften back to deliciously creamy when eaten at room temperature.
Freezing
Freezing these cake balls works like a charm. I freeze them on a tray first, then move to a sealed container or freezer bag. They keep great frozen for up to a month. When I want one, I thaw it in the fridge overnight—it’s super convenient for last-minute treats.
Reheating
Since these are really no-bake bites, I don’t heat them, but I do suggest letting them sit out for 10–15 minutes before serving if they’ve been refrigerated or frozen. That way, the cake and cream cheese centers soften perfectly without melting the coating.
FAQs
-
Can I use other cake flavors in the Mummy Cake Balls Recipe?
Absolutely! While the classic white cake gives a nice neutral base, you can try chocolate, red velvet, or even spice cake for different flavor profiles. Just keep in mind that darker or spiced cakes might change the overall look, but taste-wise they’re delicious.
-
What if I can’t find candy eyes for decorating?
No worries! You can make your own by piping small dots of black icing or melted chocolate onto the dried coating, or even use mini chocolate chips. It’s a fun little trick I’ve done when stores were out of candy eyes.
-
Is it okay to substitute cream cheese with frosting?
I wouldn’t recommend it for this recipe. Cream cheese adds moisture, tanginess, and firm binding that frosting alone can’t replicate, so the cake balls may be too soft or overly sweet if you swap it.
-
How do I prevent the almond bark from clumping when melting?
Melting the almond bark slowly in short bursts in the microwave or using a double boiler helps prevent overheating and clumps. Stir frequently and add a little vegetable oil if it seems too thick, which helps with smooth dipping.
Final Thoughts
I absolutely love how this Mummy Cake Balls Recipe makes Halloween tempting for both kids and adults alike. It’s simple to make, looks impressively festive, and tastes just right—not too rich, just sweet enough. When I first tried it, I was amazed at how quickly the kids and grownups reached for seconds. So, grab your ingredients and give it a shot—you’ll have a blast rolling, dipping, and creating tiny mummies to share with friends and family!
Print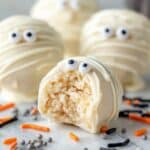
Mummy Cake Balls Recipe
- Prep Time: 30 minutes
- Cook Time: 36 minutes
- Total Time: 1 hour 6 minutes
- Yield: 36 cake balls
- Category: Dessert
- Method: Baking
- Cuisine: American
- Diet: Vegetarian
Description
These Mummy Cake Balls are a fun and spooky treat perfect for Halloween parties or festive gatherings. Made with moist white cake mixed with creamy cream cheese, these bite-sized delights are coated in smooth vanilla almond bark and decorated with candy eyes for a playful mummy appearance. Easy to make and delicious to eat, they offer a delightful combination of cake and creamy sweetness with a festive touch.
Ingredients
Cake Balls:
- 1 white cake mix, prepared according to box directions and cooled
- 8 ounces cream cheese, softened to room temperature
Coating and Decoration:
- 16 ounces vanilla almond bark
- Candy eyes
Instructions
- Bake the Cake: Prepare the white cake mix according to the package directions and bake as instructed. Once baked, allow the cake to cool completely to room temperature.
- Crumble and Mix: Crumble the cooled cake into a large mixing bowl. Add the softened cream cheese and mix thoroughly using an electric mixer until the mixture is well combined and smooth.
- Form Cake Balls: Roll the cake and cream cheese mixture into approximately 2 tablespoon-sized balls. Place the formed balls onto a parchment-lined baking sheet and freeze for 30 minutes to firm up and make them easier to dip.
- Melt the Almond Bark: Melt the vanilla almond bark according to the package instructions, ensuring it is smooth and ready for dipping.
- Coat Cake Balls: Dip each cake ball into the melted almond bark, fully coating it. Immediately press two candy eyes onto each coated ball to create the mummy look.
- Create Mummy Drizzle: Allow the coated balls to harden. Then, drizzle additional melted almond bark over each ball in thin lines resembling mummy bandages.
- Serve: Let the coating fully set before serving. Enjoy your festive mummy cake balls!
Notes
- Freezing the cake balls before dipping helps to prevent them from falling apart and makes dipping easier.
- Use parchment paper to prevent sticking and allow easy transfer of cake balls.
- You can substitute candy eyes with small chocolate chips or other edible decorations if desired.
- The almond bark can be melted using a microwave or double boiler according to package instructions.
- Store cake balls in an airtight container in the refrigerator for up to 3-4 days.
Nutrition
- Serving Size: 1 cake ball
- Calories: 130
- Sugar: 18g
- Sodium: 110mg
- Fat: 5g
- Saturated Fat: 3g
- Unsaturated Fat: 2g
- Trans Fat: 0g
- Carbohydrates: 20g
- Fiber: 0.5g
- Protein: 1g
- Cholesterol: 15mg

