

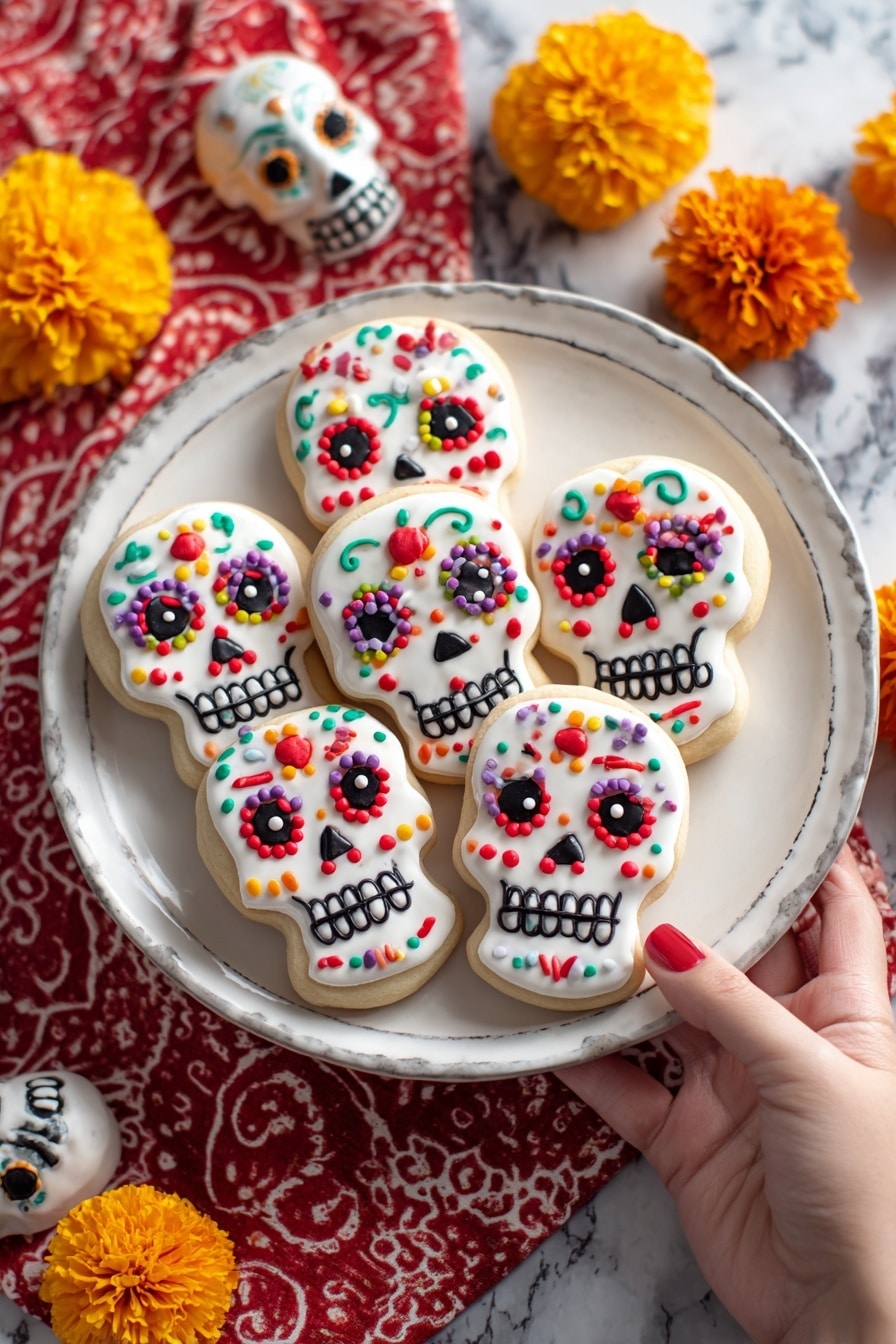
If you’re looking to bring a little festive magic to your kitchen, you’re going to adore this Day of the Dead Cookies Recipe. These are not your average sugar cookies—they’re stunning, fun to decorate, and packed with almond flavor that really sets them apart. When I first tried these, I was hooked by how beautifully they celebrate the Day of the Dead tradition with those cheerful skull shapes and colorful candy toppings. Stick with me, and I’ll walk you through every step so your cookies come out flawless and full of character!
Why You’ll Love This Recipe
- Authentic Flavor: The almond paste adds a rich, nutty note that makes these cookies truly special.
- Fun to Decorate: With bright candy toppings and frosting, these cookies are perfect for creative flair.
- Perfect Texture: Crisp edges with a tender center—you’ll get the balance just right.
- Festive Tradition: These cookies bring a meaningful cultural touch to your celebrations.

Ingredients You’ll Need
This recipe comes together with pantry staples and a few festive extras. Each ingredient plays a role to give you beautifully textured cookies with a smooth candy coating that’s great for decorating.
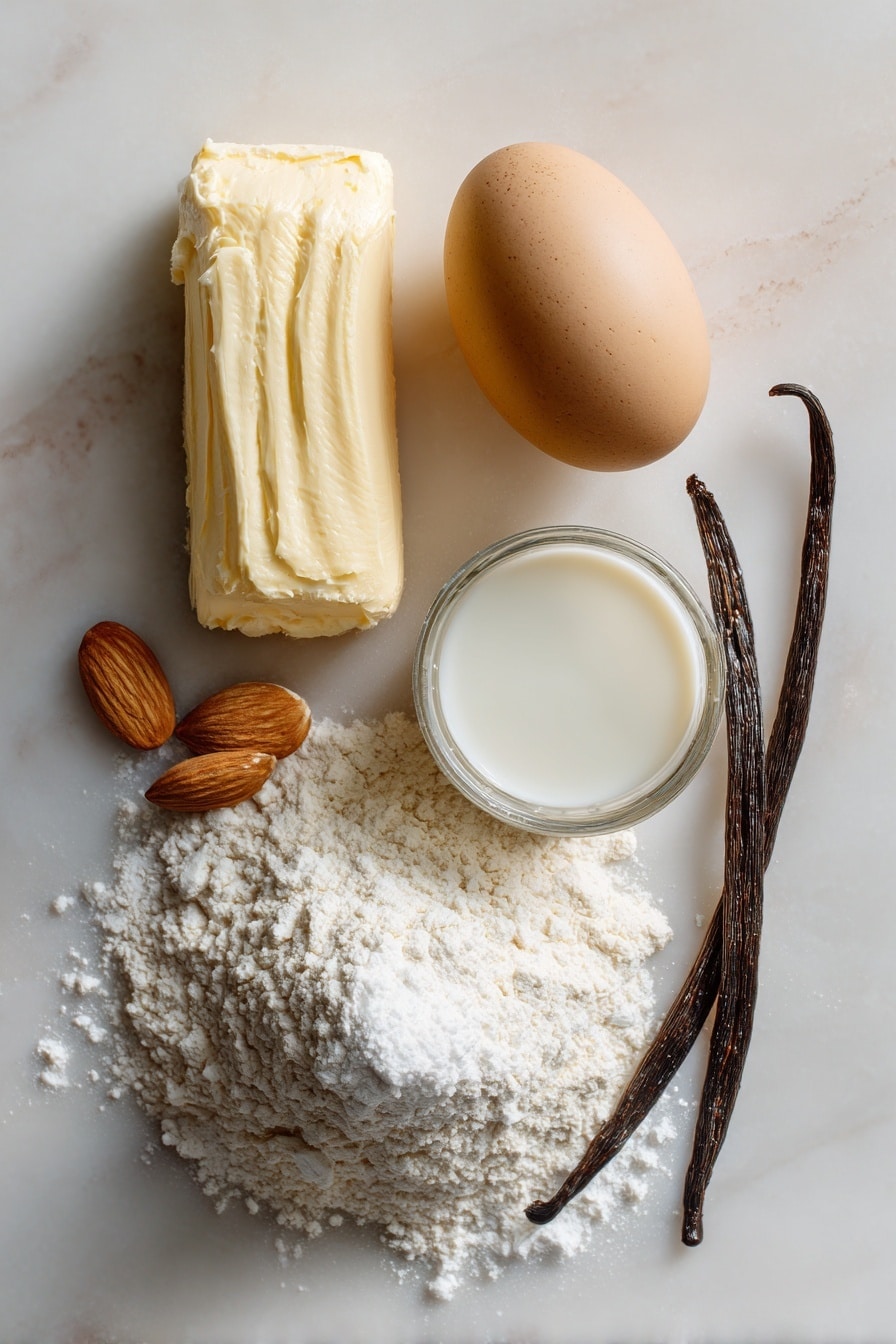
- Butter: Use softened unsalted butter for creamy, smooth dough without extra salt messing with flavor.
- Confectioners’ sugar: Provides sweetness and tenderness, plus it dissolves perfectly into the butter.
- Almond paste: This is my secret weapon for a deep almond flavor—it’s what makes these cookies stand out.
- Egg: Brings the dough together and adds richness.
- 2% Milk: Just enough moisture to keep the dough pliable but not sticky.
- Vanilla extract: Enhances all the other flavors with its warm aroma.
- All-purpose flour: The foundation for your cookies, providing structure and that irresistible bite.
- Salt: Balances sweetness and rounds out flavors.
- White candy coating melts: Essential for that glossy, smooth finish where you’ll dip the cookies.
- Decorations (Optional): Jumbo sprinkles, peppermint candies, and colorful options like Skittles or Twizzlers add festive charm.
- Black paste food coloring: To tint candy coating for piping on fun smiles and details.
Variations
One of the joys of this Day of the Dead Cookies Recipe is how easy it is to make it your own. I love switching up decorations or tweaking the coating colors to suit the vibe of the celebration.
- Gluten-Free Option: I swapped in a gluten-free flour blend once and was thrilled at how the cookies held their shape without sacrificing texture.
- Colorful Candy Coatings: Try melting colored candy melts to create vibrant patterns—a hit at parties every time.
- Nut Variations: Mix in ground pecans or walnuts with the flour for subtle nuttiness variation.
- Spicy Twist: Adding a pinch of cinnamon or ground clove gives a warm spice note that’s unexpected but delightful.
How to Make Day of the Dead Cookies Recipe
Step 1: Cream Butter, Sugar, and Almond Paste
Start by beating softened butter and confectioners’ sugar together until the mixture is light and fluffy — this usually takes about 3 to 4 minutes with a mixer. Then, add in the almond paste. I discovered this trick when I noticed the dough got extra smooth and flavorful at this step. If you’re working by hand, give it some good effort so the almond paste breaks down evenly.
Step 2: Incorporate Egg, Milk, and Vanilla
Beat in the egg, then add the milk and vanilla extract, mixing just until everything’s combined. I like to make sure my egg is at room temperature here—it helps the dough blend perfectly without curdling.
Step 3: Mix in Flour and Salt, Chill Dough
Whisk your flour and salt together, then gradually add to the wet mixture. When I first tried kneading in the flour all at once, the dough got too stiff. Slowly incorporating flour helps maintain that perfect balance. Cover the dough and pop it in the fridge for at least one hour—it’s key to making those skull shapes crisp up nice.
Step 4: Roll and Cut Out Skulls
On a lightly floured surface, roll out your chilled dough to about 1/4-inch thickness. I always recommend using just enough flour so the dough doesn’t stick but doesn’t get too dry. Use a 5-inch skull-shaped cookie cutter and place cookies about 1 inch apart on the baking sheets. This is where the real fun begins—the perfect skull shapes are such a joy!
Step 5: Bake Until Firm and Cool
Bake in a 375°F oven for 7 to 9 minutes, just until the edges feel firm. Let them stand on the pan for 2 minutes before transferring to wire racks to cool completely. I learned this pause helps prevent breakage and ensures cookies cool evenly.
Step 6: Dip in White Candy Coating and Decorate
Melt white candy coating melts in a shallow, microwave-safe dish following package directions. Dip the top of each cookie in the melted candy, letting the excess drip off before placing on waxed paper. Add decorations while coating is still wet—that’s when you get the most gorgeous, colorful results. To create the classic skull smiles, tint some of the candy coating black with food coloring and pipe on mouths once the white coating sets.
Pro Tips for Making Day of the Dead Cookies Recipe
- Chill the Dough Thoroughly: I found chilling prevents spreading and helps maintain those crisp skull edges perfectly.
- Work Quickly When Decorating: Candy coating sets fast, so have your decorations ready before dipping for best results.
- Use Room Temperature Eggs: This keeps the batter smooth and ensures even mixing without curdling.
- Avoid Over-Baking: Cookies firm up as they cool; pulling them out too late can make them dry and crumbly.
How to Serve Day of the Dead Cookies Recipe
Garnishes
I love adding jumbo colorful sprinkles and tiny peppermint candies to the coated tops—it gives each cookie personality and a festive pop. Bright candies echo the colorful spirit of Day of the Dead celebrations and make the cookies irresistible to kids and adults alike.
Side Dishes
These cookies pair wonderfully with a warm cup of Mexican hot chocolate or a lightly spiced chai tea. When my family gathers around, sipping on those warm drinks while nibbling on these festive cookies just feels right.
Creative Ways to Present
For parties, I like arranging the cookies on a platter lined with brightly colored tissue paper and accenting with marigold flowers—traditional for Day of the Dead altars. You can also stand them upright using cookie holders or mini easels for a display that really wows your guests.
Make Ahead and Storage
Storing Leftovers
I store leftover cookies in an airtight container at room temperature, separating layers with parchment paper to protect the candy coating. They stay delicious for about a week, though I rarely have leftovers because they go fast!
Freezing
Freezing works great if you want to prep in advance. I freeze the baked and decorated cookies on a tray first, then transfer them to a freezer-safe bag. Thaw at room temperature to keep the candy coating intact—no soggy cookies here!
Reheating
Since these are best enjoyed at room temperature, I usually just let frozen cookies thaw naturally. If you want them a little freshened, I pop them in a warm (not hot) oven for 2-3 minutes—just enough to lift aromas without melting the coating.
FAQs
-
Can I use regular sugar instead of confectioners’ sugar?
Confectioners’ sugar is key for this recipe because it dissolves completely and helps create that tender, smooth dough. Using granulated sugar could result in a gritty texture, so I wouldn’t recommend substituting.
-
What if I don’t have almond paste—can I skip it?
You could skip the almond paste, but your cookies will lose that distinctive almond flavor that really makes this recipe special. If you’re allergic or just don’t have it, try adding a touch of almond extract instead for some of that essence without the paste.
-
How do you keep candy coating from melting off the cookies?
Make sure your cookies are completely cool before dipping. Also, letting the excess candy drip off and placing the cookies on waxed paper to set helps prevent pooling and melting. Quick, confident dips give the best coating.
-
Can I use other shapes besides skulls?
Absolutely! While skulls are traditional and fun, this dough works great for any cookie cutters you like—stars, hearts, or seasonal shapes. Just be sure to keep the thickness consistent for even baking.
Final Thoughts
This Day of the Dead Cookies Recipe holds a special place in my heart because it combines tradition, fun, and delicious flavor all in one. If you want to bring a slice of celebration and creativity to your kitchen, these cookies are absolutely the way to do it. I promise you’ll enjoy every step—especially decorating and watching smiles light up when you serve them. Give this recipe a try, and don’t forget to share your decorated creations—I’d love to hear how yours turn out!
Print
Day of the Dead Cookies Recipe
- Prep Time: 1 hour 20 minutes
- Cook Time: 10 minutes
- Total Time: 1 hour 30 minutes
- Yield: 1 dozen
- Category: Dessert
- Method: Baking
- Cuisine: Mexican
Description
These festive Day of the Dead Cookies are soft almond-flavored sugar cookies shaped like skulls, decorated with a smooth white candy coating and colorful candies. Perfect for celebrating Día de los Muertos with a delicious treat that combines buttery texture with sweet, decorative toppings.
Ingredients
Cookie Dough
- 1-1/4 cups butter, softened
- 1-3/4 cups confectioners’ sugar
- 2 ounces almond paste
- 1 large egg, room temperature
- 1/4 cup 2% milk
- 1 teaspoon vanilla extract
- 4 cups all-purpose flour
- 1/2 teaspoon salt
Decoration
- 2 packages (12 ounces each) white candy coating melts
- Optional decorations: Jumbo sprinkles, peppermint candies, candy-coated sunflower kernels, Skittles, Twizzlers Rainbow Twists, and Good & Plenty candies
- Black paste food coloring
Instructions
- Cream Butter and Sugar: In a large bowl, cream the softened butter and confectioners’ sugar together until the mixture is light and fluffy, which should take about 3 to 4 minutes. After that, add the almond paste and beat until combined thoroughly.
- Add Wet Ingredients: Beat in the egg, followed by the 2% milk and vanilla extract until the batter is smooth and uniform.
- Combine Dry Ingredients and Chill Dough: In a separate bowl, mix the all-purpose flour and salt. Gradually add the flour mixture to the creamed wet ingredients, mixing well after each addition. Once mixed, cover the dough and refrigerate it for 1 hour to chill and firm up.
- Roll and Cut Cookies: On a lightly floured surface, roll out the chilled dough to a 1/4-inch thickness. Using a floured 5-inch skull-shaped cookie cutter, cut out the cookies. Place the cookies 1 inch apart on ungreased baking sheets.
- Bake Cookies: Bake the cookies in a preheated oven at 375°F (190°C) for 7 to 9 minutes or until they are firm to the touch. After baking, let the cookies stand on the sheet for 2 minutes, then transfer them to wire racks to cool completely.
- Melt Candy Coating and Dip Cookies: In a large, shallow microwave-safe dish, melt the white candy coating melts according to the package instructions. Dip the top side of each cooled cookie into the melted coating, allowing any excess to drip off. Place the dipped cookies on waxed paper to set.
- Decorate Cookies: While the candy coating is still wet, add decorations such as jumbo sprinkles, peppermint candies, candy-coated sunflower kernels, Skittles, Twizzlers Rainbow Twists, and Good & Plenty candies as desired.
- Color Remaining Coating and Pipe Details: Tint any remaining white candy coating with black paste food coloring and use it to pipe on mouth details or other facial features for the skull cookies.
- Let Set: Allow the decorated cookies to stand at room temperature until the candy coating is fully set and hardened before serving or storing.
Notes
- Make sure the almond paste is well incorporated to avoid clumps in the cookie dough.
- Chilling the dough is important to make rolling and cutting easier and to help cookies maintain shape during baking.
- Use waxed paper for setting the dipped cookies to prevent sticking.
- Customize decorations based on available candies and preference to create unique designs.
- The cookies can be stored in an airtight container for up to 1 week.
Nutrition
- Serving Size: 1 cookie
- Calories: 280
- Sugar: 20g
- Sodium: 130mg
- Fat: 16g
- Saturated Fat: 10g
- Unsaturated Fat: 5g
- Trans Fat: 0g
- Carbohydrates: 30g
- Fiber: 1g
- Protein: 3g
- Cholesterol: 45mg
