
If you’re searching for a fun, festive, and absolutely delightful treat for Halloween, you’re going to want to stick around—because this Candy-filled Witch Hats Recipe is one of those recipes that’s as whimsical as it is tasty. I love this recipe because it combines crunchy chocolate-covered cones with a surprise candy filling that makes it perfect for parties, trick-or-treaters, or just a cozy night with family. Keep reading, and I promise you’ll discover all my best tips to make these spooky hats shine!
Why You’ll Love This Recipe
- Super Festive and Fun: These candy-filled witch hats instantly bring Halloween magic to the table with their cute shape and colorful candy surprises.
- Easy and Quick to Make: You don’t need advanced baking skills here, just some simple melting and decorating that anyone can enjoy.
- Perfect Size for Kids and Parties: These make charming individual treats that kids adore and adults can’t resist.
- Customizable and Creative: You can mix up the candies or decorations to really make the recipe your own every time.

Ingredients You’ll Need
To make these candy-filled witch hats, you’ll want to gather ingredients that not only complement each other but also help you nail that classic witch hat look. The key is the combination of waffle cones and the rich melted chocolate that seals everything together! Here’s what I use:
- Waffle ice cream cones: These create the perfect hat shape and add a crunchy texture.
- Chocolate melting wafers: I use these because they melt smoothly and set quickly, making the decorating a breeze.
- Chocolate cookies: These serve as the brim of the hat—choose sturdy cookies to hold up well.
- Green sour belts: They add a fun splash of color and a chewy contrast around the hat’s base.
- Black cat icing decorations: I love these because they add a spooky, cute touch right on the hat.
- Halloween sprinkles: These bring festive sparkle and a bit of crunch to each hat.
- Candy: Pick your favorite Halloween candies to fill the hats, making each bite a delightful surprise.
Variations
I love how easy it is to make this Candy-filled Witch Hats Recipe your own. You can swap out candies or even tweak decorations to match your personal flair or specific Halloween themes at your party. Here are a few variations I’ve tried (and loved!):
- Gluten-Free Version: I’ve used gluten-free waffle cones and cookies before with great results, so all your guests can enjoy these treats.
- Vegan Adaptations: Try dairy-free chocolate melting wafers and vegan-friendly sprinkles to accommodate dietary needs without losing any magic.
- Flavor Twists: Swap chocolate wafers for white chocolate or caramel melts for a unique spin; I once added a sprinkle of sea salt on top for a sweet and salty combo that blew everyone away.
- Seasonal Candy Fillings: You can tailor the candy filling based on what’s available or your family’s favorites—my kids love adding gummy worms for a creepy crawl vibe!
How to Make Candy-filled Witch Hats Recipe
Step 1: Melt the Chocolate and Coat the Cones
Start by melting your chocolate wafers following the package directions—usually, this means heating them gently in short bursts and stirring often to avoid burning. Once smooth, grab a spatula and begin coating each waffle cone thoroughly inside and out. I like to do this over a sheet of parchment paper to catch drips. Don’t worry if your first coat isn’t perfect; you can smooth it out carefully. This chocolate layer not only makes the hats yummy but also strengthens the cone so it won’t get soggy from the candy inside.
Step 2: Add Sprinkles and Attach Green Sour Belts
Before the chocolate sets, sprinkle Halloween-themed sprinkles all over the cones to add festive sparkle. Then, use a little extra melted chocolate at the bottom edge of each cone to stick on a green sour belt, wrapping it around like a hatband. If you want to get creative, press a black cat icing decoration right onto the belt while the chocolate is still wet. This detail really elevates the look and makes these hats stand out on any dessert table.
Step 3: Fill the Hats and Finish with the Cookie Brim
Once your hats are decorated and the chocolate has mostly set, it’s time to fill them with candy! Carefully spoon in your chosen Halloween candy and sprinkles inside each cone—this is the fun surprise part everyone loves. Then, cover the bottom rim with another layer of melted chocolate (just a little, to act as “glue”) and gently press a chocolate cookie on top as the brim. Flip the hat over so the chocolate can harden without smudging your decorations. Patience here is key—I usually let them set on a parchment-lined tray before moving them to a container.
Pro Tips for Making Candy-filled Witch Hats Recipe
- Use Quality Chocolate Wafers: I always pick good-quality melting wafers because they set shinier and taste richer, which really makes a difference.
- Don’t Overfill the Cones: Filling too much can crack the cone or make it hard to seal with the cookie brim—leave some space at the top for neatness.
- Work Quickly But Carefully: Chocolate starts to harden fast, so have your decorations and candies ready before you melt it.
- Patience is Key: Let each layer of chocolate fully set before moving on to avoid smudging or breaking your hats.
How to Serve Candy-filled Witch Hats Recipe
Garnishes
I like to add a little extra flair with a few more sprinkles or mini edible stars right before serving. Sometimes, I place a tiny candy spider or similar Halloween-themed decoration on top for an added creepy-cute effect. These small touches make the witch hats look even more special and festive.
Side Dishes
These witch hats shine best as a standalone treat, but if you’re planning a full Halloween spread, try pairing them with warm spiced cider or hot chocolate. They also go well alongside pumpkin-shaped cupcakes or a bowl of caramel popcorn for a complete seasonal dessert table.
Creative Ways to Present
For parties, I like to arrange these candy-filled witch hats in a circular pattern on a black or orange platter to mimic a witch’s hat circle. Wrapping each one in cellophane with a little ribbon adds a cute gift-like appeal if you’re handing them out to guests or neighbors. One time, I even placed them atop frosted cupcakes, turning the hats into edible toppers that were a real conversation starter!
Make Ahead and Storage
Storing Leftovers
I store leftover witch hats in an airtight container at room temperature to keep that perfect crunch. They’ll stay fresh for a few days this way. Just make sure to keep them away from direct heat or humidity, or the chocolate coating can soften and lose its snap.
Freezing
Freezing isn’t my go-to for this recipe because the candy fillings and wafer cones can sometimes lose texture and become a bit soggy after thawing. If you want to freeze them, place the hats in a single layer and tightly wrap with plastic wrap plus a container, then thaw slowly at room temperature before serving.
Reheating
Reheating isn’t really necessary here since these are meant to be enjoyed at room temperature. If you do want to warm the chocolate slightly, do so for just a few seconds in the microwave, but be careful not to melt the candy inside. Otherwise, they taste best fresh or the next day.
FAQs
-
Can I use regular chocolate instead of melting wafers?
Absolutely, but be aware that regular baking chocolate or chips may need to be tempered for a smooth, shiny finish, and they might take longer to set. Melting wafers are designed to melt smoothly and harden quickly, which makes the process much easier, especially if you’re new to chocolate work.
-
What types of candy work best for filling the witch hats?
I recommend small, individually bite-sized candies like mini M&Ms, gummy worms, candy corn, or small chocolates. Avoid very sticky or melty candies that could ruin the cone’s crunch or get messy inside the hat.
-
How long do these Candy-filled Witch Hats last?
When stored in an airtight container at room temperature, they typically stay fresh for about 3 to 5 days. After that, the cones may start to lose their crispness.
-
Can I prepare these ahead of time for a party?
Yes! These hats can be made a day in advance and stored in an airtight container. Just assemble and decorate close to the event if you want the freshest look and crunch, but they hold up well when prepped early.
Final Thoughts
I’ve found that the Candy-filled Witch Hats Recipe is always a hit, whether it’s a casual family night or a festive Halloween gathering. I love how versatile and fun it is—plus, the smile you get when someone bites into the crunchy chocolate hat and finds candy inside? Priceless. Give this recipe a try like you’re making a little Halloween magic in your own kitchen, and trust me, it will become one of those seasonal favorites you return to year after year!
Print
Candy-filled Witch Hats Recipe
- Prep Time: 15 minutes
- Cook Time: 15 minutes
- Total Time: 30 minutes
- Yield: 12 witch hats
- Category: Dessert
- Method: No-Cook
- Cuisine: American
Description
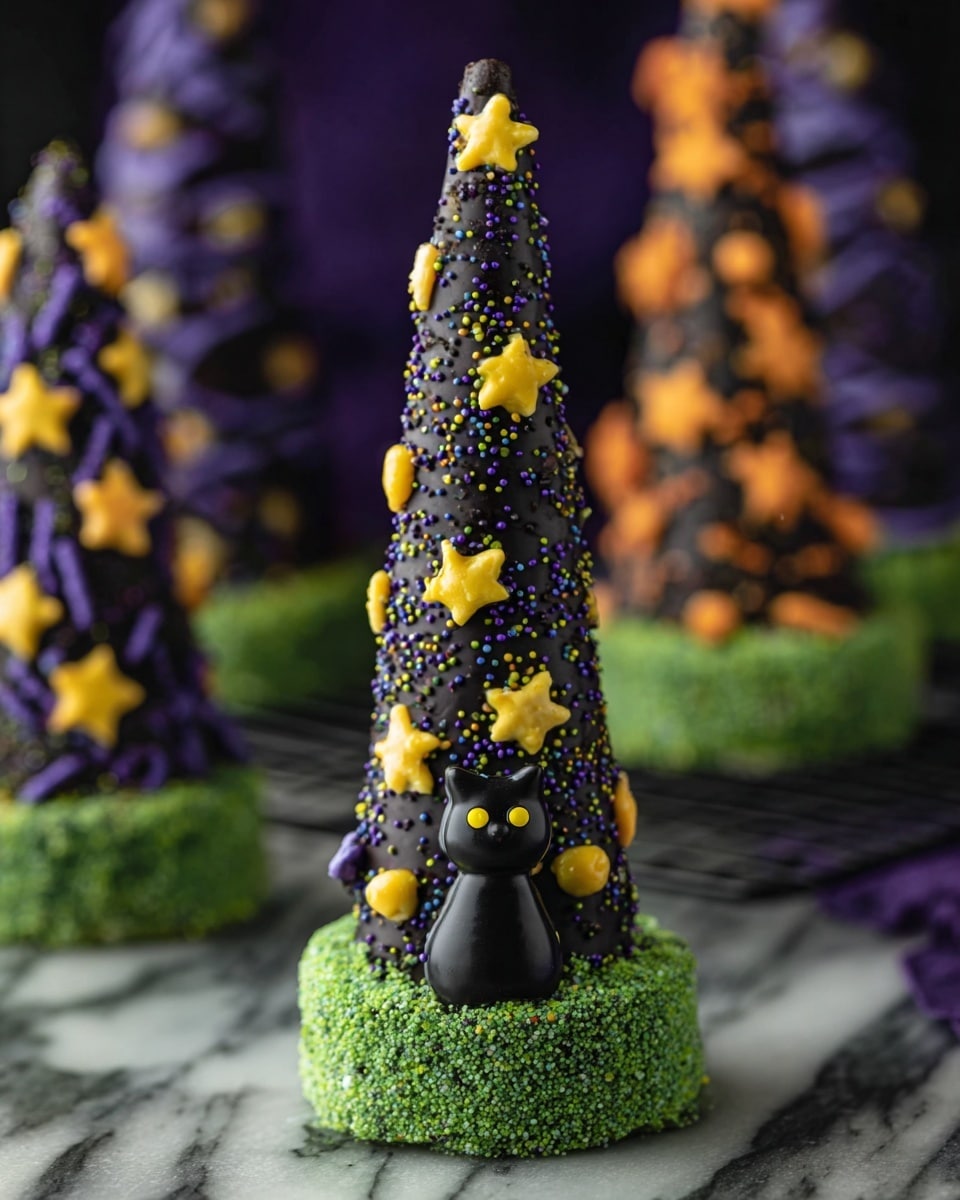
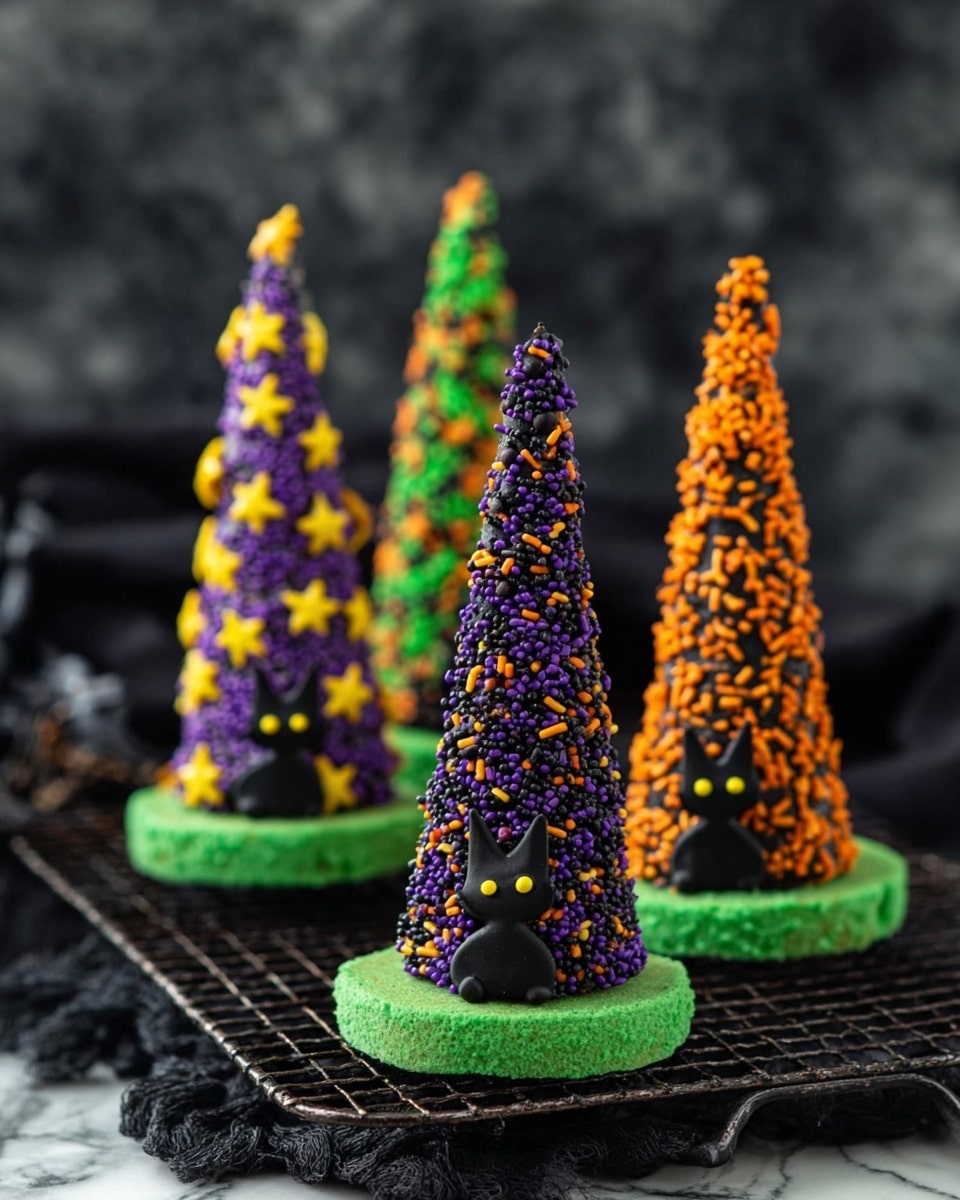
Candy-filled Witch Hats are a fun and festive Halloween treat made with waffle ice cream cones dipped in chocolate, decorated with sprinkles and sour belts, filled with candy, and topped with chocolate cookies. These adorable and edible witch hats are perfect for parties or as spooky treats for kids and adults alike.
Ingredients
Cones and Decorations
- 12 waffle ice cream cones
- 12 black cat icing decorations
- Halloween sprinkles, as needed
- 12 green sour belts
Chocolate Components
- 12 oz chocolate melting wafers
- 12 chocolate cookies
Filling
- Assorted Halloween candy, amount as desired for filling
Instructions
- Melt the Chocolate: Melt the chocolate wafers according to the package directions until smooth and glossy. This forms the base for coating the cones.
- Coat the Cones: Using a spatula, evenly cover each waffle cone with the melted chocolate. Smooth out the surface and remove excess chocolate to create a sleek outer layer on the cones.
- Add Decorations: While the chocolate is still wet, sprinkle Halloween sprinkles over the cones. Then place the cones on a parchment paper–lined baking sheet to set.
- Attach Sour Belts and Icing Decorations: Dab a small amount of melted chocolate on the bottom edge of each cone, then adhere a green sour belt around it. Optionally, attach a black cat icing decoration to the front of each cone for an extra festive touch.
- Fill the Cones: Fill each cone with assorted Halloween candy and additional sprinkles, being careful not to overfill or let candy spill out.
- Seal the Bottom: Carefully cover the open bottom of each cone with melted chocolate, making sure not to let chocolate drip inside the cone. Immediately place a chocolate cookie on top of the chocolate to seal the bottom of the cone like a hat brim.
- Allow to Set: Flip the cones upside down and let them sit until the chocolate seal is fully set and hardened.
- Store Properly: Transfer the finished candy-filled witch hats to an airtight container until ready to serve or gift.
Notes
- Use chocolate melting wafers for easy and smooth chocolate coating.
- Be careful when sealing the bottom of the cone to avoid dripping chocolate inside the cone.
- Customize with any Halloween candies or sprinkles you prefer.
- Allow chocolate to fully set for neat presentation and easy handling.
- These make great party favors or fun snacks for Halloween gatherings.
Nutrition
- Serving Size: 1 witch hat
- Calories: 220
- Sugar: 20g
- Sodium: 75mg
- Fat: 12g
- Saturated Fat: 7g
- Unsaturated Fat: 4g
- Trans Fat: 0g
- Carbohydrates: 28g
- Fiber: 1g
- Protein: 2g
- Cholesterol: 5mg


