
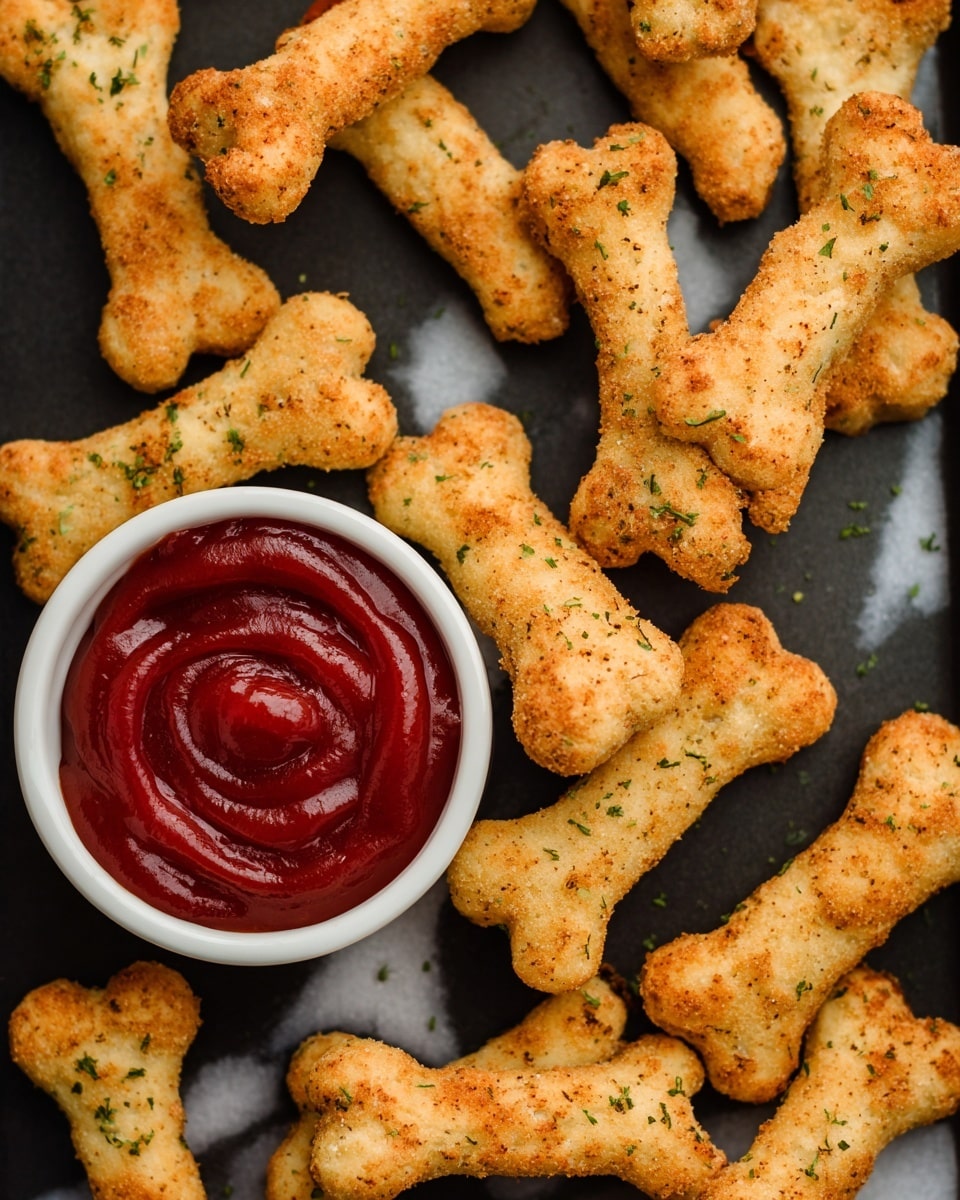
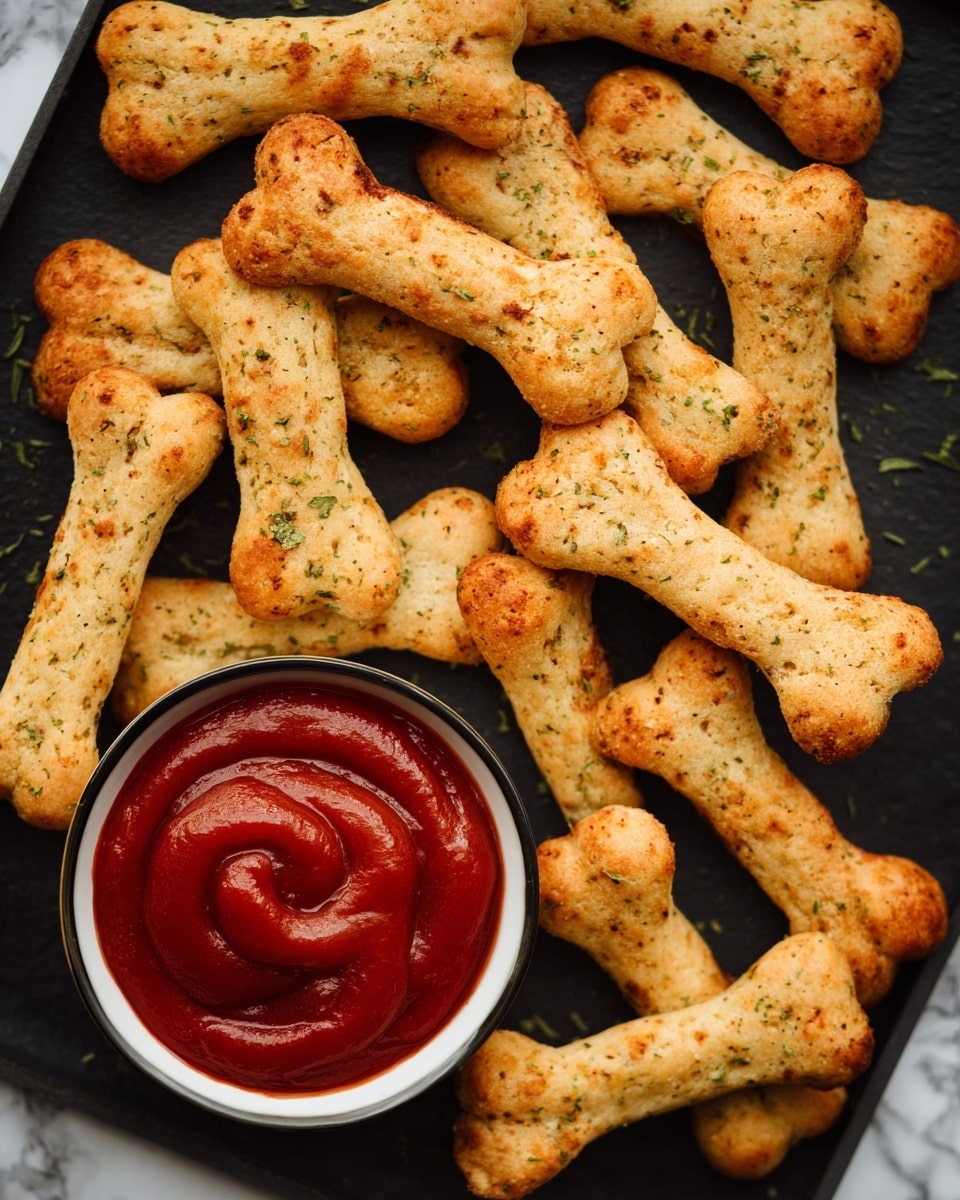
If you’re looking for a spooky, cheesy snack that’s as fun to make as it is to eat, you’ve got to try this Cheesy Halloween Breadstick Bones Recipe. I absolutely love how these breadsticks turn out—golden, cheesy, and just the right amount of festive creepiness. Whether you’re hosting a Halloween party or just want a fun appetizer for a cozy night in, this recipe is sure to impress and satisfy. Keep reading because I’m sharing all my best tips to make these breadstick bones perfectly every time!
Why You’ll Love This Recipe
- Fun and Festive: You’ll enjoy shaping the dough into spooky “bones,” making these breadsticks a hit with kids and adults alike.
- Cheesy Goodness: The combo of Parmesan and melty mozzarella gives you layers of cheesy flavor that keep everyone coming back for more.
- Simple Yet Impressive: With easy steps and basic ingredients, you can create a snack that looks like you spent hours in the kitchen.
- Perfect for Sharing: Serves 10 breadsticks, great for parties or family movie nights.

Ingredients You’ll Need
Each ingredient plays a starring role to make these Cheesy Halloween Breadstick Bones taste irresistible. I always recommend using quality pizza dough and freshly grated cheese to get that authentic, fresh-baked flavor. Here’s what you’ll want to grab before getting started.
- All-purpose flour: Great for dusting your surface so the dough doesn’t stick when rolling and shaping.
- Pizza dough: I prefer store-bought for convenience, but homemade works just as well—just make sure it’s at room temperature for easier handling.
- Unsalted butter: Melted and brushed on for a rich golden crust and extra flavor.
- Grated Parmesan cheese: Adds a sharp, savory bite that complements the mozzarella beautifully.
- Shredded mozzarella cheese: The melty, bubbly topping that makes these breadsticks downright addictive.
- Marinara sauce: Your dipping buddy! I like mine warm and garlicky.
Variations
One of the things I love about the Cheesy Halloween Breadstick Bones Recipe is how easy it is to personalize. I often switch things up to suit dietary needs or just to add a little twist. Feel free to get creative with these fun breadsticks!
- Gluten-free version: I swapped regular pizza dough for gluten-free dough once and was pleasantly surprised—the texture stayed soft and flavorful.
- Dairy-free alternative: Using vegan butter and plant-based cheese works well, especially if you’re making these for friends with allergies.
- Extra spooky touch: Try adding some black sesame seeds or poppy seeds around the bone ends for a “dirtied” effect—it really freaks out the kids!
- Flavor twist: Mix a bit of garlic powder or Italian seasoning into the melted butter before brushing to amp up the taste.
How to Make Cheesy Halloween Breadstick Bones Recipe
Step 1: Preheat and Prep Your Workspace
First things first, preheat your oven to 375°F (190°C). This temperature is perfect for getting a crispy, golden crust without overcooking the cheese. While it heats, line two baking sheets with parchment paper—this prevents sticking and makes cleanup a breeze. I always dust my workspace lightly with flour to keep the dough from clinging to the counter when I start rolling.
Step 2: Shape the Dough Into Bones
Take your pizza dough and divide it into 10 equal pieces. I like to roll them out into ropes about 8 inches long. Here’s a pro tip I learned the hard way: make the ends slightly thicker than the middle—this gives you those classic bone shapes. Trust me, it makes a difference! Place your ropes spaced out on the parchment-lined sheets so they don’t stick together while baking.
Step 3: Create the Bone Ends with Snips
Grab your kitchen scissors and carefully make two small cuts about an inch deep on each end of every dough rope. Then, gently stretch those sections apart to create “bones.” This step is so fun—it’s like giving your breadsticks little fingers! I always opt for scissors here; knives just don’t give that clean snip I want.
Step 4: Butter, Parmesan, and Bake
Melt your butter and brush it generously over each breadstick. This helps get that rich golden crust and locks in moisture. Don’t be shy—cover every nook and cranny. Next, sprinkle on your Parmesan cheese, which adds a nutty punch. Pop the breadsticks in the oven and bake for about 15 minutes, until they’re starting to turn golden around the edges.
Step 5: Add Mozzarella and Finish Baking
Take the baking sheets out and sprinkle shredded mozzarella evenly across the breadsticks. Be careful not to smother them—too much cheese can get soggy. Back into the oven they go for another 5 to 7 minutes, until the mozzarella melts beautifully and bubbles with golden spots. That gooey cheese is the magic that makes these breadstick bones unforgettable!
Step 6: Serve Warm with Marinara
Once out of the oven, these cheesy breadstick bones are best enjoyed warm. Serve them up with a side of your favorite marinara sauce for dipping. I’ve caught myself double-dipping more times than I care to admit! The tangy sauce perfectly balances the savory cheesy breadsticks.
Pro Tips for Making Cheesy Halloween Breadstick Bones Recipe
- Room Temperature Dough: Always let your dough come to room temp before shaping—it’s much easier to work with and stretches more smoothly.
- Use Kitchen Scissors: For those perfect bone cuts, scissors work way better than a knife for clean, precise snips.
- Freshly Grated Cheese: Fresh Parmesan and mozzarella melt better and taste richer than pre-grated versions—totally worth the extra effort!
- Don’t Overload Cheese: Adding too much mozzarella can make your breadsticks soggy—just an even light layer works best.
How to Serve Cheesy Halloween Breadstick Bones Recipe
Garnishes
I love finishing off these breadstick bones with a little sprinkle of extra Parmesan right before serving. Sometimes, I add a dash of chopped fresh parsley or dried oregano to bring color and a hint of herbal freshness. If you want a spooky touch, a few black sesame seeds on the bone ends mimic “dirt” or give a cool contrast that looks almost eerie!
Side Dishes
My go-to sides for these cheesy breadsticks are a bowl of warm marinara or even a spicy arrabbiata sauce for dipping. They also pair well with a crisp green salad for balance or a creamy pumpkin soup to keep the Halloween vibe going. For a party, I set out an assortment of dips like ranch, pesto, or garlic butter.
Creative Ways to Present
One of my favorite ways to present these is arranging them on a spooky-themed platter with fake “bones” labeled around them for a fun touch. For kids’ parties, I’ve wrapped “bandages” of parchment paper around the middle to create mummy-like breadsticks. Another idea? Serve them standing up in a tall jar or vase, like a bone bouquet. It’s always a conversation starter!
Make Ahead and Storage
Storing Leftovers
After enjoying these breadstick bones, if you have leftovers (which is a good problem to have!), store them in an airtight container at room temperature for up to two days. I found that keeping them wrapped loosely in foil helps prevent them from drying out too much.
Freezing
I’ve frozen these breadsticks successfully, but only after baking and cooling completely. Just place them in a freezer-safe container or zip-top bag, and when you’re ready, reheat them in the oven for the best texture. Freezing the dough before baking didn’t work as well for me—texture suffered a bit on reheating.
Reheating
To warm up leftover Cheesy Halloween Breadstick Bones, I preheat the oven to 350°F and place them on a baking sheet for about 8-10 minutes. This keeps the outside crispy and the cheese melty again—microwaving tends to make them chewy or soggy, so I avoid that whenever possible.
FAQs
-
Can I make the Cheesy Halloween Breadstick Bones Recipe ahead of time?
Absolutely! You can shape and bake the breadstick bones a day in advance. Store them in an airtight container at room temperature and reheat in the oven before serving to bring back their crispy, cheesy goodness.
-
What if I don’t have pizza dough?
If you don’t have pizza dough, you can use bread dough or even biscuit dough, but the texture and flavor may vary slightly. For the most authentic result, pizza dough or a similar yeast dough is best because it stretches easily and bakes into soft, chewy breadsticks.
-
How do I prevent the breadsticks from getting soggy?
Be sure to brush with melted butter before baking and avoid piling on too much mozzarella cheese. Baking the breadsticks first before adding cheese creates a crisp base that keeps sogginess at bay.
-
Can I use pre-grated cheese?
You can, but freshly grated Parmesan and mozzarella melt better and deliver a richer flavor. Pre-grated cheese often contains anti-caking agents that affect melting and texture.
-
Is this recipe suitable for dietary restrictions?
Yes! You can customize the Cheesy Halloween Breadstick Bones Recipe by using gluten-free pizza dough and dairy-free cheese and butter alternatives to fit gluten-free or vegan diets.
Final Thoughts
This Cheesy Halloween Breadstick Bones Recipe holds a special place in my kitchen every fall. It’s the perfect mix of fun, flavor, and festivity that brings out smiles from everyone—especially the kids who get a kick out of “eating bones.” I hope you’ll try making these soon; they’re one of those recipes that’s simple to pull off but feels delightfully impressive. Plus, sharing them with friends and family just makes Halloween a little tastier. Happy baking and spooky snacking!
Print
Cheesy Halloween Breadstick Bones Recipe
- Prep Time: 10 minutes
- Cook Time: 22 minutes
- Total Time: 32 minutes
- Yield: 10 Breadsticks
- Category: Snack
- Method: Baking
- Cuisine: American
- Diet: Vegetarian
Description
Cheesy Halloween Breadstick Bones are a fun and spooky snack perfect for Halloween parties. These breadsticks are shaped like bones, brushed with melted butter, sprinkled with Parmesan cheese, baked to golden perfection, and topped with melted mozzarella cheese. Served warm with marinara sauce, they make a deliciously cheesy treat that both kids and adults will love.
Ingredients
Dough
- 1 pound pizza dough
- All-purpose flour for dusting
Topping & Coating
- 2 tablespoons unsalted butter, melted
- ½ cup grated Parmesan cheese
- 1 cup shredded mozzarella cheese
Serving
- Marinara sauce for dipping
Instructions
- Preheat the Oven: Set your oven to 375°F and allow it to heat up. While waiting, prepare two baking sheets by lining them with parchment paper to prevent the breadsticks from sticking.
- Shape the Dough: Take your pizza dough and divide it into 10 equal portions. Roll each portion into a rope about 8 inches long. To create the “bone” effect, make sure the ends of each rope are slightly thicker than the middle. Place the shaped dough onto the prepared baking sheets, leaving some space between each piece so they don’t touch while baking.
- Snip the Ends: Grab your kitchen scissors and make two small cuts (about 1 inch deep) on both ends of each dough rope. Gently pull and stretch these cut pieces apart to create the shape of bone ends.
- Brush and Bake: Melt the butter and, using a pastry brush, generously coat each breadstick with it. Sprinkle the grated Parmesan cheese over the top for extra flavor. Place the breadsticks in the oven and bake for about 15 minutes, or until they begin to turn golden.
- Add Mozzarella: After 15 minutes, take the breadsticks out of the oven. Sprinkle the shredded mozzarella cheese evenly over each one, then return them to the oven. Bake for another 5 to 7 minutes, or until the mozzarella has melted and is bubbling.
- Serve: Once the breadsticks are out of the oven, serve them warm with a side of marinara sauce for dipping. Enjoy the spooky, cheesy snack!
Notes
- Room Temperature Dough: Always let the pizza dough come to room temperature before rolling. This makes it easier to handle and shape.
- Snipping with Scissors: Kitchen scissors work best for shaping the “bone” ends of the breadsticks. A knife may not create clean cuts.
- Cheese Tips: For extra cheesiness, use freshly grated Parmesan and mozzarella. Pre-grated cheese can work but may not melt as smoothly.
- Butter for Browning: Brushing with melted butter before baking helps the breadsticks turn golden brown and gives them a rich flavor.
- Stretching Dough: The dough may shrink back after rolling. If your breadsticks turn out “fat,” consider rolling the ropes slightly longer.
- Making Ahead: You can prepare and bake these a day in advance. Store them in an airtight container and reheat in the oven to retain crispiness.
- Freezing Option: Freeze baked breadsticks after cooling. Reheat them in the oven to maintain texture—freezing before baking may alter the texture upon reheating.
- Gluten-Free/Dairy-Free Substitutes: You can make these gluten-free with gluten-free pizza dough and dairy-free with vegan cheese and butter.
- Avoid Overloading with Cheese: Adding too much mozzarella can make the breadsticks soggy. Use just enough to cover the surface.
Nutrition
- Serving Size: 1 breadstick (approx. 70g)
- Calories: 210
- Sugar: 1.2g
- Sodium: 380mg
- Fat: 9g
- Saturated Fat: 5g
- Unsaturated Fat: 3.5g
- Trans Fat: 0g
- Carbohydrates: 26g
- Fiber: 1.2g
- Protein: 8g
- Cholesterol: 20mg

