
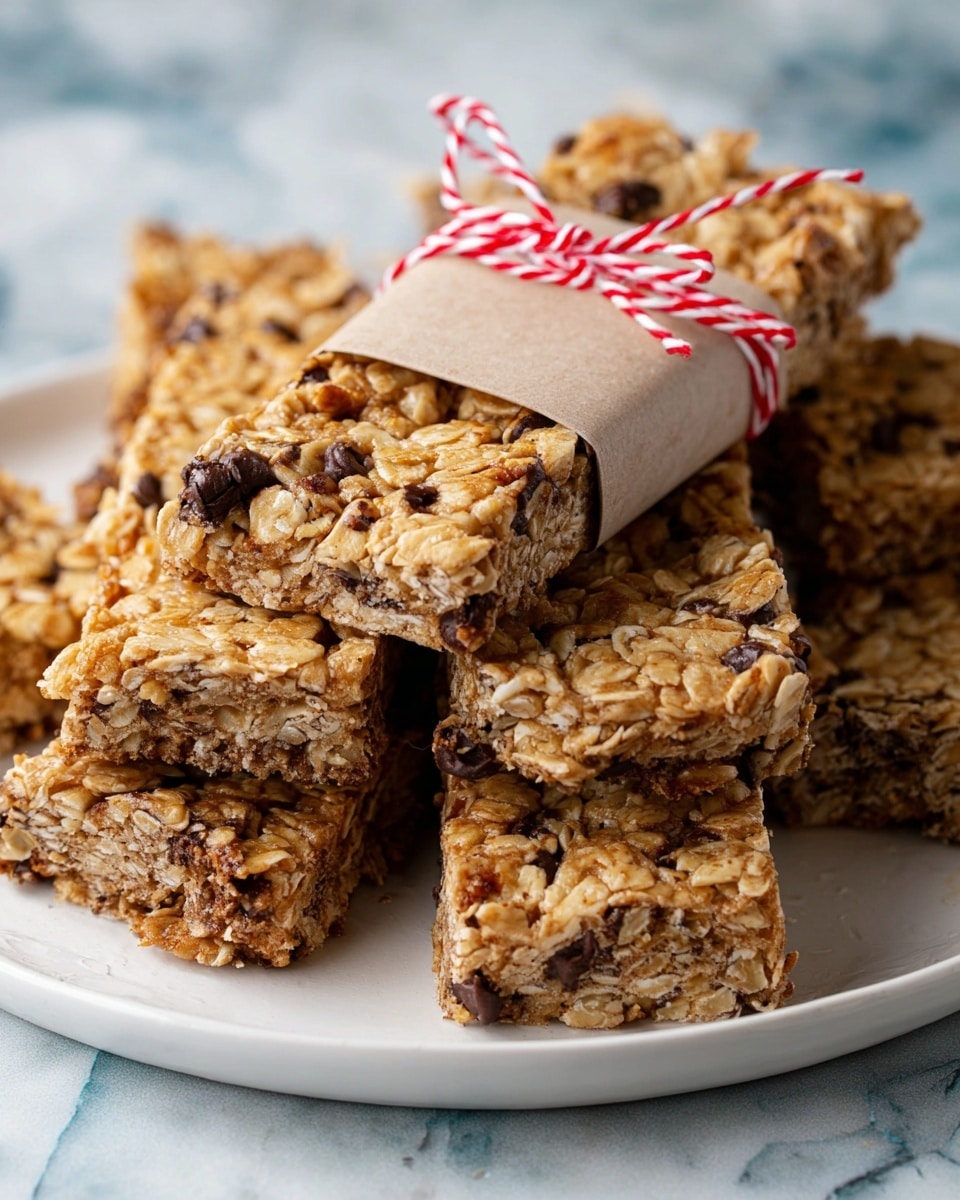
I have to tell you, this Chocolate Chip Granola Bars Recipe quickly became a staple in my kitchen. It’s the perfect blend of chewy oats and melty chocolate chips, which makes for an incredibly satisfying snack that you can feel good about. Whether you’re packing lunches, grabbing a quick bite post-workout, or just craving something sweet but wholesome, these bars hit all the right notes.
What I really love about this recipe is how adaptable it is—you can customize it easily based on what you have on hand or your dietary preferences. Plus, it’s incredibly forgiving, so even if you’re not a pro baker, you’ll still end up with bars that look and taste delicious. Stick with me, and I’ll share some of the tricks that helped me perfect this Chocolate Chip Granola Bars Recipe so you can enjoy them just as much as my family does!
Why You’ll Love This Recipe
- Simple Ingredients: Uses pantry staples you probably already have, making it easy to whip up anytime.
- Customizable: Swap chocolate chips for dried fruit or choose your favorite oil to suit your taste and needs.
- Perfect Texture: Chewy on the inside with just the right bit of crunch thanks to toasted oats and coconut.
- Great Make-Ahead Snack: Keep them wrapped for busy days, lunches, or road trips—they stay fresh for weeks!

Ingredients You’ll Need
Let’s talk about the ingredients that make this Chocolate Chip Granola Bars Recipe so great. The combination of oats and coconut brings texture and flavor, while the honey and brown sugar add sweetness without being overpowering.
- Old Fashioned Oats: I love using rolled oats because they provide a hearty chew and hold together well when baked.
- Whole Wheat Flour: Adds a touch of nuttiness and extra nutrients; you can substitute with all-purpose flour or gluten-free flour if needed.
- Shredded Unsweetened Coconut: Brings a subtle tropical flavor and great texture contrast to the bars.
- Brown Sugar: Offers a deeper sweetness that pairs beautifully with honey.
- Chocolate Chips: The star of the show! Use semi-sweet or dark chocolate chips, or replace with raisins or dried cranberries for a less sweet version.
- Kosher Salt: Just a pinch to balance all the flavors.
- Vegetable (or Canola, Avocado) Oil: This helps bind everything together nicely and keeps the bars moist.
- Vanilla Extract: A little splash adds a warm, inviting aroma and enhances the chocolate’s flavor.
- Honey: The natural sweetener that also acts as a binder; I recommend using raw or local honey for the best taste.
Variations
I’m all about making recipes your own, and this Chocolate Chip Granola Bars Recipe is no exception. Over time, I’ve tweaked it depending on what’s in the pantry or the occasion, and it always turns out delicious.
- Chocolate-Free Version: I swapped the chocolate chips for dried cherries once when my kids had a school project, and they still loved them (plus, parents were happy with the less sugar!).
- Nutty Add-Ins: Adding chopped nuts like almonds or walnuts boosts the crunch and protein—perfect if you’re packing these for hikes or after sports.
- Gluten-Free Option: Use a gluten-free oat and flour blend—it’s great for those with sensitivities, and the result is just as tasty.
- Spiced Up: Sprinkle in a bit of cinnamon or pumpkin pie spice for a cozy flavor twist during colder months—my family goes crazy for this version in fall.
How to Make Chocolate Chip Granola Bars Recipe
Step 1: Prepping the Dry Ingredients
Start by preheating your oven to 325°F—this temperature keeps the bars perfectly chewy instead of crunchy. In a large bowl, combine the oats, whole wheat flour, shredded coconut, brown sugar, chocolate chips, and kosher salt. Stir them together so they’re evenly mixed. This dry foundation is what gives your bars that hearty texture you’ll crave.
Step 2: Mixing the Wet Ingredients
In a separate bowl, whisk together the oil, vanilla extract, and honey. I found whisking these first helps the honey blend in smoothly without clumps. Once combined, pour this mixture over the dry ingredients. This is where it all comes together, so stir thoroughly until every bit of oat is coated and sticky. You don’t want any dry patches or your bars won’t hold as well.
Step 3: Pressing and Baking
Line a baking sheet with parchment paper—trust me, this makes cleanup a breeze and keeps your bars intact. Transfer the granola mixture onto the sheet, then use the back of a spatula or your hands to press it down firmly into a rectangle about 13 x 9 inches and 1 inch thick. Pressing firmly is key, so your bars hold together instead of crumbling after baking. Bake in the oven for 30-40 minutes, until edges are lightly golden. The aroma alone will have you counting down the minutes!
Step 4: Cooling and Cutting
This is where patience pays off—I know it’s tempting to slice right away, but let the bars cool completely on the baking sheet. Trust me, cutting too soon means crumbly bars that won’t stick together. Once cooled, slice into 3 x 1 inch bars, and they’re ready to eat or pack up for later.
Pro Tips for Making Chocolate Chip Granola Bars Recipe
- Firm Pressure: Press the granola mixture down as firmly as you can before baking to ensure it holds together well—you want to see little cracks, not crumbles.
- Cool Completely: Always let bars cool fully before slicing to avoid messy, crumbly edges.
- Sweetness Balance: Taste your wet mix before combining to adjust honey or sugar if you like a sweeter or milder bar.
- Oven Variations: If you notice the bars browning too fast, tent them with foil halfway through baking to avoid burning.
How to Serve Chocolate Chip Granola Bars Recipe
Garnishes
I usually enjoy these bars as-is because the chocolate chips add that perfect pop of flavor and look so nostalgic. But if I’m feeling fancy, I’ll drizzle a bit of melted dark chocolate on top or sprinkle a pinch of flaky sea salt before they cool—it’s a little extra touch that makes snack time feel special.
Side Dishes
This granola bar pairs beautifully with fresh fruit like apple slices or a banana for a well-rounded snack. I also like to serve it alongside a small yogurt parfait for breakfast when I’m short on time but crave something nutritious.
Creative Ways to Present
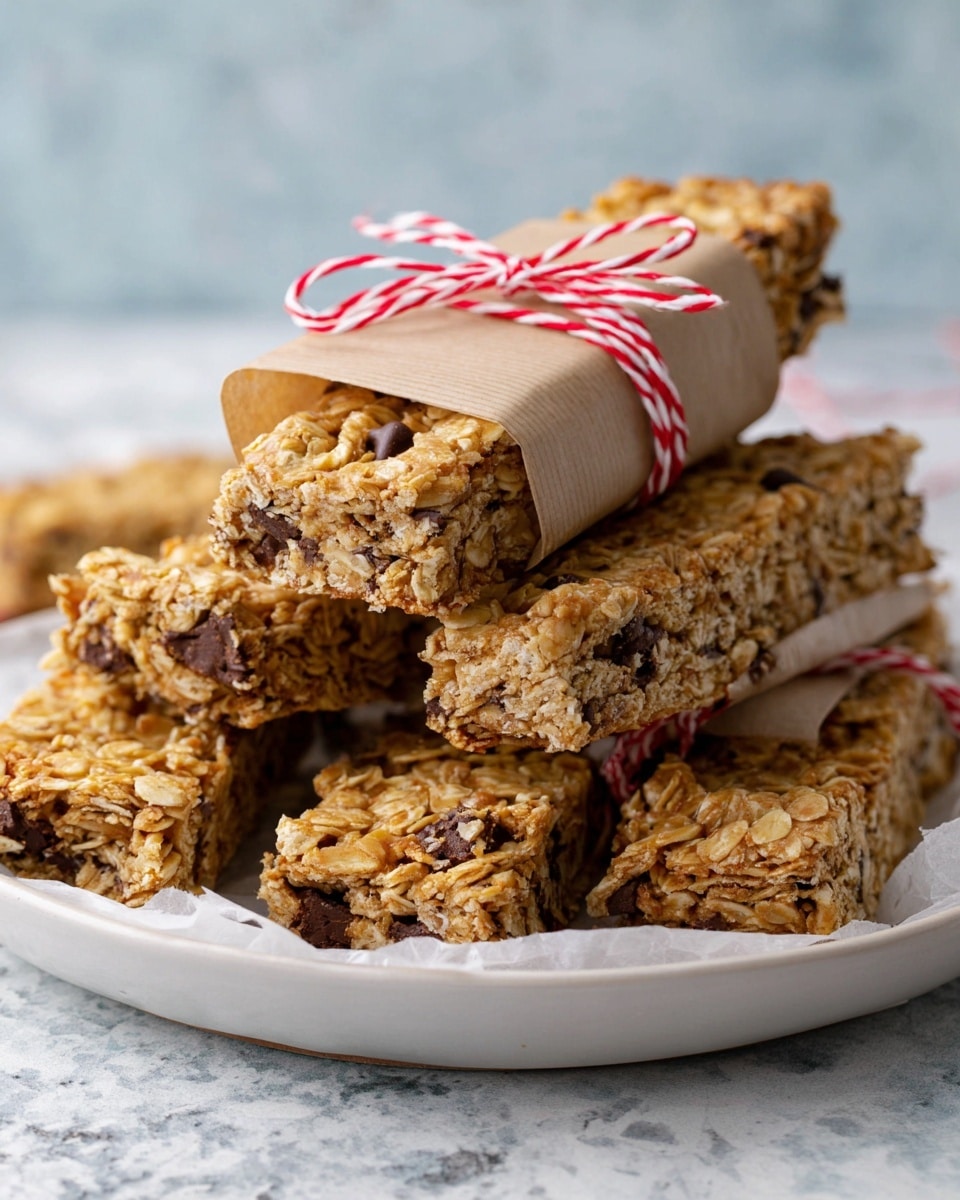
For birthday parties or a fun lunchbox surprise, I’ll cut these bars into fun shapes using cookie cutters and wrap them in colorful parchment paper tied with twine. It’s a simple trick that impresses the kids—and adults too!
Make Ahead and Storage
Storing Leftovers
I wrap each bar individually in parchment or plastic wrap and store them in an airtight container at room temperature. This keeps them fresh and chewy for up to three weeks, making them my go-to grab-and-go snack during busy mornings.
Freezing
If you want to make a big batch, freezing works like a charm. Just place wrapped bars in a freezer-safe container, and they’ll keep well for up to 4 months. When you’re ready to enjoy, just thaw them at room temperature for about 20 minutes—easy and convenient!
Reheating
To refresh your granola bars, I pop them in a microwave for 10-15 seconds or a warm oven for a few minutes. This brings back that freshly baked feel and slightly melts the chocolate—absolutely irresistible.
FAQs
-
Can I make these granola bars nut-free?
Absolutely! The base recipe doesn’t call for nuts, so as long as you avoid adding nuts or nut-based ingredients, these bars are naturally nut-free and great for those with allergies.
-
How do I keep my granola bars from being too crumbly?
Firmly pressing the mixture into the pan before baking and allowing the bars to cool completely before cutting are key. This helps everything bind well and keeps your bars intact instead of crumbling apart.
-
Can I substitute the honey with maple syrup?
Yes, maple syrup can be used as a substitute for honey in this recipe. Just keep in mind that maple syrup is slightly thinner in consistency, so you may need to bake a few extra minutes to help the bars set properly.
-
How long do these Chocolate Chip Granola Bars stay fresh?
If stored in an airtight container at room temperature, these bars stay fresh for up to three weeks. Wrapping them individually helps maintain freshness and portability.
Final Thoughts
I absolutely love how this Chocolate Chip Granola Bars Recipe turned out because it combines simplicity, flavor, and flexibility in such a satisfying way. It’s one of those recipes that feels homemade but is easy enough to whip up on a whim—and the smiles from my family tell me they appreciate it just as much as I do. Give it a try and keep a stash ready for when you need a quick snack that tastes like a little treat from the heart.
Print
Chocolate Chip Granola Bars Recipe
- Prep Time: 10 minutes
- Cook Time: 30 minutes
- Total Time: 40 minutes
- Yield: 30 bars
- Category: Snack
- Method: Baking
- Cuisine: American
- Diet: Vegetarian
Description
These homemade Chocolate Chip Granola Bars are a wholesome, delicious snack perfect for breakfast or on-the-go munching. Made with oats, whole wheat flour, shredded coconut, and sweetened with honey and brown sugar, they offer a satisfying chewy texture balanced with melty chocolate chips. Easy to prepare and customizable with dried fruits instead of chocolate, these bars are a crowd-pleaser for all ages.
Ingredients
Dry Ingredients
- 4 cups old fashioned oats
- 1/4 cup whole wheat flour
- 1/2 cup shredded unsweetened coconut
- 1/3 cup brown sugar
- 1 cup chocolate chips (or substitute with raisins or other dried fruit)
- 1/2 teaspoon kosher salt
Wet Ingredients
- 1/2 cup vegetable oil (canola, avocado, or oil of choice)
- 1 teaspoon vanilla extract
- 1/2 cup honey
Instructions
- Preheat Oven: Set your oven to 325°F (163°C) to get it ready for baking the granola bars.
- Combine Dry Ingredients: In a large bowl, mix together the oats, whole wheat flour, shredded coconut, brown sugar, chocolate chips, and kosher salt until well blended.
- Mix Wet Ingredients: In a separate bowl, whisk thoroughly together the vegetable oil, vanilla extract, and honey to create a smooth liquid mixture.
- Combine Mixtures: Pour the wet ingredient mixture over the dry oat mixture and stir thoroughly to ensure everything is evenly coated and combined.
- Shape the Bars: Line a baking sheet with parchment paper. Transfer the granola mixture onto it and press firmly into a rectangle approximately 13 x 9 inches in size and about 1 inch thick so the mixture sticks together well.
- Bake: Place the baking sheet in the preheated oven and bake for 30 to 40 minutes until the bars are golden and set.
- Cool and Cut: Allow the granola bars to cool completely on the baking sheet, then cut into 3 x 1 inch bars for easy serving.
Notes
- Storage: Individually wrapping these bars will keep them fresh for several weeks at room temperature.
- Freezing: Store the bars in an airtight container in the freezer for up to 4 months. Let them thaw about 20 minutes before eating for best texture.
- Flour Substitution: No whole wheat flour? Use all-purpose, gluten-free flour, or almond flour as an alternative.
- Chocolate Alternatives: Replace chocolate chips with naturally sweet dried fruits like cranberries, cherries, or raisins if preferred, especially for kids.
Nutrition
- Serving Size: 1 bar (approx. 3×1 inch)
- Calories: 160
- Sugar: 10g
- Sodium: 70mg
- Fat: 7g
- Saturated Fat: 2g
- Unsaturated Fat: 5g
- Trans Fat: 0g
- Carbohydrates: 22g
- Fiber: 3g
- Protein: 3g
- Cholesterol: 0mg

