
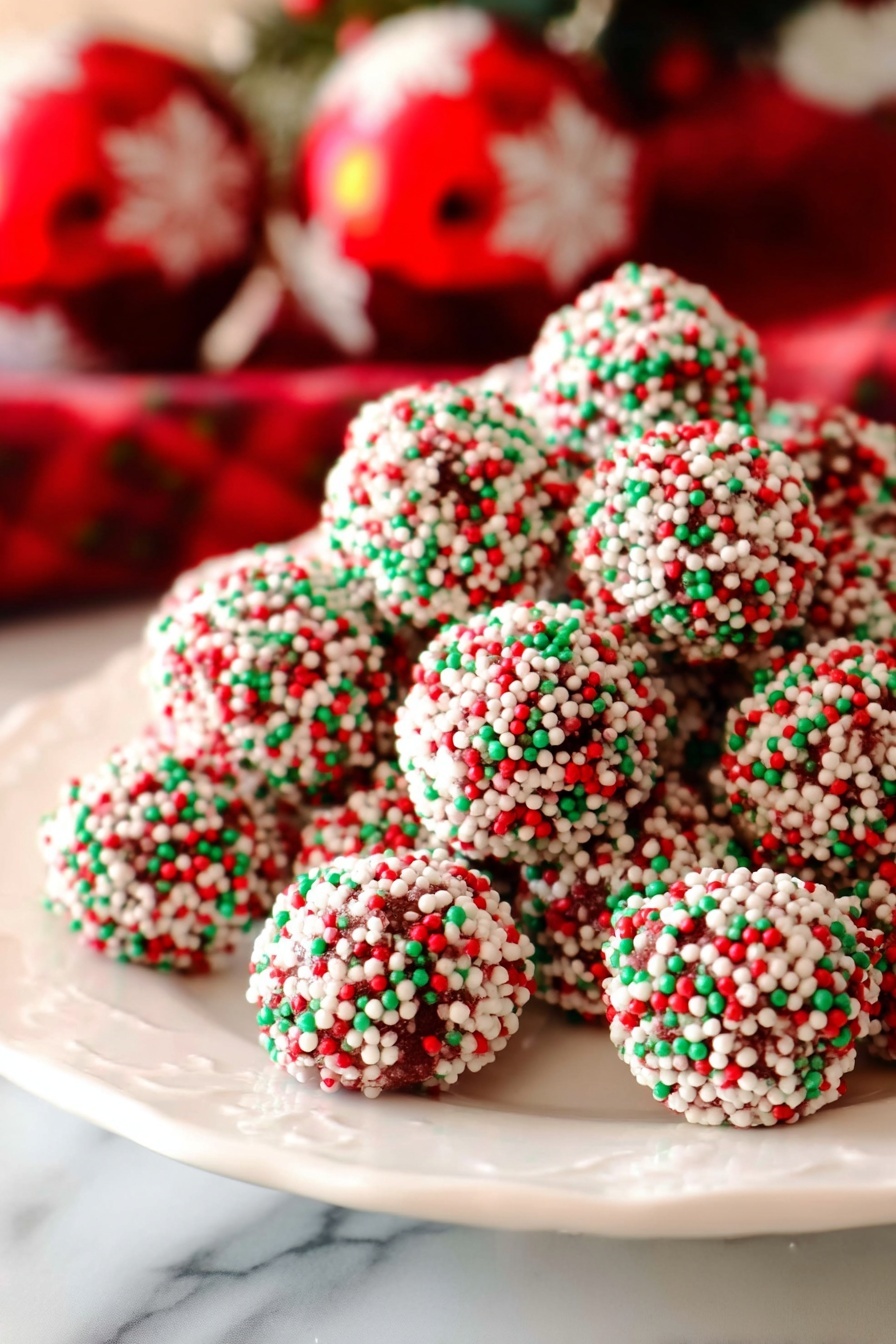
If you’re on the hunt for a rich, melt-in-your-mouth treat that’s easy to make but totally indulgent, this Chocolate Truffles Recipe is exactly what you need. I absolutely love how these truffles turn out—silky smooth, perfectly sweet, and with a fun festive twist when you roll them in sprinkles. Whether you’re making them for the holidays, a special gift, or just because you deserve a little chocolate happiness, this recipe will become your new go-to favorite.
Why You’ll Love This Recipe
- Super Simple Ingredients: You only need three main ingredients that you probably already have or can easily find.
- No Fancy Equipment Needed: A double boiler method works wonders and is totally foolproof.
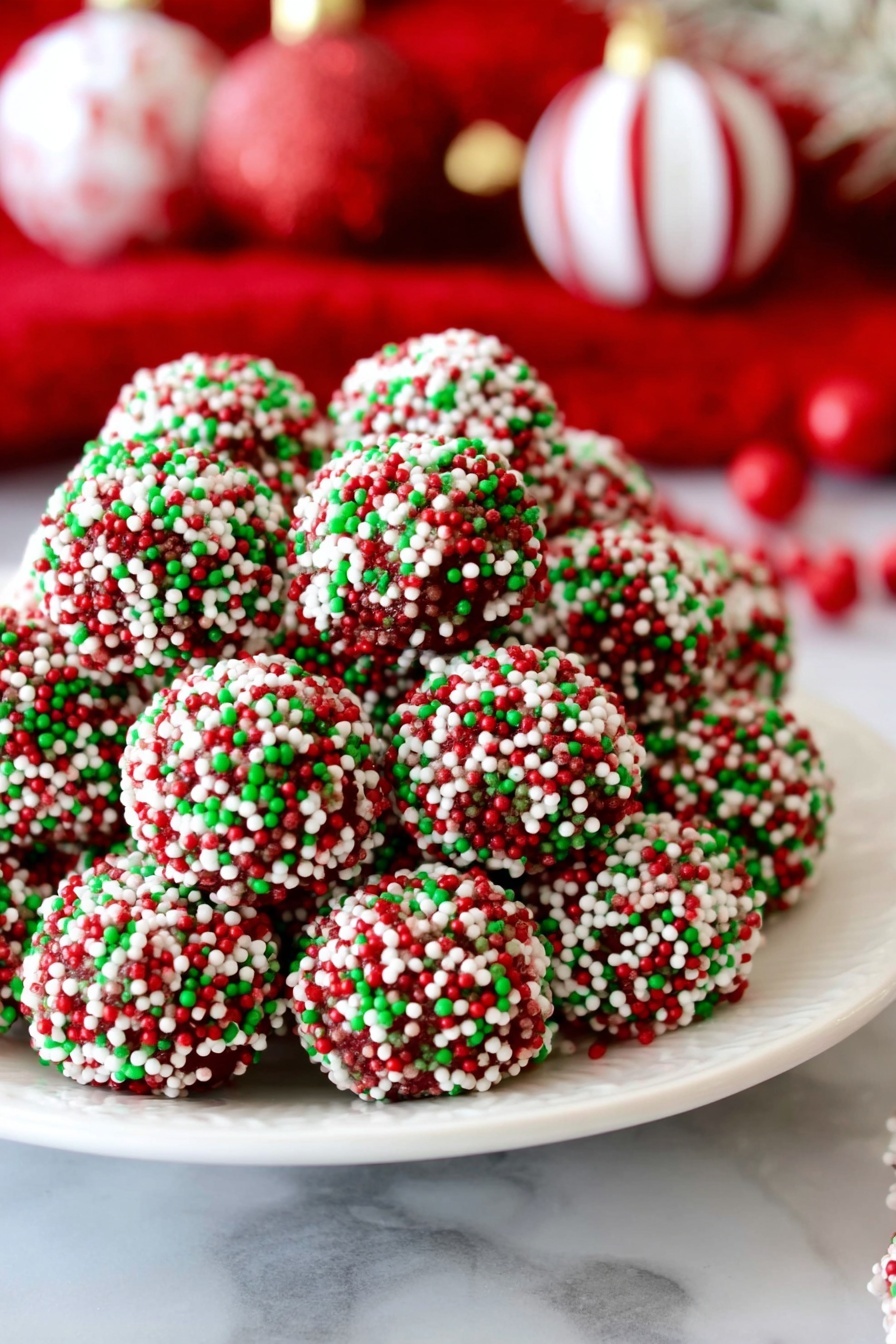
- Festive & Fun: Rolling the truffles in sprinkles gives them a playful, holiday-ready look that your family and friends will adore.
- Perfect Texture Every Time: The sweetened condensed milk makes these truffles creamy without any guesswork on consistency.

Ingredients You’ll Need
This Chocolate Truffles Recipe relies on just a handful of ingredients that blend beautifully to create that luscious, velvety texture. I love how the semi-sweet chocolate works alongside the condensed milk to keep things balanced and rich. Plus, a splash of vanilla adds depth, and sprinkles bring a cheerful pop of color and texture.
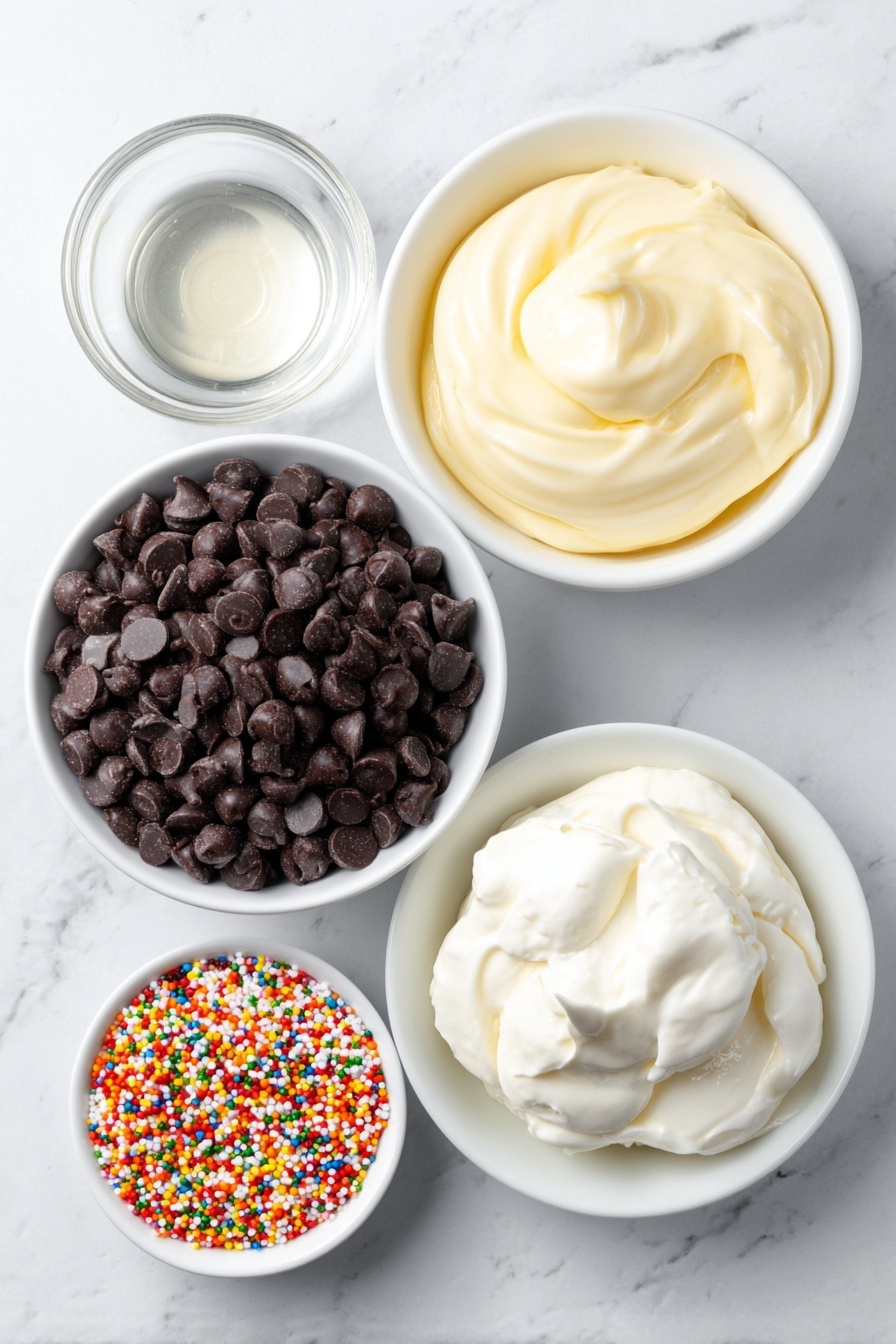
- Semi-sweet chocolate chips: I prefer chips because they melt uniformly, but you can chop a good quality bar if you like.
- Canned sweetened condensed milk: This is the secret to the creamy texture—make sure to use the full-fat variety for best results.
- Vanilla extract: Just a tablespoon, but it really rounds out the flavor and cuts through the sweetness.
- Sprinkles: For rolling the truffles—pick your favorite colors or go classic with chocolate or cocoa powder for a more understated look.
Variations
One of my favorite things about this Chocolate Truffles Recipe is how easy it is to tailor it to your preferences or occasion. I often tweak the coatings or add a little something extra to the mix to keep things exciting. Feel free to get creative and make it your own!
- Nutty Variation: I love mixing in finely chopped toasted nuts like almonds or hazelnuts for a crunchy surprise inside the truffles.
- Spiced Up: Adding a pinch of cinnamon or chili powder into the melted chocolate mixture gives a subtle warmth and depth I really enjoy.
- Vegan Swap: Use dairy-free chocolate chips and a coconut condensed milk alternative to make a vegan version that’s just as delicious.
- Coating Choices: Instead of sprinkles, try rolling your truffles in cocoa powder, powdered sugar, or crushed peppermint candies, especially for the holiday season.
How to Make Chocolate Truffles Recipe
Step 1: Melt the Chocolate Mixture Slowly
Start by setting up a double boiler—fill a pot with a couple inches of water and bring it to a gentle simmer. Place a heatproof bowl on top, making sure it doesn’t touch the water. Add the semi-sweet chocolate chips, sweetened condensed milk, and vanilla extract to the bowl. Stir frequently as they melt together to create a smooth, glossy mixture. I found this slow, gentle heat method really helps avoid burning the chocolate and ensures everything blends perfectly.
Step 2: Chill the Mixture Until Slightly Firm
Once everything is melted and combined, transfer the mixture to a bowl, cover it with plastic wrap, and refrigerate for about one hour. You’re aiming for it to be slightly firm but still pliable—this makes shaping the truffles so much easier. I’ve learned that chilling too long or not long enough makes rolling tricky, so keep an eye on the texture, not just time.
Step 3: Shape and Coat Your Truffles
Now comes the fun part! Use a small scoop or two-teaspoon measure to portion out the mixture evenly. Roll each portion quickly into a smooth ball with your hands, then immediately roll it in your chosen coating—sprinkles are my go-to because they add a festive sparkle and a slight crunch. Working quickly helps prevent the mixture from melting too much in your hands.
Step 4: Set the Truffles in the Fridge
Place the coated truffles on a parchment-lined baking sheet and pop them back in the fridge for another hour to firm up completely. This final chill makes them hold their shape well and gives you that satisfying bite that makes these truffles irresistible.
Pro Tips for Making Chocolate Truffles Recipe
- Use Quality Chocolate: The better the chocolate, the richer and smoother your truffles will taste—don’t skimp here.
- Keep Your Hands Cool: I sometimes chill my hands with cold water before rolling to keep the chocolate from melting too fast.
- Even Sizing Is Key: Using a scoop ensures your truffles are all uniform, which not only looks better but helps them set evenly.
- Don’t Skip the Second Chill: Letting the truffles set fully is what makes them firm yet creamy—patience pays off!
How to Serve Chocolate Truffles Recipe
Garnishes
I always love making these truffles extra special by rolling them in colorful sprinkles for holidays or finely chopped nuts for a classy look. Sometimes, I dust them lightly with cocoa powder if I want something less sweet but still elegant. Fresh mint leaves on the side add a pop of color and a refreshing note if you’re serving the truffles at a party.
Side Dishes
Chocolate truffles are a wonderful treat on their own, but if you want to create a full dessert experience, I like pairing them with a cup of rich espresso or a glass of red wine. For a festive gathering, they also go great with cheese platters or fresh berries to balance that silky chocolate richness.
Creative Ways to Present
For holiday gifts or special occasions, I arrange truffles in pretty paper liners inside decorative boxes or mason jars with a ribbon tied on top. Another fun idea is to skewer a few truffles on decorative sticks and present them as chocolate “lollipops” — they’re super cute and make for easy serving at parties.
Make Ahead and Storage
Storing Leftovers
I store leftover truffles in an airtight container in the refrigerator, where they keep perfectly for up to two weeks. Just make sure they don’t get too cozy with strong-smelling foods, as their taste can pick up unwanted aromas.
Freezing
Freezing these truffles works wonderfully if you want to make them well in advance. I wrap each truffle individually in plastic wrap, place them in a freezer-safe container, and freeze for up to three months. When it’s party time, just thaw them overnight in the fridge to keep their perfect texture.
Reheating
Since these are no-bake truffles, I don’t recommend heating them. Instead, let them come to room temperature before serving if they’re too firm from the fridge—this way, you get that ideal creamy, melt-in-your-mouth feel every time.
FAQs
-
Can I use milk chocolate instead of semi-sweet in this Chocolate Truffles Recipe?
Absolutely! Milk chocolate will make your truffles sweeter and creamier. Just keep in mind that the sweetness level will increase, so you might want to adjust the amount of sweetened condensed milk or add a pinch of salt to balance the flavors.
-
Do I have to use sprinkles as a coating?
Not at all! Sprinkles add a festive touch and texture, but cocoa powder, powdered sugar, chopped nuts, or even crushed cookies are fantastic alternatives. You can also leave the truffles plain for an ultra-smooth finish.
-
Is this Chocolate Truffles Recipe suitable for gifting?
Definitely! These truffles make fantastic homemade gifts. Just package them in decorative boxes or tins, and they’re guaranteed to impress friends and family. Just keep them refrigerated until you gift them for optimal freshness.
-
Can I add flavors like liqueurs or spices?
Yes! Adding a tablespoon or two of your favorite liqueur (like Bailey’s or Grand Marnier) or a pinch of spices (like cinnamon or chili) can elevate the flavor profile beautifully. Just add these during the melting stage and adjust to taste.
-
How do I keep the truffles from melting when handling?
Keep your hands cool by washing them with cold water and drying thoroughly before rolling the truffles. You can also work quickly and refrigerate the mixture between batches to prevent them from getting too soft.
Final Thoughts
This Chocolate Truffles Recipe holds a special place in my heart because it’s one of those recipes that feels fancy but isn’t complicated at all. It’s helped me impress guests nearly every time without stress, and my family goes crazy for the festive sprinkles and smooth texture. If you try making these, I really think you’ll find they’re as fun to make as they are delicious to eat—perfect for sharing or savoring all by yourself. Give it a go, and I promise it’ll become a cherished recipe in your kitchen too!
Print
Chocolate Truffles Recipe
- Prep Time: 10 mins
- Cook Time: 2 hrs
- Total Time: 2 hrs 10 mins
- Yield: 36 truffles
- Category: Dessert
- Method: No-Cook
- Cuisine: American
Description
Delight in these festive Christmas Chocolate Truffles, rich and creamy confections made with smooth melted semi-sweet chocolate, sweetened condensed milk, and vanilla extract. Coated with colorful sprinkles, these bite-sized treats are perfect for holiday gifting or enjoying by the fireside.
Ingredients
Main Ingredients
- 3 cups semi-sweet chocolate chips
- 14 ounces canned sweetened condensed milk
- 1 tablespoon vanilla extract
Coating
- ½ cup sprinkles
Instructions
- Melt Ingredients: Using a double boiler method, gently melt the semi-sweet chocolate chips with the sweetened condensed milk and vanilla extract, stirring continuously until the mixture becomes smooth and well combined.
- Chill Mixture: Pour the melted chocolate mixture into a bowl and refrigerate for one hour to allow it to firm up slightly, making it easier to handle for shaping.
- Shape Truffles: Once firm, scoop the mixture using a two teaspoon measure to ensure uniform size. Roll each portion into a smooth ball with your hands.
- Coat with Sprinkles: Roll each chocolate ball into the sprinkles, coating them evenly for a festive look and added texture.
- Set Truffles: Arrange the coated truffles on a parchment-lined baking sheet and refrigerate for another hour to allow them to fully set before serving.
Notes
- Using a double boiler prevents the chocolate from burning during melting.
- For a firmer texture, chill the mixture longer before shaping.
- Substitute sprinkles with cocoa powder, crushed nuts, or shredded coconut for different coatings.
- Store truffles in an airtight container in the refrigerator for up to one week.
- For extra flavor, consider adding a teaspoon of your favorite liqueur to the melted mixture.
Nutrition
- Serving Size: 1 truffle (approx. 20g)
- Calories: 90
- Sugar: 13g
- Sodium: 15mg
- Fat: 4.5g
- Saturated Fat: 3g
- Unsaturated Fat: 1.5g
- Trans Fat: 0g
- Carbohydrates: 12g
- Fiber: 1g
- Protein: 1.2g
- Cholesterol: 5mg

