If you’ve been on the hunt for a cozy, comforting dessert that feels like a warm hug on a plate, you’ve just found it. This Classic Apple Crisp Recipe is one of those timeless treats that never goes out of style—and I absolutely love how it turns out every single time. The tender, cinnamon-spiced apples paired with that irresistibly crunchy oat topping? It’s total magic. Keep reading and you’ll see why this recipe has become my go-to for family gatherings and simple weeknight desserts alike.
Why You’ll Love This Recipe
- Simple Ingredients: You probably already have everything in your pantry for this one, making it a super easy recipe to whip up anytime.
- Perfect Balance: The filling is juicy and flavorful without being too sweet, and the oat topping adds that satisfying crunch.
- Versatile Serving Options: Whether you like it warm with vanilla ice cream or cooled down for a snack, this crisp never disappoints.
- Family Favorite: My crowd goes crazy for this dessert, and I bet yours will, too.
Ingredients You’ll Need
Each ingredient has a job here that helps create that classic apple crisp flavor and texture. I always recommend using tart but sweet apples for the filling to get the best balance, and don’t skimp on the oats in the topping—that’s where the magic happens.

- Apples: I like to use a mix of Granny Smith and Honeycrisp for tartness and sweetness; peeling them helps the texture stay tender.
- Light or dark brown sugar: Both bring lovely caramel notes, but dark brown sugar adds a deeper molasses flavor if you want that.
- All-purpose flour: Used in both filling and topping to thicken the fruit juices and give the topping structure.
- Vanilla extract: A little splash brightens the apple flavors beautifully.
- Ground cinnamon and nutmeg: These warm spices are classic partners to apples—don’t skip them!
- Salt: Just a pinch to balance all the sweet flavors.
- Unsalted butter: Cold butter cut into the topping creates that crumbly, melt-in-your-mouth texture.
- Old-fashioned rolled oats: Essential for that crispy, chewy topping everyone loves.
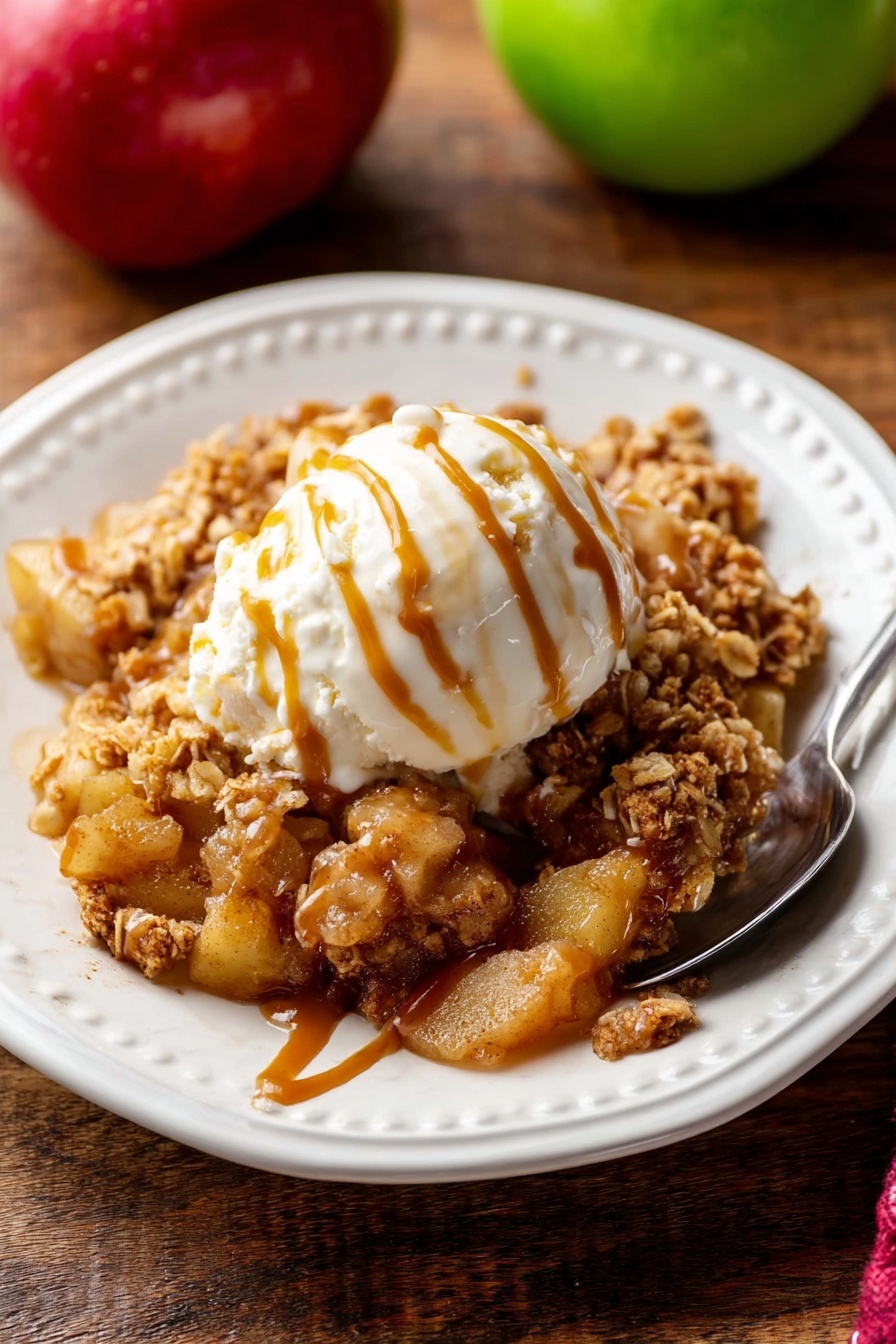
- Optional toppings: Salted caramel sauce and vanilla ice cream are game changers for serving.
Variations
I love how adaptable the Classic Apple Crisp Recipe is—you can easily tweak it depending on what you have on hand or what you’re in the mood for. Feel free to get creative and make it your own!
- Add nuts: My family goes nuts (pun intended) for chopped pecans or walnuts stirred into the oat topping for extra texture and nuttiness.
- Use different fruits: Pears or berries mixed with apples give a fresh twist, especially in late summer or fall.
- Make it gluten-free: Swap all-purpose flour for almond flour or a gluten-free blend, and it still bakes up beautifully.
- Spice it up: Throw in a pinch of ground ginger or cardamom for a unique flavor you might just fall in love with.
How to Make Classic Apple Crisp Recipe
Step 1: Prepare the Filling
Start by peeling and chopping your apples into roughly 1-inch chunks to get that perfect tender-but-not-mushy bite. Toss them in a large bowl with the brown sugar, flour, vanilla, cinnamon, nutmeg, and salt until everything is evenly coated. This mix is what keeps the filling flavorful and thickens those delicious juices as it bakes. Spread this mixture evenly in a greased 9×13-inch baking dish—any similar-sized pan works fine.
Step 2: Make the Topping
In a separate bowl, whisk together the flour, brown sugar, and cinnamon. Cut in cold, cubed butter using a pastry cutter or fork until the mixture looks crumbly like coarse sand. Stir in the rolled oats last—they bring that perfect nutty crunch. Sprinkle this mixture generously over the apples, covering them evenly.
Step 3: Bake to Perfection
Pop the pan in your preheated oven (350°F/177°C) and bake for about 45 minutes. Keep an eye on it near the end—the topping should turn golden brown and you’ll notice bubbling apple juices peeking around the edges. Once baked, transfer to a wire rack and let it cool for at least 5 minutes so the juices thicken slightly. I love serving it warm, but it’s delicious at room temp or even chilled.
Pro Tips for Making Classic Apple Crisp Recipe
- Choose the right apples: Combining tart and sweet varieties gives you that perfect balance of flavor and texture.
- Keep butter cold: Cold butter creates those lovely flaky crumbs in the topping instead of ending up greasy.
- Don’t skip the flour in filling: It’s what turns the apple juices into a luscious sauce rather than a runny mess.
- Wait before serving: Cooling it for a few minutes allows the crisp to set, so your serving holds together nicely.
How to Serve Classic Apple Crisp Recipe
Garnishes
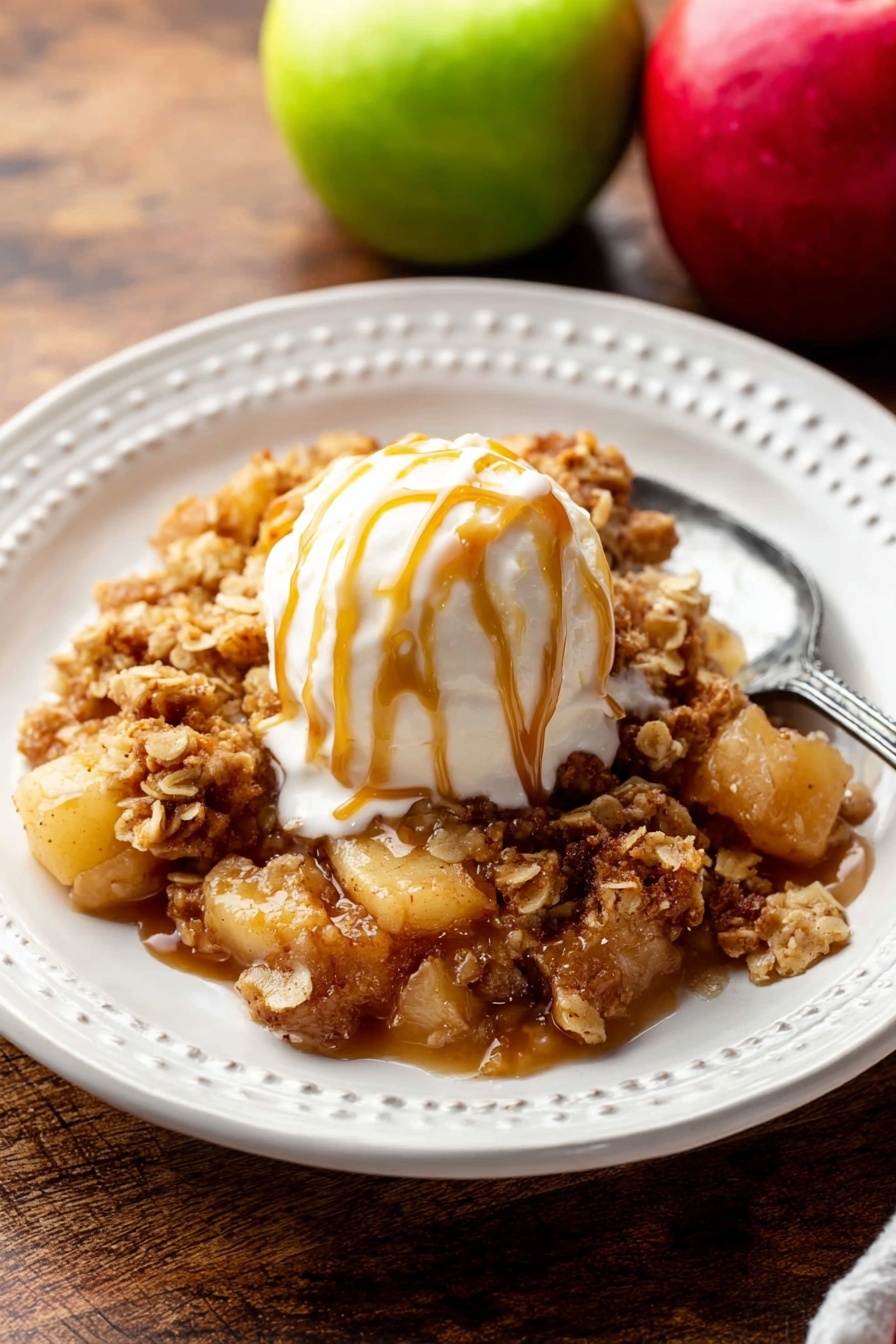
I’m a huge fan of a scoop of creamy vanilla ice cream melting over each portion—that warm-cold combo is unbeatable. For an extra special touch, drizzle a little salted caramel sauce on top. Sometimes I even sprinkle a pinch of flaky sea salt to balance the sweetness and add depth.
Side Dishes
If this crisp is part of a larger meal, I like to serve it with a strong black coffee or spiced chai tea. For a brunch spread, it goes beautifully alongside creamy yogurt or a cheese plate with sharp cheddar—surprisingly good together!
Creative Ways to Present
For holidays or dinner parties, I bake this crisp in individual ramekins or mini cast iron skillets. It makes serving and presentation so charming, plus everyone gets their own crispy, ooey-gooey apple dessert to enjoy. I once even topped it with a dollop of freshly whipped cinnamon cream for a festive touch.
Make Ahead and Storage
Storing Leftovers
Leftover apple crisp just keeps getting better, if you ask me! I cover it tightly with plastic wrap or foil, then pop it in the fridge where it keeps beautifully for up to 5 days. Just be sure to bring it back to room temperature or warm slightly before serving again.
Freezing
I’ve frozen apple crisp a few times with good results. I recommend freezing it unbaked in an airtight container, then baking it straight from the freezer with a little added time. It’s a fantastic way to have a homemade dessert ready in a pinch.
Reheating
To reheat leftovers, I usually bake the crisp at 325°F (160°C) for about 15 minutes until warmed through and the topping is crisp again. If you’re short on time, a quick zap in the microwave works but tends to soften the topping.
FAQs
-
Can I use other types of apples for this Classic Apple Crisp Recipe?
Absolutely! While I recommend a mix of tart and sweet apples like Granny Smith and Honeycrisp for the best flavor and texture, you can use any apples you enjoy. Just aim for apples that hold their shape well during baking so your crisp doesn’t turn into apple sauce.
-
Is it necessary to peel the apples?
Peeling apples is traditional in this recipe because it helps achieve a tender filling without the extra chewy skin texture. However, if you prefer a rustic feel or want to save prep time, you can leave the skins on—just make sure to wash the apples well.
-
Can I make the topping ahead of time?
Yes! You can prepare the oat topping in advance and keep it covered in the fridge for up to a day. Just give it a quick stir before sprinkling over the apples to make sure it’s crumbly and ready to bake.
-
How do I prevent the topping from getting soggy?
Using cold butter and cutting it properly into the flour and sugar helps create that crumbly texture that bakes crisp instead of soggy. Also, spreading the topping evenly and not stirring the crisp after baking preserves that crunch.
Final Thoughts
This Classic Apple Crisp Recipe holds a special place in my heart because it’s one of those desserts you can rely on to bring smiles and comfort without a fuss. Whether you’re new to baking or a seasoned pro, the straightforward steps and familiar flavors make it a total winner. I can’t wait for you to try it and hear how it becomes a family favorite for you, too—consider this your new “go-to” apple dessert that never disappoints!
Print
Classic Apple Crisp Recipe
- Prep Time: 15 minutes
- Cook Time: 45 minutes
- Total Time: 1 hour, 0 minutes
- Yield: Serves 8-10
- Category: Dessert
- Method: Baking
- Cuisine: American
Description
This Classic Apple Crisp recipe is a warm, comforting dessert featuring tender, cinnamon-spiced apples topped with a buttery oat crumble. Perfectly baked until golden and bubbling, it’s ideal for serving plain or with salted caramel and vanilla ice cream for an extra indulgence.
Ingredients
Filling
- 8 medium peeled apples, cut into 1-inch chunks (about 10 cups or 1200g)
- 1/2 cup (100g) packed light or dark brown sugar
- 1/4 cup (31g) all-purpose flour (spooned & leveled)
- 1 teaspoon pure vanilla extract
- 1 teaspoon ground cinnamon
- 1/2 teaspoon ground nutmeg
- 1/4 teaspoon salt
Topping
- 3/4 cup (94g) all-purpose flour (spooned & leveled)
- 3/4 cup (150g) packed light or dark brown sugar
- 1 teaspoon ground cinnamon
- 1/2 cup (8 Tbsp; 113g) unsalted butter, cold and cubed
- 1 cup (85g) old-fashioned whole rolled oats
- Optional: salted caramel and vanilla ice cream for serving
Instructions
- Preheat and Prepare Pan: Preheat your oven to 350°F (177°C). Lightly grease a 9×13-inch baking pan or any 3.5-4-quart baking dish to prevent sticking.
- Mix Filling: In a large bowl, combine the peeled and chunked apples, brown sugar, all-purpose flour, vanilla extract, ground cinnamon, ground nutmeg, and salt. Toss everything together until the apples are evenly coated with the mixture. Spread this filling evenly into the prepared baking pan.
- Make Topping: In a medium bowl, whisk together flour, brown sugar, and cinnamon. Using a pastry cutter or fork, cut in the cold cubed butter until the mixture resembles coarse crumbs. Stir in the old-fashioned rolled oats until evenly distributed.
- Assemble and Bake: Sprinkle the crumbly oat topping evenly over the apple filling. Place the baking dish in the oven and bake for 45 minutes or until the topping is golden brown and the fruit juices are bubbling at the edges.
- Cool and Serve: Remove the apple crisp from the oven and transfer to a wire rack. Allow it to cool for at least 5 minutes to set. Serve warm, at room temperature, or even chilled. Optionally, add a drizzle of salted caramel sauce and a scoop of vanilla ice cream for extra decadence.
- Storage: Cover any leftovers tightly and store in the refrigerator for up to 5 days.
Notes
- Use firm apples like Granny Smith, Honeycrisp, or Fuji for the best texture and flavor.
- For a gluten-free version, substitute all-purpose flour with a gluten-free flour blend.
- Cold butter ensures a crumbly and crisp topping.
- Make ahead: The topping can be prepared in advance and stored in the fridge until ready to bake.
- Reheat leftovers gently in the oven or microwave for a warm treat.
Nutrition
- Serving Size: 1/10th of recipe
- Calories: 320
- Sugar: 30g
- Sodium: 140mg
- Fat: 12g
- Saturated Fat: 7g
- Unsaturated Fat: 4g
- Trans Fat: 0g
- Carbohydrates: 50g
- Fiber: 4g
- Protein: 2g
- Cholesterol: 30mg

