
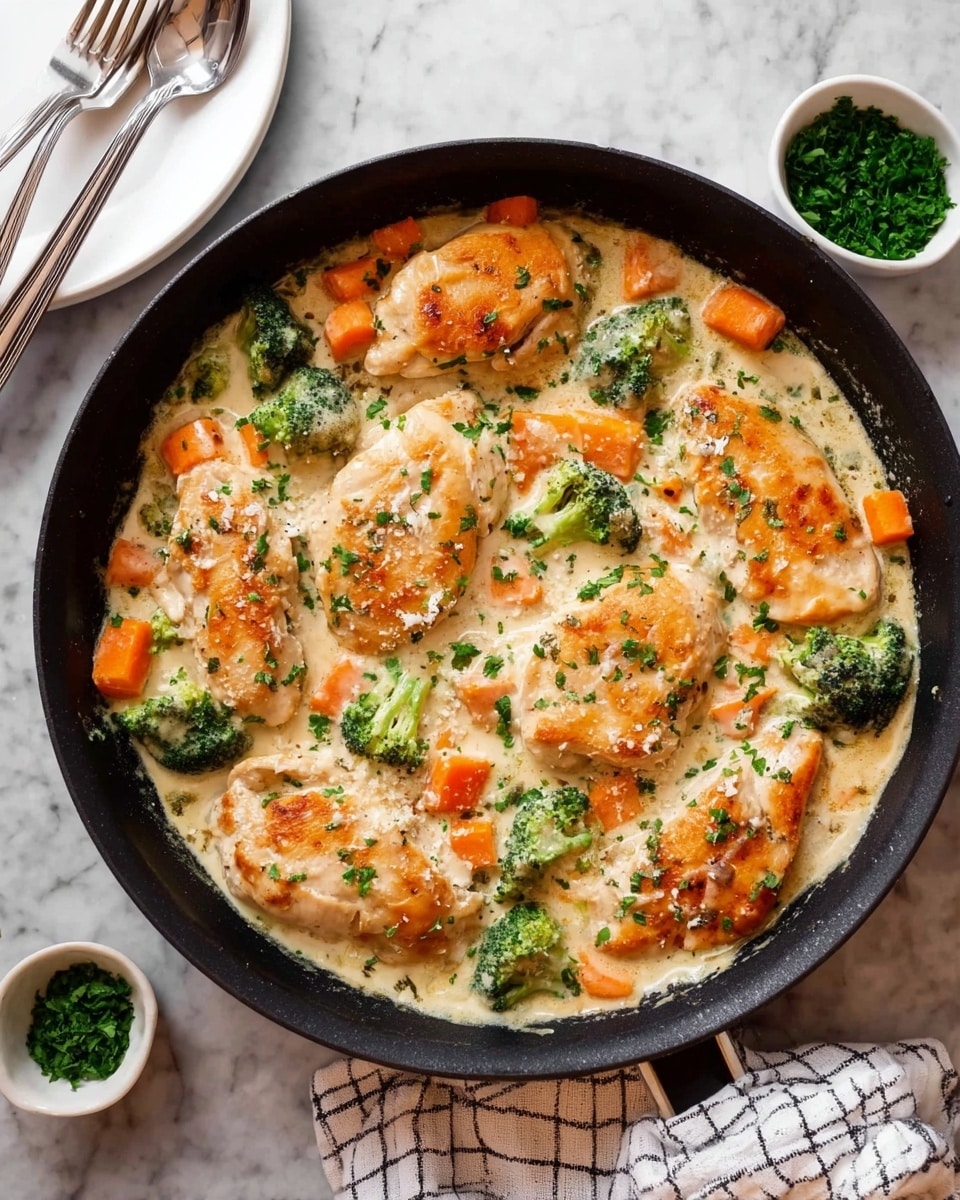
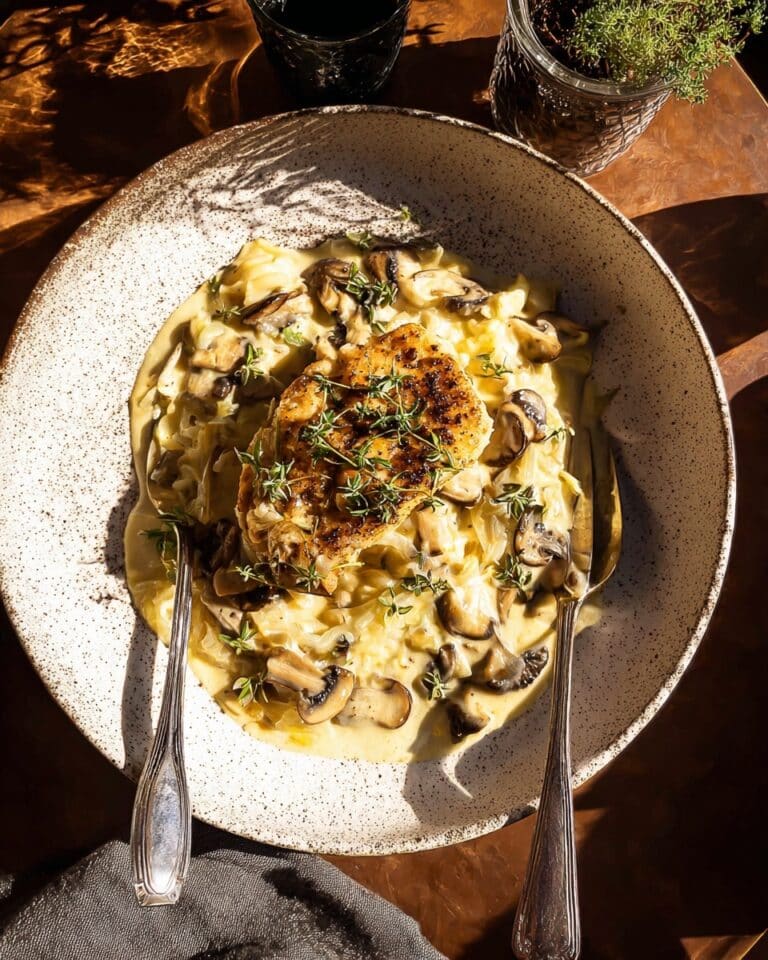
If you love dishes that feel like a warm hug on a plate, you’re going to flip for this Creamy Garlic Chicken and Vegetables Recipe. I absolutely love how the tender chicken thighs soak up the rich garlic sauce, while the roasted broccoli and butternut squash add the perfect touch of sweetness and texture. Trust me, once you make this for your family or just for yourself, it’s going to be one of those go-to meals you’ll want to make again and again.
Why You’ll Love This Recipe
- Unbelievably Creamy Sauce: The garlic cream sauce is silky, flavorful, and made without heavy cream.
- Perfectly Roasted Veggies: Roasting broccoli and butternut squash brings out their natural sweetness and adds texture.
- Simple Ingredients: You probably already have everything in your kitchen, making it easy and approachable.
- Great for Meal Prep: Holds up well for leftovers and reheats beautifully, so you can enjoy it all week.

Ingredients You’ll Need
All the ingredients work in harmony here – the butternut squash’s natural sweetness complements the savory garlicky richness, while the chicken stays juicy and tender thanks to the cooking technique.
- Broccoli florets: Fresh is best here for roasting to get that nice crisp-tender bite.
- Butternut squash: Cubed evenly for even roasting and a subtle sweetness.
- Olive oil: Divided use helps with roasting and sautéing for rich flavor.
- Boneless skinless chicken thighs or breasts: Thighs stay more tender and juicy, but breasts work if you prefer leaner meat.
- Unsalted butter: Adds richness to the pan sauce without overpowering the garlic.
- Salt and ground black pepper: Essential seasoning, plus you can adjust based on taste.
- Diced onion: Builds a savory base for the sauce.
- Garlic cloves, minced: Loads of garlic—because that’s where the magic is.
- Dried parsley: Adds a mild herby note and brightens the sauce.
- Chicken broth: Low-sodium is ideal so you can control the saltiness.
- Half-and-half or whole milk: Creates that creamy texture without being too heavy.
- Cornstarch: Helps thicken the sauce perfectly without lumps.
- Fresh parsley (optional): Adds a fresh pop of color and flavor at the end.
Variations
I love how flexible this recipe is—you can easily tweak it to your liking or what you have on hand. Don’t be afraid to make it yours!
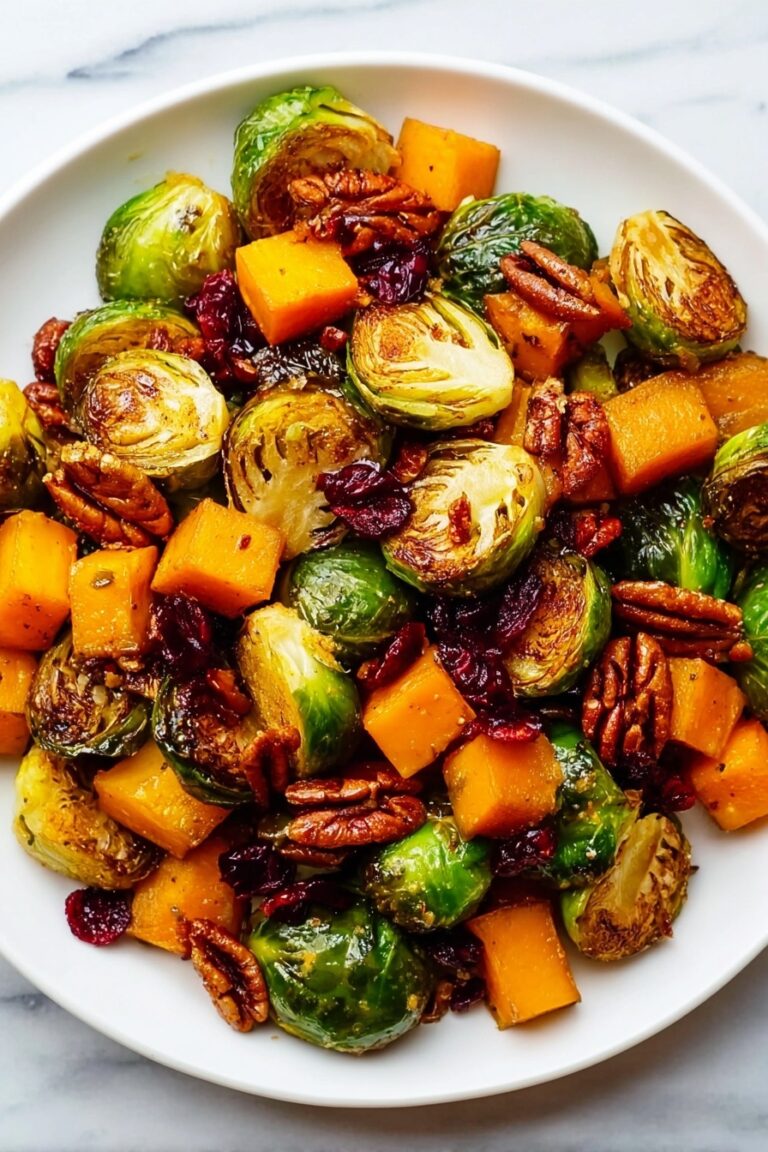
- Swap the Veggies: I’ve swapped butternut squash for sweet potatoes or carrots when I wanted a bit more sweetness or color variety, and it always turned out great.
- Dairy-Free: Use coconut milk or your favorite plant-based milk instead of half-and-half—just be sure to use a thickener like arrowroot powder to keep the sauce creamy.
- Herbs and Spices: I sometimes add a pinch of smoked paprika or Italian seasoning for a different flavor profile.
- Chicken Cuts: While I usually go with thighs for the juiciness, chicken breasts work fine too, just keep an eye to avoid drying them out.
How to Make Creamy Garlic Chicken and Vegetables Recipe
Step 1: Roast the Vegetables
Start by preheating your oven to 400°F (204°C). Line a baking sheet with parchment, which helps with cleanup and prevents sticking. Spread the broccoli florets and cubed butternut squash out in a single layer. Drizzle with 1 tablespoon of olive oil and toss until everything’s nicely coated. Sprinkle with salt and pepper to season. Pop the tray into the oven for about 20 minutes. You’ll want the veggies tender but with a slight crisp on the edges—that roasted flavor is what makes this dish sing.
Step 2: Sear the Chicken
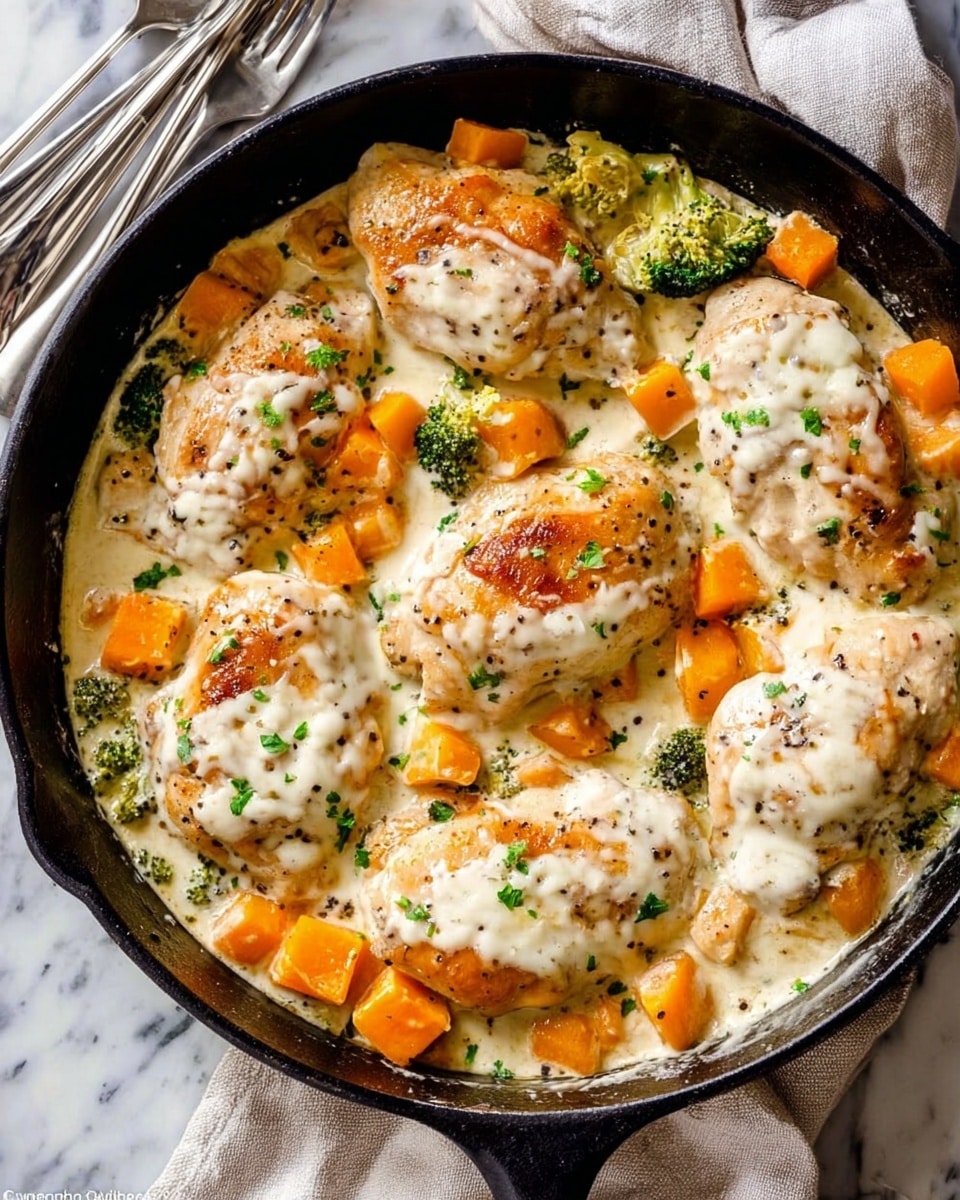
While the veggies roast, heat the remaining tablespoon of olive oil in a large skillet over medium heat. I usually grab my trusty 12-inch cast iron skillet because it holds heat well, but any big skillet or even a Dutch oven works. Season the chicken thighs with salt and pepper and lay them in the hot pan, not crowding them. Cook for about 4 minutes per side—you’re aiming for a golden-brown outside, but the chicken should still be just barely cooked inside since it will finish in the oven. Once seared, transfer the chicken to a plate and loosely cover with foil to keep warm.
Step 3: Create the Creamy Garlic Sauce
Without wiping out the pan, melt the butter in the hot skillet. As it melts, add salt, pepper, diced onion, minced garlic, and dried parsley. Stir everything together and deglaze the pan with chicken broth, scraping up those beautiful browned bits from the bottom—you don’t want to miss that flavor! Let this simmer for about 5 minutes to meld the flavors. Meanwhile, whisk together half-and-half and cornstarch in a small bowl until smooth, then slowly pour it in while stirring or whisking. Cook for about a minute more until thickened. Give it a taste and adjust the seasoning if you want more zing.
Step 4: Combine and Finish in the Oven
Gently add the seared chicken and roasted veggies back into the skillet, tossing everything together so the sauce coats the ingredients evenly. Transfer the skillet to your preheated oven and bake for another 5 to 10 minutes, or until the chicken is fully cooked through (internal temperature of 165°F/74°C). This final oven time lets all the flavors meld and finishes off the chicken perfectly.
When it’s done, pull the skillet out and sprinkle on some fresh parsley if you have it—it adds a nice fresh finish. And voilà, you’re ready to dig in!
Pro Tips for Making Creamy Garlic Chicken and Vegetables Recipe
- Even Veggie Sizes: Cutting broccoli and butternut squash into similar sizes helps everything roast evenly and finish cooking at the same time.
- Don’t Overcrowd the Pan: When searing chicken, give each piece enough space so it browns properly and doesn’t steam.
- Use a Whisk: Whisking the half-and-half and cornstarch together before adding prevents lumps and guarantees silky sauce.
- Check Internal Temperature: Always use a meat thermometer to avoid undercooked or dry chicken—165°F is your safety sweet spot.
How to Serve Creamy Garlic Chicken and Vegetables Recipe
Garnishes
I almost always garnish with chopped fresh parsley. It adds a fresh, herbaceous brightness that cuts through the richness of the sauce, plus it makes everything look so inviting on the plate.
Side Dishes
This dish is fantastic on its own, but I like to pair it with a simple green salad or some crusty bread to soak up every last bit of that creamy sauce. Sometimes I even serve it over garlic mashed potatoes or creamy polenta for extra comfort food vibes.
Creative Ways to Present
For special occasions, I’ve served this in individual oven-safe ramekins, topped with a sprinkle of parmesan and broiled for a minute to get a golden crust on top. It’s always a showstopper and feels extra special for guests.
Make Ahead and Storage
Storing Leftovers
I store leftovers in an airtight container in the fridge for up to 3 days. The sauce thickens up nicely and the flavors deepen overnight, so leftovers often taste even better the next day.
Freezing
Freezing works well too—just portion the dish into freezer-safe containers and freeze for up to 2 months. When you defrost, do so overnight in the fridge for best texture and flavor.
Reheating
I reheat leftovers gently on the stove over medium-low heat, adding a splash of broth or water if the sauce feels too thick. You can also microwave it covered, stopping halfway to stir and ensure even heating.
FAQs
-
Can I use chicken breasts instead of thighs for this recipe?
Absolutely! Chicken breasts are a leaner option and work great here. Just be careful not to overcook them — sear until golden and finish baking just until the internal temperature reaches 165°F (74°C). Thighs tend to stay more tender, but breasts will still taste delicious.
-
Is there a way to make the sauce dairy-free?
Yes, swap the half-and-half with canned coconut milk or another dairy-free milk alternative. To help the sauce thicken, use arrowroot powder or additional cornstarch. The flavor will shift slightly but remains creamy and comforting.
-
Can I prepare this recipe ahead of time?
You sure can! Roast the vegetables and sear the chicken up to a day in advance, then make the sauce and combine everything just before baking. This saves time if you’re short on prep time before mealtime.
-
What sides pair well with Creamy Garlic Chicken and Vegetables Recipe?
Simple sides like garlic mashed potatoes, steamed rice, or a crisp green salad complement this dish wonderfully. The key is to keep sides mild so the creamy garlic sauce shines.
Final Thoughts
This Creamy Garlic Chicken and Vegetables Recipe has become a personal favorite for those cozy weeknight dinners when I want something warming but still packed with flavor. It’s one of those meals that feels a little indulgent, yet so approachable to throw together. I know you’re going to enjoy the blend of roasted veggies and savory garlicky sauce just as much as I do. Make it for your loved ones or yourself—you’ll be surprised how fast this disappears from the plate. Go ahead, give it a try and watch this become one of your kitchen staples.
Print
Creamy Garlic Chicken and Vegetables Recipe
- Prep Time: 10 minutes
- Cook Time: 35 minutes
- Total Time: 45 minutes
- Yield: 4 servings
- Category: Main Course
- Method: Baking
- Cuisine: American
- Diet: Gluten Free
Description
This Creamy Garlic Chicken & Vegetables recipe features tender chicken thighs cooked to perfection with roasted broccoli and butternut squash, all enveloped in a rich garlic-parsley cream sauce. Easy to prepare and baked to meld flavors beautifully, it’s a comforting and nutritious meal perfect for a weeknight dinner.
Ingredients
Vegetables
- 2 cups (150g) fresh broccoli florets
- 2 cups (300g) cubed butternut squash
- Salt and pepper, to taste
Protein
- 1.5 pounds (24 ounces/680g) boneless, skinless chicken thighs or breasts
- Salt and pepper, to taste
Sauce & Seasonings
- 2 Tablespoons olive oil, divided
- 1 Tablespoon (14g) unsalted butter
- 1/4 teaspoon salt
- 1/4 teaspoon ground black pepper
- 1/4 cup (33g) diced onion
- 7–8 garlic cloves, minced
- 2 teaspoons dried parsley
- 1 and 1/4 cups (300ml) chicken broth (low-sodium preferred)
- 3/4 cup (180ml) half-and-half or whole milk
- 1 Tablespoon (8g) cornstarch
- Optional: chopped fresh parsley, for garnish
Instructions
- Roast the Vegetables: Preheat your oven to 400°F (204°C). Line a large baking sheet with parchment paper. Spread the broccoli florets and cubed butternut squash evenly on the baking sheet. Drizzle with 1 tablespoon of olive oil, toss gently to coat, and season with salt and pepper. Bake for 20 minutes until tender and slightly caramelized.
- Sear the Chicken: While the vegetables roast, heat the remaining 1 tablespoon of olive oil in a large 12-inch skillet over medium heat. Place the chicken thighs in the hot skillet, season with salt and pepper, and cook for 4 minutes on each side to develop a light golden brown crust. The chicken doesn’t need to be fully cooked at this stage. Remove the chicken and keep it warm covered with foil.
- Prepare the Sauce: Without cleaning the skillet, add the butter and swirl it around to melt. Add the diced onion, minced garlic, dried parsley, salt, and pepper, then pour in the chicken broth. Stir well, scraping any browned bits from the pan for extra flavor. Let the sauce simmer gently for about 5 minutes, stirring occasionally.
- Thicken the Sauce: In a small bowl or cup, whisk together the half-and-half (or whole milk) and cornstarch until smooth. Slowly pour this mixture into the simmering sauce while stirring continuously. Cook for an additional minute until the sauce thickens to a creamy consistency. Taste and adjust seasonings as needed.
- Combine and Bake: Add the seared chicken and roasted vegetables into the skillet, stirring well to coat everything in the creamy sauce. Transfer the skillet to the oven and bake for 5–10 minutes, or until the chicken reaches an internal temperature of at least 165°F (74°C) and is fully cooked through.
- Serve: Remove the skillet from the oven and sprinkle with freshly chopped parsley if desired. Serve warm and enjoy!
- Storage and Reheating: Store leftovers in an airtight container in the refrigerator for up to 3 days. To reheat, warm gently on the stovetop over medium heat or microwave until heated through.
Notes
- You can use boneless, skinless chicken breasts if preferred, but thighs tend to remain juicier.
- Half-and-half can be substituted with whole milk, but the sauce may be slightly less rich.
- Make sure to not fully cook the chicken when searing to avoid dryness; the oven finishing step ensures tender meat.
- For added flavor, consider adding a pinch of smoked paprika or fresh thyme to the sauce.
- This recipe can be easily doubled for larger gatherings.
- Low-sodium chicken broth is recommended to control salt content.
Nutrition
- Serving Size: 1 serving
- Calories: 420 kcal
- Sugar: 5 g
- Sodium: 350 mg
- Fat: 22 g
- Saturated Fat: 7 g
- Unsaturated Fat: 13 g
- Trans Fat: 0 g
- Carbohydrates: 20 g
- Fiber: 4 g
- Protein: 36 g
- Cholesterol: 110 mg


