

If you’re craving a rich, melt-in-your-mouth treat that doesn’t require fancy techniques or hard-to-find ingredients, then this Easy Chocolate Fudge Recipe is going to become your new best friend. I absolutely love this fudge because it’s silky smooth, just the right balance of sweet and chocolatey, and honestly, it’s foolproof! Whether you’re making it for a holiday gift or a cozy night in, you’re going to find that this recipe delivers every single time, with minimal effort and maximum deliciousness.
Why You’ll Love This Recipe
- Super Simple Ingredients: You’ll only need a handful of pantry staples to whip this up, so it’s perfect for last-minute cravings.
- No Candy Thermometer Required: This recipe skips the stress of precise temperatures while still delivering perfect texture.
- Customizable Add-Ins: Nuts, sea salt, or even dried fruit – you can make it your own without messing with the base recipe.
- Great for Gifts or Gatherings: It sets up beautifully and keeps well, making it a crowd-pleaser every time.

Ingredients You’ll Need
These ingredients work in perfect harmony to give you that classic fudge flavor and creamy texture you expect. When shopping, try to go for high-quality chocolate – it makes a noticeable difference in richness and smoothness.
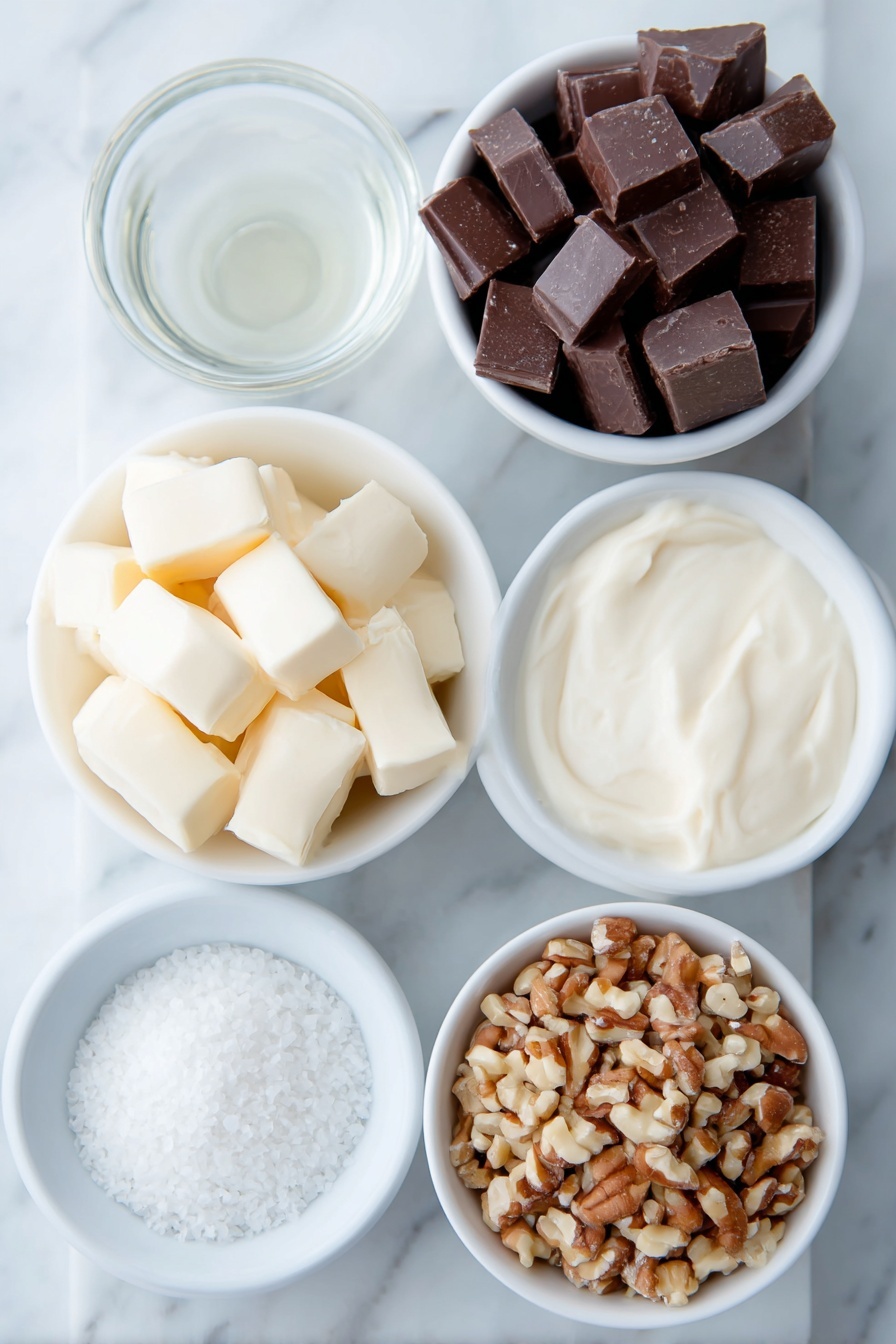
- Sweetened condensed milk: This is the secret to the fudge’s creamy sweetness and smooth texture; don’t substitute evaporated milk here.
- Pure vanilla extract: Adds depth and warmth – make sure it’s real vanilla for the best flavor.
- Semi-sweet chocolate: Use good-quality chocolate bars or chips; roughly chopping makes melting more even.
- Unsalted butter: Adds richness and a velvety mouthfeel; room temperature butter blends smoothly.
- Flaky sea salt (optional): Sprinkling a little on top at the end really amps up the flavor contrast.
- Chopped nuts or crushed candies (optional): Perfect if you want to add texture and a personalized twist.
Variations
I love how versatile this Easy Chocolate Fudge Recipe is — once you nail the basics, feel free to play around with mix-ins and toppings to put your own spin on it. The best part? You still get that wonderful fudgy texture no matter how you tweak it!
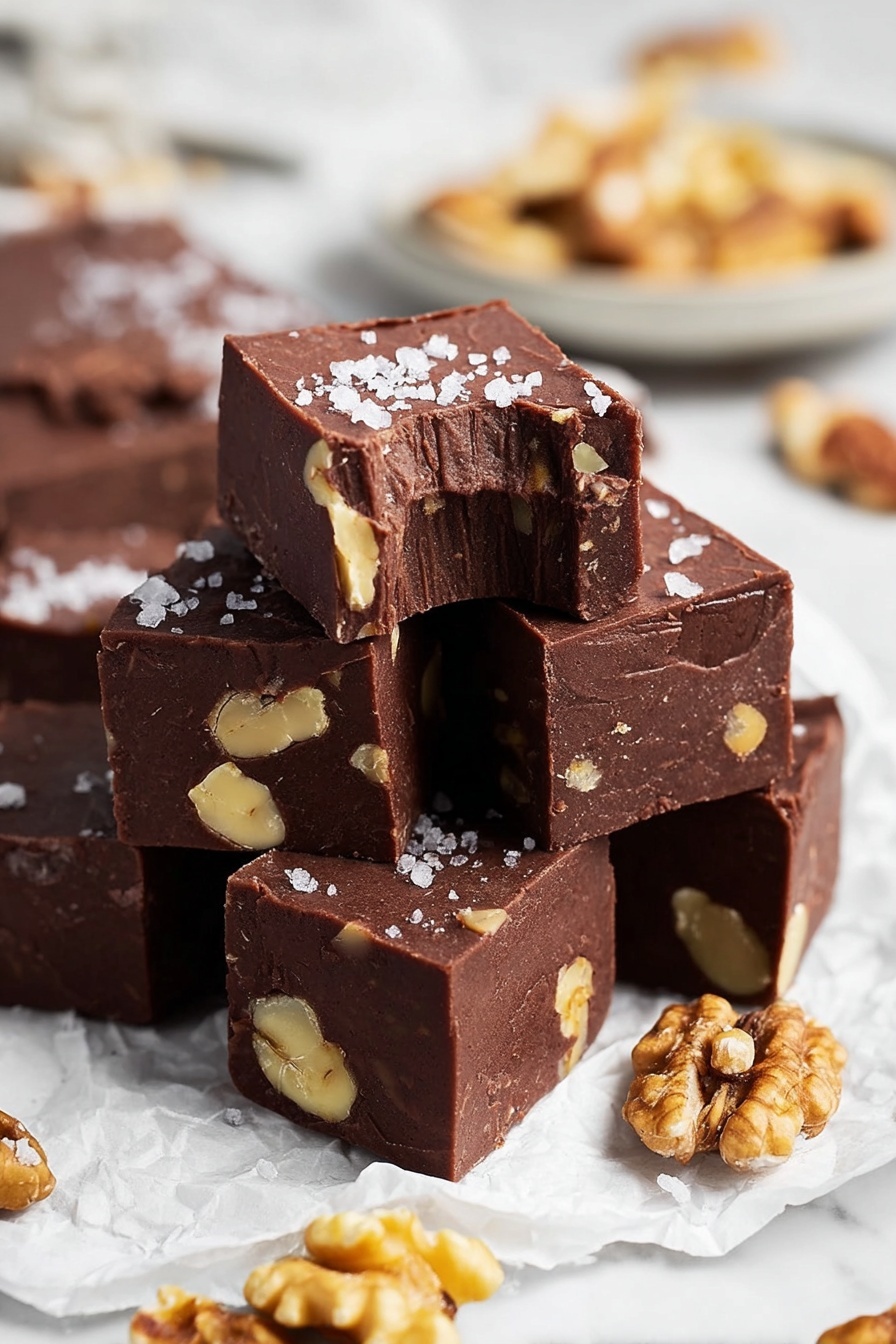
- Nutty Delight: I often toss in chopped pecans or walnuts for crunch—my family goes crazy for the extra texture.
- Sea Salt Finish: Sprinkling flaky sea salt on top before chilling gives such a sophisticated flavor balance I’ve come to adore.
- Chocolate Candy Mix-In: Crushed peppermint candies or toffee bits make excellent seasonal variations that turn this into a holiday fave.
- Vegan Version: I experimented by using coconut condensed milk and vegan chocolate; results were great but slightly softer—perfect if you want a dairy-free fudge.
How to Make Easy Chocolate Fudge Recipe
Step 1: Prep Your Pan Like a Pro
First things first, lightly grease an 8×8-inch baking pan. This simple step helps you lift the fudge out without it sticking. Then line the pan with parchment paper or aluminum foil, letting the edges hang over the sides—you’ll thank me later when it’s time to remove the fudge in one perfect slab.
Step 2: Combine Ingredients Using a Double Boiler
In a large, heatproof bowl, toss together the sweetened condensed milk, vanilla extract, chopped chocolate, and butter pieces. I like to chop the chocolate somewhat roughly to help it melt evenly – give it a quick mix before heating.
Fill a saucepan about a quarter full with water and bring it to a boil. Then reduce it to a gentle simmer. Place your bowl on top of the saucepan, ensuring the water doesn’t touch the bottom of the bowl—this is the magic of the double boiler method, gently melting without burning.
Step 3: Melt and Stir Carefully
Stir the mixture with a rubber spatula as it melts. After about 4 minutes, once the chocolate is mostly melted with just a few chunks left, pull the bowl off the heat. This is a crucial step—I discovered that if you wait till everything is fully melted on the heat, the fudge can separate and end up greasy. Stir off the heat until perfectly smooth, about 2 more minutes.
Step 4: Add Mix-Ins and Chill
If you want those nuts or crushed candies, this is the time to fold them in—no need to over-stir, just enough for even distribution. Then scrape the chocolate mixture into your prepped pan, smoothing it out with your spatula. Pop it in the fridge and chill for about 2 hours until it’s fully set.
Step 5: Cut and Serve
To get neat squares, gently run a butter knife around the edges of the pan. Then lift the fudge out using the foil or parchment overhang, peel off the lining, and slice into bite-sized pieces. You can serve right away, or store it in the fridge for weeks—if it lasts that long!
Pro Tips for Making Easy Chocolate Fudge Recipe
- Use a Heatproof Bowl: Always use a glass or metal bowl for the double boiler; plastic can melt or warp.
- Don’t Overheat the Chocolate: Take it off the heat early to avoid grainy texture or separation—patience during off-heat stirring works wonders.
- Room Temperature Butter: Letting butter soften before adding ensures it blends seamlessly without clumps.
- Add Mix-Ins Off Heat: This keeps nuts or candies crunchy rather than melting or getting soggy.
How to Serve Easy Chocolate Fudge Recipe
Garnishes
I love sprinkling flaky sea salt on top right after spreading the fudge in the pan – it gives a perfect sweet and salty combo. Sometimes I toss on a few extra chopped nuts or pressed in mini chocolate chips for a fun look and extra texture.
Side Dishes
This fudge pairs beautifully with a cup of strong coffee or a glass of cold milk—simple but unbeatable. For parties, I like serving it alongside fresh berries, which adds a lovely freshness to balance out the richness.
Creative Ways to Present
If you’re gifting this fudge, I’ve found that wrapping squares in colorful parchment paper or placing them in little decorative tins makes them extra special. For holidays, you can cut them into festive shapes using cookie cutters after chilling—a crowd-pleaser and great way to impress friends!
Make Ahead and Storage
Storing Leftovers
Leftover fudge stores brilliantly in the refrigerator, wrapped tightly in plastic wrap or kept in an airtight container. I usually keep mine chilled and just bring out what I want to nibble on to soften slightly before serving—it’s easier to bite into that way.
Freezing
I’ve frozen fudge before with great results. Just wrap individual pieces tightly in parchment and put them into a freezer-safe container. When you want a treat, let them thaw in the fridge overnight or on the counter for a couple hours.
Reheating
This fudge is best enjoyed chilled or at room temperature, so I don’t recommend reheating it in the microwave. If you want it softer, let it sit out 10–15 minutes before serving—it melts beautifully with no fuss that way.
FAQs
-
Can I use evaporated milk instead of sweetened condensed milk?
Evaporated milk won’t give you the same texture or sweetness as sweetened condensed milk. The sugar content and thickness in condensed milk are key for that classic fudge consistency, so it’s best to stick with sweetened condensed milk for reliable results.
-
Why is my fudge grainy or crumbly?
Grainy fudge usually means the chocolate overheated or the mixture crystallized. To avoid this, remove the bowl from heat when most chocolate is melted and stir off-heat until smooth. Also, use good-quality chocolate and don’t rush tempering or cooling.
-
Can I make this fudge vegan?
Yes! Swap in sweetened condensed coconut milk and use dairy-free vegan chocolate and butter alternatives. The texture will be slightly softer but still delicious. I recommend chilling a little longer to help it set firm.
-
How long does this fudge keep?
Stored properly in the fridge, this fudge will stay fresh for up to one month. Freezing extends its life to about two months, so you can always make a batch ahead for future cravings or gifts.
Final Thoughts
When I first made this Easy Chocolate Fudge Recipe, I was blown away by how simple it was to make something so decadent and smooth without any candy thermometer drama. It quickly became a staple in my kitchen and a favorite gift to share because everyone always asks for the recipe! I honestly believe you’ll find the same kind of joy in making and sharing this fudge — it’s just that kind of recipe that feels like a warm hug in every bite. So go ahead, give it a try, and treat yourself or someone you love to some homemade chocolate bliss!
Print
Easy Chocolate Fudge Recipe
- Prep Time: 10 minutes
- Cook Time: 10 minutes
- Total Time: 2 hours 20 minutes
- Yield: Approximately 16 1-inch squares (1 8-inch pan)
- Category: Dessert
- Method: Stovetop
- Cuisine: American
Description
This Foolproof Chocolate Fudge recipe is a creamy, rich, and indulgent treat made with sweetened condensed milk, semi-sweet chocolate, and butter. It uses a gentle double boiler method to melt the ingredients perfectly, ensuring a smooth texture without greasy separation. Easy to make and customizable with nuts or crushed candies, this classic fudge sets beautifully in the refrigerator and slices into perfect squares for sharing or gifting.
Ingredients
Main Ingredients
- 1 14-ounce can sweetened condensed milk (NOT evaporated milk)
- 1 teaspoon pure vanilla extract
- 20 ounces semi-sweet chocolate, roughly chopped
- 3 tablespoons unsalted butter, cut into 1/2-inch pieces, at room temperature
Optional Mix-ins
- Flaky sea salt, for sprinkling
- 1/2 cup chopped nuts or crushed candies
Instructions
- Prepare the Pan: Lightly grease an 8×8-inch baking pan and line it with parchment paper or aluminum foil, leaving excess paper overhanging the sides for easy removal later. Set aside.
- Combine Ingredients: In a large heatproof bowl, combine the sweetened condensed milk, vanilla extract, chopped semi-sweet chocolate, and unsalted butter pieces.
- Set Up Double Boiler: Fill a saucepan with about 1/4 full of water and bring it to a boil. Reduce the heat to a gentle simmer.
- Melt Chocolate Mixture: Place the heatproof bowl with the ingredients over the simmering water, ensuring the bottom of the bowl doesn’t touch the water. Stir continuously with a rubber spatula until the chocolate is almost fully melted and only a few small pieces remain, about 4 minutes. Be careful not to overheat to avoid greasy fudge.
- Finish Melting: Remove the bowl from heat and stir for an additional 2 minutes until the mixture is fully melted, smooth, and glossy.
- Add Mix-ins: Stir in any optional nuts or crushed candies if using.
- Pour and Set: Scrape the fudge mixture into the prepared pan and spread an even layer with a spatula. Sprinkle with flaky sea salt if desired.
- Chill: Refrigerate the fudge for about 2 hours until fully set.
- Slice and Serve: Run a butter knife around the edges to loosen the fudge, then lift it out using the foil or parchment overhang. Peel off the paper, place the fudge on a cutting board, and cut into squares. Serve immediately or store.
- Storage Tips: Store fudge in an airtight container in the refrigerator for up to 1 month, or freeze in a freezer-safe container for up to 2 months.
Notes
- Use sweetened condensed milk, NOT evaporated milk, to achieve the proper sweetness and texture.
- Do not overheat while melting chocolate to prevent separation and greasiness.
- Include your favorite mix-ins like nuts or crushed candies to add texture and flavor.
- For easy removal, be sure to line the pan with parchment or foil with an overhang.
- Fudge keeps well refrigerated and can be frozen for longer storage.
Nutrition
- Serving Size: 1 square (about 1/16th of the batch)
- Calories: 190
- Sugar: 20g
- Sodium: 35mg
- Fat: 11g
- Saturated Fat: 7g
- Unsaturated Fat: 3g
- Trans Fat: 0g
- Carbohydrates: 23g
- Fiber: 1g
- Protein: 2g
- Cholesterol: 20mg


