
I absolutely love sharing this Garlic Dill Pickle Recipe because it s such a classic that never fails to bring that nostalgic crunch and tang to your palate. Whenever I whip up a batch, my kitchen fills with the fragrant mix of garlic and fresh dill that instantly signals something delicious is in the works. Whether you re a seasoned pickler or just dipping your toes in, this recipe strikes the perfect balance of tangy, garlicky goodness with that unmistakable dill freshness.
What I find really great about this Garlic Dill Pickle Recipe is how perfect it is for summertime harvests or whenever you want to capture the bright flavors of fresh cucumbers. Plus, making your own pickles means you control every ingredient – no mystery preservatives, just wholesome, crunchy delights that last. Once you get the hang of it, you ll find yourself making these pickles to brighten up sandwiches, snack platters, or just for munching straight from the jar!
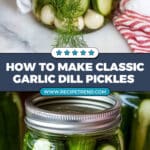
Why You’ll Love This Recipe
- Simple Ingredients: Uses pantry staples and fresh garden finds for authentic flavor.
- Crunchy Texture: Soaking cucumbers in ice water keeps them extra crisp and refreshing.
- Perfectly Balanced Flavor: The garlic and dill create that classic pickle taste you ll crave again and again.
- Safe Canning Tips: Includes up-to-date advice on hot water bath processing for peace of mind.

Ingredients You’ll Need
The ingredients in this Garlic Dill Pickle Recipe work together to create those satisfyingly crisp and tangy pickles you’ll love. Each element is straightforward, but every detail counts-especially the fresh garlic and dill that give these pickles their iconic flavor.
- Pickling Cucumbers: Look for firm, freshly picked cucumbers to ensure maximum crunch.
- Water: Cold water for soaking, and fresh water for brine preparation.
- Cider Vinegar: Adds tang and helps preserve the pickles while delivering a mild fruity note.
- Canning or Kosher Salt: Essential for flavor and safety-avoid iodized table salt as it can cloud the brine.
- Garlic Cloves: Fresh, firm cloves add a punch of aromatic garlicky goodness.
- Fresh Dill: A large head of dill per jar ensures that classic herbaceous dill flavor.
Variations
I like to play around with this Garlic Dill Pickle Recipe depending on the season and what herbs I have on hand-feel free to make it your own! Changing the garlic quantity or adding a pinch of red pepper flakes can turn these pickles from classic to a little spicy, perfect for your taste buds.
- Spicy Kick: When I m craving a little heat, I toss in a couple of crushed red pepper flakes per jar-it adds such a fun zing!
- Herb Mix-Up: Sometimes I swap fresh dill for a mix of dill and fresh thyme for a subtle twist on the classic flavor.
- Garlic Boost: If you love garlic as much as I do, adding an extra clove or two per jar makes these pickles irresistibly fragrant.
How to Make Garlic Dill Pickle Recipe
Step 1: Soak Your Cucumbers for Maximum Crunch
Start by soaking your fresh pickling cucumbers in ice-cold water for about 3 to 4 hours. I like doing this step early in the day or even overnight if I m prepping ahead. It s a simple trick I discovered that keeps your pickles crunchy instead of soggy once they sit in the brine.
Step 2: Sterilize Your Jars to Keep Things Safe
While your cucumbers are soaking, boil a large pot of water and submerge your canning jars and lids for about 10 minutes to sterilize them. This step is crucial to prevent any unwanted bacteria from spoiling your pickles. I usually place a clean towel on the counter and carefully remove jars with tongs to keep them warm and ready.
Step 3: Prepare the Brine
In a large saucepan, combine water, cider vinegar, and kosher salt, and bring the mixture to a full boil. Once boiling, reduce the heat to low to keep the brine hot but not boiling. This hot brine will be poured over your cucumbers to start that magic pickling process.
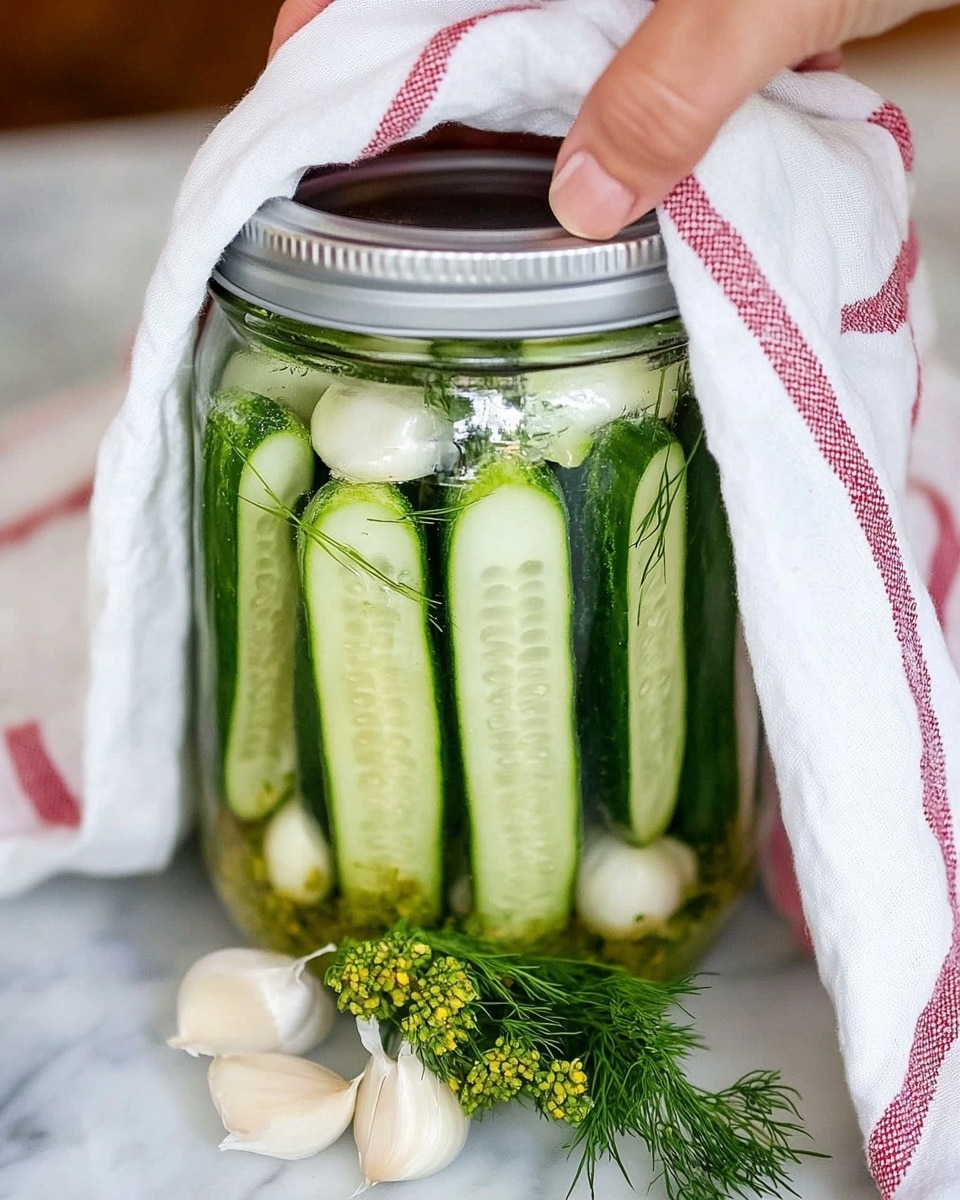
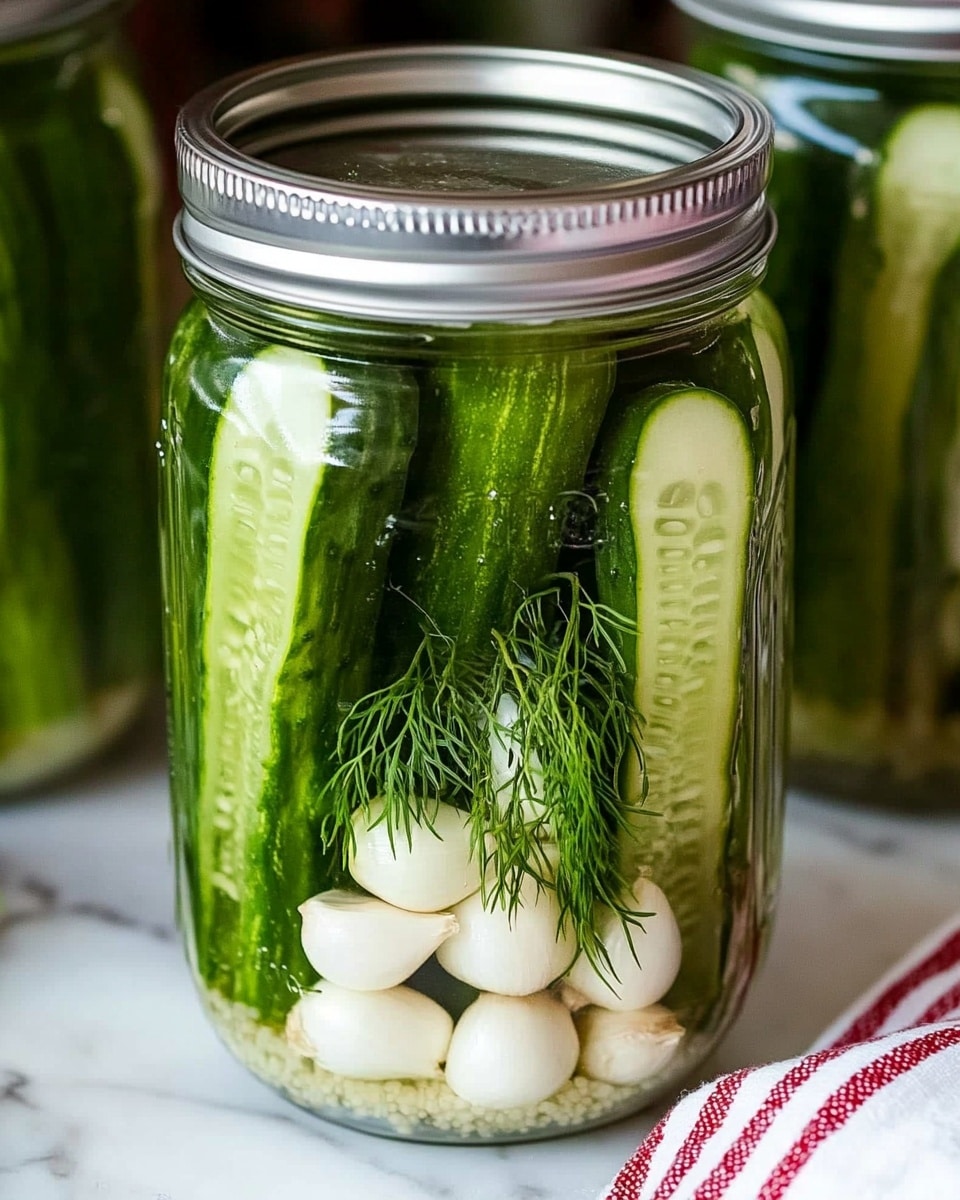
Step 4: Pack Your Jars with Cucumbers, Garlic, and Dill
Grab one hot jar from your sterilizing water with tongs and place it on a towel-lined counter. Add 4 garlic cloves and a large head of fresh dill to each jar, then pack the soaked cucumbers in tightly-but not so tight they’re crushed. I find that snug packing helps the brine get evenly around each cucumber slice for a wonderful flavor all around.
Step 5: Pour in the Hot Brine and Seal
Pour your hot brine over the packed cucumbers, making sure to cover them completely. Slide a thin rubber spatula around inside the jar to gently release any air bubbles-this little step makes a big difference in texture. Wipe the jar s rim with a clean towel before placing the sterilized lid and screwing on the cap tightly. Repeat for each jar.
Step 6: Cool and Process for Safety
Place your sealed pickle jars on a towel-lined surface and cover with another towel to keep the warmth in while they cool. It s important to check that every jar seals properly-any jar that doesn t seal should be refrigerated. For safety, I now recommend processing your jars in a hot water bath at 180°F for at least 15 minutes to follow the latest guidelines and keep your pickles shelf-stable.
Pro Tips for Making Garlic Dill Pickle Recipe
- Keep It Cold: Soaking cucumbers in ice water before pickling dramatically improves crunch.
- Tight Packing: Pack cucumbers firmly but gently to avoid breaking – this helps flavor penetration and preserves texture.
- Hot Brine Pour: Always pour hot brine over cucumbers to jumpstart pickling and maintain food safety.
- Seal Check: Double-check seals after cooling; any unsealed jars belong in the fridge, never shelf storage.
How to Serve Garlic Dill Pickle Recipe
Garnishes
I love adding a sprig of fresh dill or even a thin slice of garlic clove on top of a plate of sliced pickles when serving-it looks pretty and reinforces that fresh, herbal note every time. Plus, a dash of cracked black pepper can elevate the flavor if you’re feeling fancy!
Side Dishes
These pickles are fantastic alongside classic deli sandwiches, homemade burgers, or grilled cheese. I also like pairing them with rich, creamy potato salad or alongside charcuterie boards for a tangy escape from heavier flavors.
Creative Ways to Present
For parties, I arranged sliced garlic dill pickles on skewers with cherry tomatoes and cheese cubes for a fun and portable snack. Another favorite is layering pickle slices and fresh herbs in a clear glass jar as a vibrant garnish on buffet tables-always gets compliments!
Make Ahead and Storage
Storing Leftovers
I keep my sealed jars in a cool, dark pantry for up to several months. Once opened, the pickles go straight into the fridge, where they stay fresh and crunchy for weeks. Always use a clean fork to avoid contamination and keep those pickles happy and tasty!
Freezing
I don t recommend freezing these pickles since freezing changes their texture and taste, turning them mushy. Instead, aiming for proper canning and cold storage offers the best longevity and flavor.
Reheating
Pickles aren t meant to be reheated, and honestly, I love them chilled or at room temperature best. If you re using pickle juice for dressings or cocktails, just use it cold or at room temp for that ultimate sharp flavor.
FAQs
-
How long does it take for the pickles to develop their flavor?
For the best flavor, allow your Garlic Dill Pickle Recipe jars to sit for at least a week after sealing. This waiting time lets the garlic and dill infuse deeply into the cucumbers. That said, if you really can t wait, they ll still taste great after a few days!
-
Can I use regular vinegar instead of cider vinegar?
While apple cider vinegar adds a touch of fruity sweetness that complements garlic and dill nicely, you can use white distilled vinegar in a pinch. Just be aware it may give the pickles a sharper, more acidic bite, which some people prefer.
-
Why is a hot water bath recommended?
The hot water bath helps to properly seal the jars and ensures that any harmful bacteria or yeasts are destroyed, making your Garlic Dill Pickle Recipe safe for long-term storage outside the fridge. It s an easy step that gives you peace of mind.
-
What if some jars don t seal?
If a jar hasn t sealed properly, store it in the refrigerator and use those pickles first. An unsealed jar isn t safe to keep on the shelf, but refrigerated, the pickles will remain good and delicious for weeks.
Final Thoughts
This Garlic Dill Pickle Recipe has been a staple in my kitchen for years, and I can t recommend it enough for anyone who enjoys homemade pickles with that perfect burst of garlic and dill flavor. It s approachable, satisfying, and such a joy to make-especially when you see the smiles from your family tasting those crunchy bites. Give it a try, and I bet you ll be hooked just like I was the very first time I made them!
Print
Garlic Dill Pickle Recipe
- Prep Time: 4 hours 20 minutes
- Cook Time: 15 minutes
- Total Time: 4 hours 35 minutes
- Yield: Approximately 112 servings (jars)
- Category: Pickling
- Method: Baking
- Cuisine: American
Description
This classic Garlic Dill Pickle recipe offers a traditional method to create crisp, flavorful pickles using fresh cucumbers, garlic, and dill. The pickles are preserved with a combination of cider vinegar and salt brine, making them a perfect tangy accompaniment for sandwiches, salads, or snacking. The recipe emphasizes safe home canning techniques, including sterilizing jars and using a hot water bath for sealing, ensuring your pickles stay fresh and shelf-stable.
Ingredients
Pickles
- 14 pounds pickling cucumbers
Brine and Seasonings
- 2 quarts water
- 2 cups cider vinegar
- 1/2 cup canning or kosher salt
- 4 garlic cloves per jar
- 1 large head of fresh dill per jar
Instructions
- Soak Cucumbers: Soak the cucumbers in ice cold water for 3-4 hours to help maintain their crispness during the pickling process.
- Sterilize Jars: Fill a large pan with water, bring it to a boil, and submerge the canning jars and lids to sterilize them properly, ensuring a safe preservation environment.
- Prepare Brine: In a large saucepan, combine the water, cider vinegar, and salt, then bring the mixture to a full boil. Reduce heat to low to keep the brine hot but not boiling.
- Fill Jars: Using tongs, carefully remove one hot jar from the sterilizing pan and place it on a towel-lined countertop. Add 4 garlic cloves and a large head of fresh dill to the jar, then pack the prepared cucumbers tightly into the jar.
- Add Brine: Pour the hot brine over the cucumbers, filling the jar adequately. Use a thin rubber spatula to slide around inside the jar to release any trapped air bubbles. Wipe the rim of the jar with a clean towel to remove any residue.
- Seal Jars: Place a sterilized sealing lid on the jar and screw on the cap tightly. Repeat this process for all remaining jars.
- Cool and Seal: Place filled pickle jars on a towel and cover with another towel to prevent air circulation while cooling. Once cooled, ensure that all lids have sealed properly. Any jars that fail to seal should be refrigerated and consumed first.
- Process in Hot Water Bath: To enhance safety, process the sealed jars in a hot water bath at 180°F (82°C) for 15 minutes, especially if you live at altitudes up to 1000 feet. This ensures a reliable seal and extends shelf life.
Notes
- This recipe is a family tradition and has been reliable for years, but safety guidelines have evolved. The hot water bath step is now essential for safe preservation.
- If a jar does not seal after processing, refrigerate it and consume the pickles within a reasonable time to avoid spoilage.
- Using ice-cold water initially and proper sterilization helps maintain crispness and prevent contamination.
- Adjust processing time or altitude recommendations if you live above 1000 feet elevation.
Nutrition
- Serving Size: 1 tablespoon
- Calories: 5
- Sugar: 0.5 g
- Sodium: 200 mg
- Fat: 0 g
- Saturated Fat: 0 g
- Unsaturated Fat: 0 g
- Trans Fat: 0 g
- Carbohydrates: 1 g
- Fiber: 0.2 g
- Protein: 0.1 g
- Cholesterol: 0 mg
