

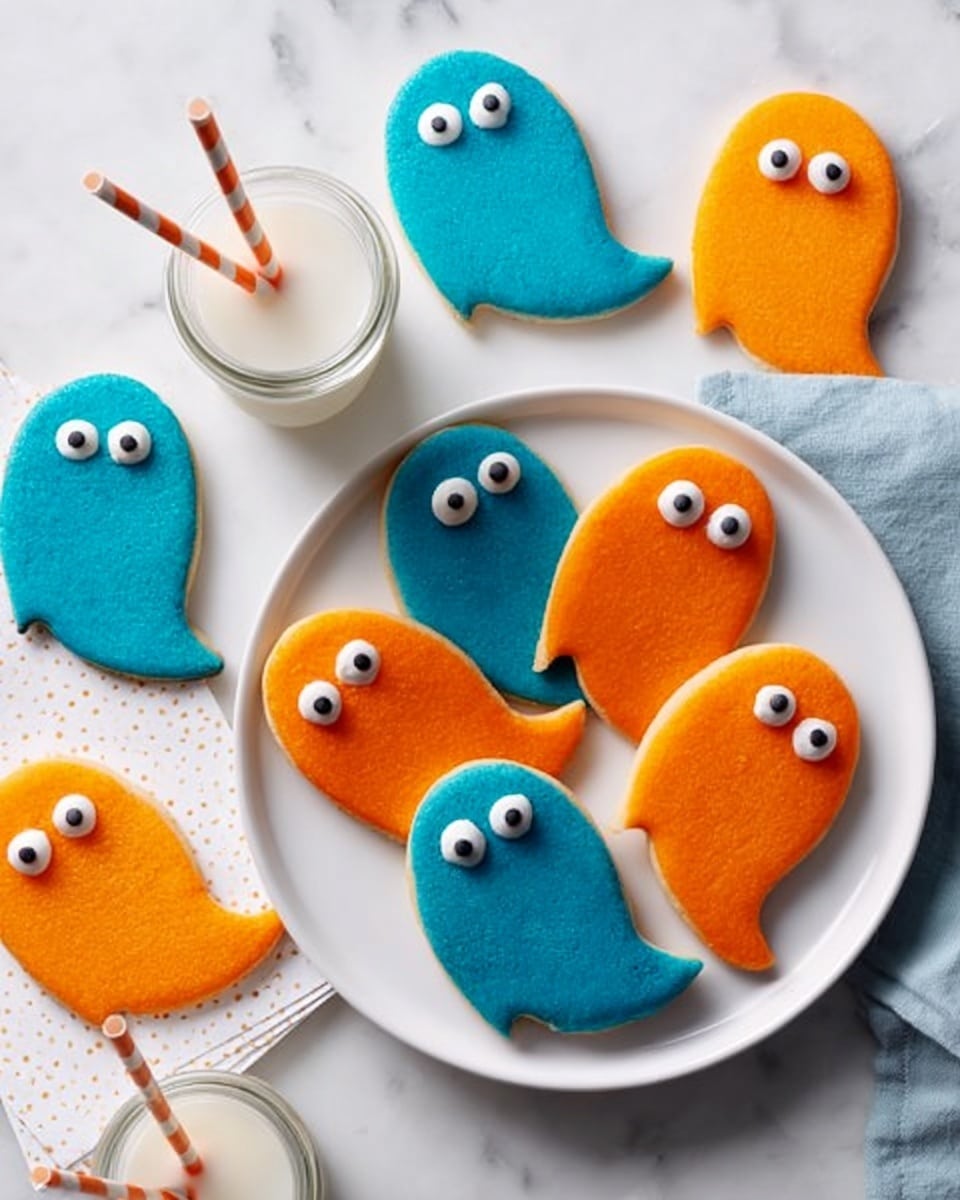
If you’re looking for the perfect Halloween treat that’s both cute and absolutely delicious, I have to share my favorite Ghost Shortbread Cookies Recipe with you. These buttery, melt-in-your-mouth cookies not only taste amazing but also have the most fun little ghost faces that will definitely make your family—and friends—smile. I promise once you try this recipe, it’ll become a seasonal staple you’ll make over and over.
Why You’ll Love This Recipe
- Delightfully Buttery Texture: The shortbread is tender and crumbly in all the right ways, thanks to the cornstarch addition.
- Playful & Festive Look: The little ghost shapes decorated with chocolate chip eyes are irresistibly cute for Halloween parties.
- Simple to Make: You don’t need fancy tools—just a cookie cutter and some frosting to bring these ghosts to life.
- Perfect for Kids & Beginners: My kids love helping me pipe eyes and decorate, making it a fun kitchen activity.

Ingredients You’ll Need
The ingredients in this Ghost Shortbread Cookies Recipe come together to create the most tender, buttery cookie with just a touch of sweetness—the cornstarch is the secret to that delicate texture you’ll adore.
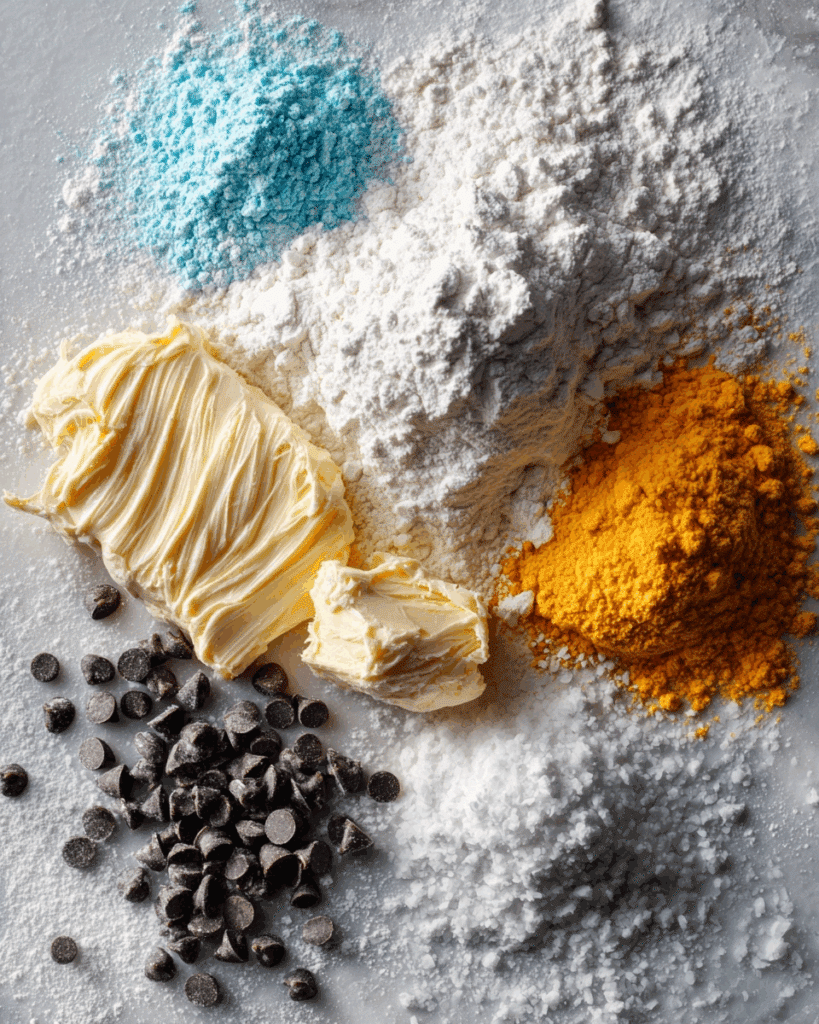
- Butter: Use softened unsalted butter for the creamiest dough and best flavor control.
- Confectioners’ Sugar: Super fine sugar is key for smooth shortbread dough and flawless frosting.
- All-Purpose Flour: The base of the cookies, providing structure without toughening the dough.
- Cornstarch: This lightens the dough, giving that melt-in-your-mouth feeling.
- Orange and Blue Food Coloring (optional): Fun for tinting dough portions if you want to play with colors!
- Milk: Just a little for smoothing out the frosting without it getting runny.
- Miniature Semisweet Chocolate Chips: These make perfect ghostly eyes—small and easy to pipe frosting around.
Variations
I love how versatile this Ghost Shortbread Cookies Recipe is. Over the years, I’ve tried a few twists to keep things interesting and suit different taste preferences—don’t be afraid to experiment!
- Adding Spices: Once, I added a pinch of cinnamon and nutmeg to the dough, which gave a cozy warmth that paired beautifully with the buttery base.
- Gluten-Free Version: Swap the all-purpose flour for your favorite gluten-free flour blend—the texture changes slightly but remains tender and delicious.
- Colored Dough: I often tint half of the dough orange and the other half blue before rolling, which makes the cookie tray pop with festive color.
- Chocolate Shortbread: Add a tablespoon of cocoa powder to the dough for a subtle chocolate twist that’s rich but still light.
How to Make Ghost Shortbread Cookies Recipe
Step 1: Whip Up the Dough
Start by preheating your oven to 325°F. Then, in a large bowl, beat together the softened butter, confectioners’ sugar, and cornstarch until everything’s nicely combined and smooth. The texture will be quite soft. Next, gradually beat in the flour until it’s just mixed—you’ll get a soft, pliable dough that’s perfect for rolling. If you want to add a pop of color, now’s the time to divide the dough and mix in your food coloring. I’ve found that using gel colors works best—they’re vibrant and don’t make the dough sticky.
Step 2: Roll and Cut Your Ghosts
Lightly flour your surface and rolling pin, then roll each dough portion to about 1/4-inch thickness—thin enough for a tender cookie, but thick enough to hold shape. Use a 2-inch tulip-shaped cookie cutter (or any ghost shape you have) to cut as many cookies as possible from each dough section. Remember to flour your cutter too, so the dough doesn’t stick. Arrange your cookies on greased baking sheets, leaving at least 2 inches of space between each one to prevent spreading into each other.
Step 3: Bake and Cool
Bake your cookies for 7-9 minutes, or until the bottoms turn a light golden brown. Keep a close eye—they can quickly overbake if left too long, which makes them crumbly and brittle. Once baked, carefully transfer the cookies to wire racks to cool completely before decorating. This step is important so your frosting doesn’t melt and slide off.
Step 4: Pipe on the Ghostly Frosting
While the cookies cool, mix together the frosting by beating confectioners’ sugar, softened butter, and milk until smooth and creamy—but still pipeable. Fill a piping bag fitted with a small round tip with the frosting. Now for the fun part: pipe little eyes onto each “ghost” and gently press a miniature chocolate chip onto the frosting for each eye—this gives your ghosts their spooky little faces! Let the frosting set for about 20 minutes before serving.
Pro Tips for Making Ghost Shortbread Cookies Recipe
- Butter at Room Temperature: I always make sure my butter is soft but not melting to get the perfect dough consistency.
- Chill Dough if Too Soft: If your dough feels sticky or hard to work with, pop it in the fridge for 15-20 minutes—it’ll be easier to roll.
- Use Mini Chocolate Chips: They’re just the right size for little ghost eyes and don’t overpower the cookie’s delicate flavor.
- Don’t Skip Cooling: Decorating on warm cookies makes the frosting melt, so wait till they’re fully cool for best results.
How to Serve Ghost Shortbread Cookies Recipe
Garnishes
I usually keep garnishes simple to let the ghosts shine—but sometimes I sprinkle a little edible glitter or colored sugar crystals on top before the frosting sets to add a little sparkle. It’s a small touch that makes them feel extra festive and magical.
Side Dishes
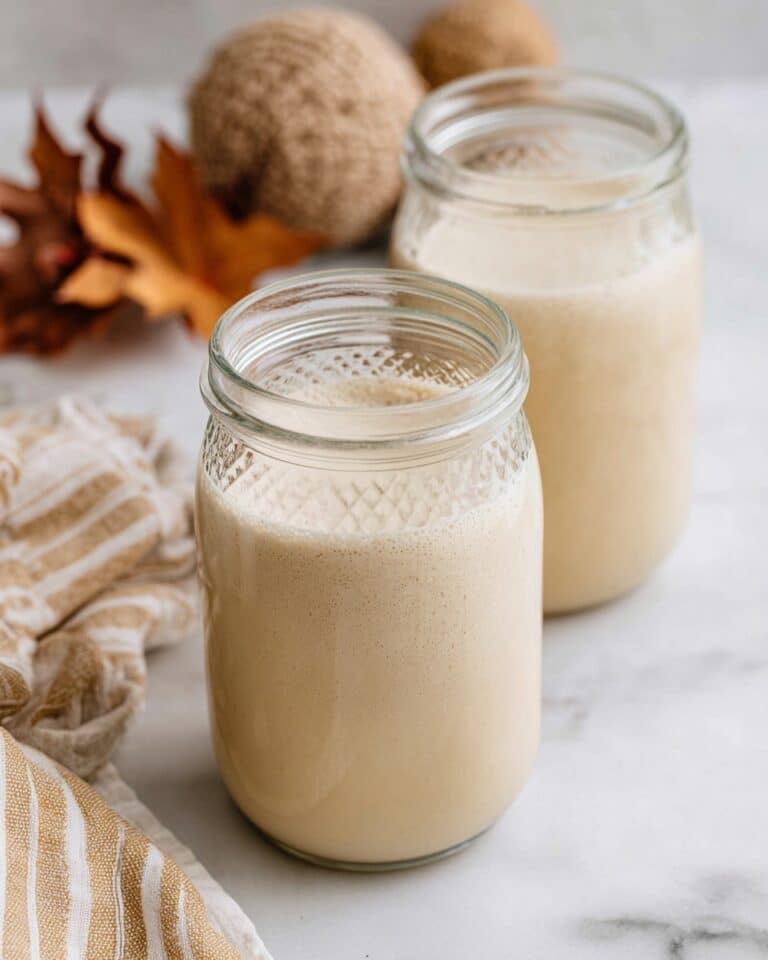
These cookies are fantastic alongside a warm cup of spiced chai, hot chocolate, or a simple glass of cold milk. I’ve also served them at Halloween brunch with pumpkin spice muffins and fresh fruit for a fun seasonal spread.
Creative Ways to Present
For parties, I like arranging these ghosts artfully on black or orange platters with a few sprigs of fresh rosemary for a “spooky forest” vibe. Another hit trick? Wrapping a small stack in clear cellophane tied with Halloween-themed ribbon to give as adorable edible gifts!
Make Ahead and Storage
Storing Leftovers
I keep leftover Ghost Shortbread Cookies in an airtight container at room temperature, and they usually stay fresh and crisp for up to a week. Make sure the frosting has fully set and avoid stacking cookies too tightly to prevent smudging.
Freezing
I’ve frozen these cookies twice—first before baking, by shaping and freezing the dough discs wrapped in plastic, and again after baking fully cooled and decorated. For the baked cookies, place them in a single layer between parchment sheets inside a freezer bag. Thaw at room temperature when ready to enjoy, and they’re just as good as fresh.
Reheating
Reheating isn’t really necessary for shortbread cookies since they’re best crisp and cool. But if you want a warm bite, just pop a cookie in the microwave for 5-7 seconds—be careful not to melt the frosting, so I usually peel off the chocolate chips first!
FAQs
-
Can I use regular sugar instead of confectioners’ sugar?
It’s best to use confectioners’ sugar for both the dough and frosting because it dissolves completely and gives that smooth, tender texture. Regular granulated sugar won’t blend as smoothly and can make the dough gritty.
-
What if I don’t have a tulip-shaped cutter?
Any 2-inch cookie cutter will work, especially ghost or pumpkin shapes if you want to keep that Halloween spirit. If you don’t have a cookie cutter, you can also shape the dough into small, rounded mounds and frost them like little ghosts—still super cute!
-
How do I prevent my cookies from spreading too much?
Make sure your butter is softened but not melted, and that you don’t overwork the dough. Chilling your dough for a bit before cutting can also help keep the shapes sharp. Baking at 325°F helps maintain the shape without excessive spreading.
-
Can I decorate these without frosting?
Absolutely! You can dust them with powdered sugar or dip them lightly in melted white chocolate and add chocolate chips for eyes before it hardens. Just make sure your decoration method complements the shortbread’s delicate texture.
-
How far in advance can I make these cookies?
You can bake the cookies up to 3 days ahead and store them in an airtight container. For best results, do the frosting just before serving so it stays fresh and vibrant.
Final Thoughts
This Ghost Shortbread Cookies Recipe holds a special place in my heart—and my kitchen—because it combines the cozy, buttery goodness of classic shortbread with charming Halloween spirit. It’s a treat that’s as fun to make as it is to eat, perfect for sharing with kids or friends. So next time you’re hunting for that seasonal crowd-pleaser, I hope you give these ghosts a try—I bet you’ll love how magically simple and tasty they are.
Print
Ghost Shortbread Cookies Recipe
- Prep Time: 45 minutes
- Cook Time: 7-9 minutes
- Total Time: 52-54 minutes
- Yield: 2-1/2 dozen (about 30 cookies)
- Category: Dessert
- Method: Baking
- Cuisine: American
Description
Delightfully spooky and buttery Ghost Shortbread Cookies perfect for Halloween or any festive occasion. These tender, melt-in-your-mouth cookies are lightly flavored with vanilla and topped with simple frosting and chocolate chip eyes to create charming ghost shapes that are as fun to make as they are to eat.
Ingredients
Cookie Dough
- 1 cup butter, softened
- 1 cup confectioners’ sugar
- 2 cups all-purpose flour
- 1/2 cup cornstarch
- Orange and blue food coloring, optional
Frosting
- 1-1/3 cups confectioners’ sugar
- 1/4 cup butter, softened
- 2-1/2 teaspoons 2% milk
- 60 miniature semisweet chocolate chips
Instructions
- Preheat Oven and Prepare Dough: Preheat your oven to 325°F (163°C). In a large bowl, beat together the softened butter, confectioners’ sugar, and cornstarch until the mixture is smooth and well blended.
- Form the Dough: Gradually add in the all-purpose flour and continue beating until fully combined. If desired, divide the dough into two portions and tint one with orange food coloring and the other with blue to create colorful ghosts.
- Roll and Cut Shapes: On a lightly floured surface, roll each colored dough portion to about 1/4-inch thickness. Using a floured 2-inch tulip-shaped cookie cutter, cut out ghost shapes.
- Arrange and Bake: Place the ghost cookies about 2 inches apart on greased baking sheets. Bake in the preheated oven for 7 to 9 minutes or until the bottoms turn light brown.
- Cool the Cookies: Remove the cookies from the baking sheets and transfer them to wire racks. Let them cool completely to ensure the frosting adheres properly.
- Prepare Frosting: In a small bowl, combine confectioners’ sugar, softened butter, and 2% milk. Beat the mixture until it becomes smooth and creamy.
- Decorate Cookies: Using a piping bag or small spoon, pipe small eyes onto each ghost cookie using the prepared frosting. Immediately top the eyes with miniature semisweet chocolate chips to complete the ghostly look.
- Set and Serve: Allow the decorated cookies to stand until the frosting sets to avoid smudging. Enjoy your festive and spooky Ghost Shortbread Cookies!
Notes
- For vibrant cookie colors, add a few drops of food coloring to the dough before rolling.
- If you don’t have a tulip-shaped cutter, use any ghost or similar-shaped cookie cutter.
- Ensure cookies are completely cool before frosting to prevent melting.
- Store cookies in an airtight container to maintain freshness for up to a week.
- Miniature chocolate chips can be substituted with small candy eyes for a different decoration effect.
Nutrition
- Serving Size: 1 cookie
- Calories: 110
- Sugar: 8g
- Sodium: 40mg
- Fat: 7g
- Saturated Fat: 4.5g
- Unsaturated Fat: 2g
- Trans Fat: 0g
- Carbohydrates: 12g
- Fiber: 0.3g
- Protein: 1g
- Cholesterol: 20mg

