
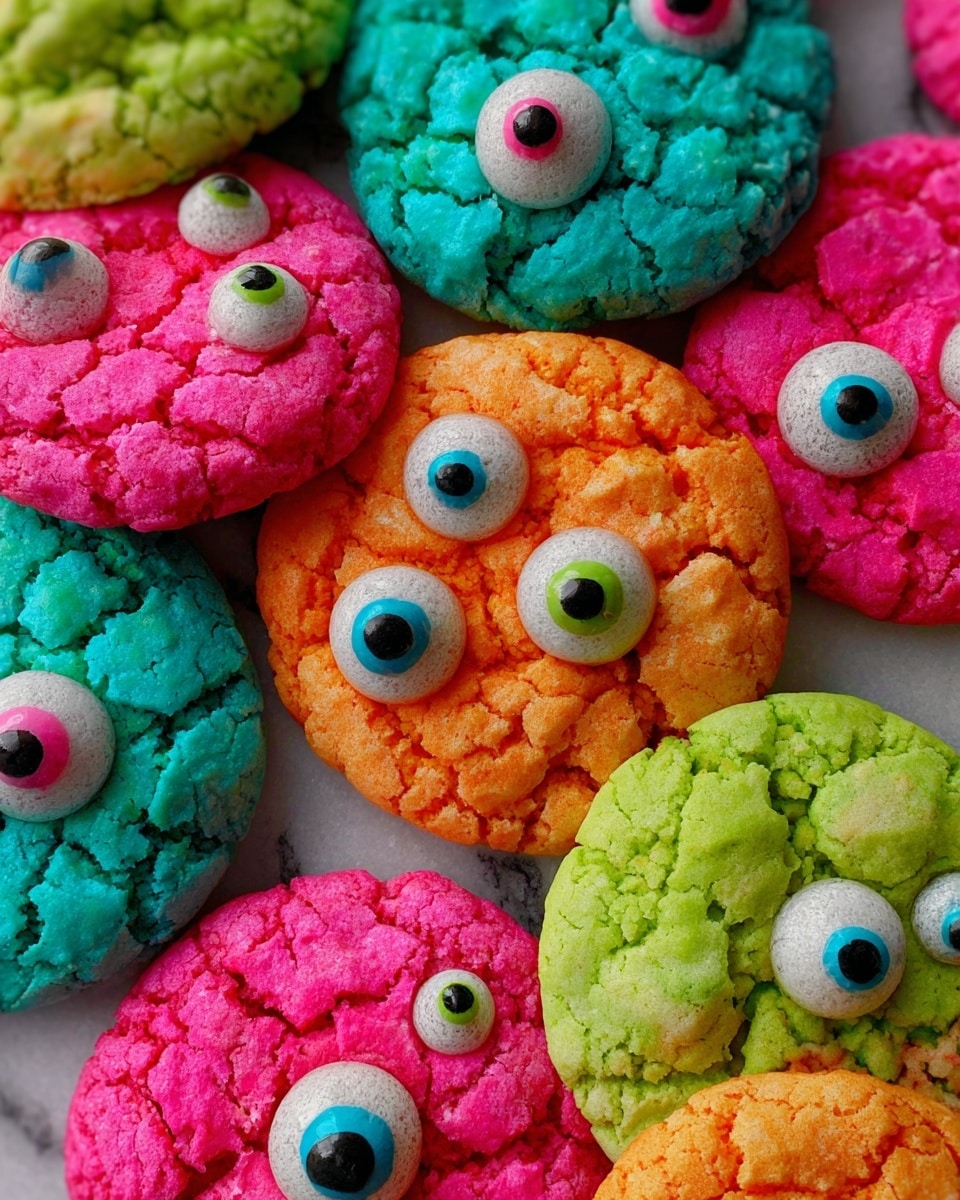
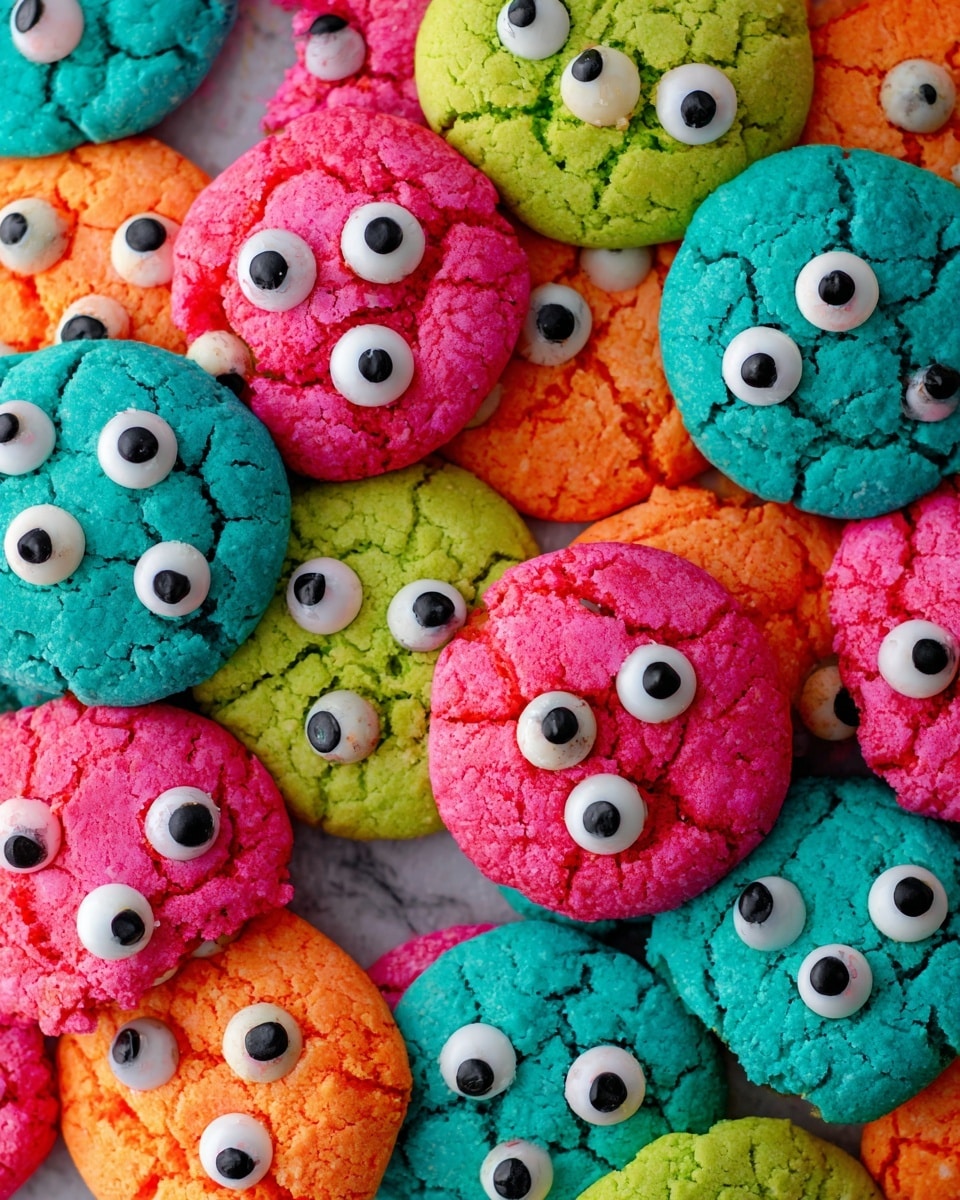
If you’re looking for a cookie that’s bursting with fun, flavor, and brings out your inner kid, this Gooey Monster Cookie Recipe is exactly what you need. I absolutely love how these cookies turn out—with their super soft, gooey center and vibrant neon colors, they’re just pure happiness baked in. You’ll find that these monster cookies aren’t just adorable to look at but also melt-in-your-mouth delicious, making them perfect for parties, Halloween, or just an everyday treat that cheers up your kitchen.
Why You’ll Love This Recipe
- Incredibly Gooey Texture: These cookies stay soft and melty inside—no more dry, crumbly bites.
- Easy & Fast to Make: Only a handful of ingredients and under an hour from start to finish.
- Fun Customization: Use neon food coloring and candy eyeballs for playful, eye-catching treats.
- Perfect for Any Occasion: Whether it’s a kid’s party or a quirky snack, these cookies bring smiles every time.

Ingredients You’ll Need
This recipe is like a little magic trick blending simple pantry staples to get a soft, colorful cookie that’s seriously delightful. Choosing a good-quality white cake mix and using softened butter and cream cheese is key for the perfect gooey texture.
- White Cake Mix: The base for your cookie batter that keeps things fluffy and moist without fuss.
- Butter: Softened butter brings richness and helps the dough come together beautifully.
- Vanilla Extract: Just a splash elevates the flavor for a sweet, comforting aroma.
- Cream Cheese: Softened cream cheese adds that unbeatable gooeyness inside every bite.
- Egg: Acts like glue, holding everything together while adding moisture.
- Powdered Sugar: For that sweet, slightly crunchy coating on the outside.
- Food Coloring: Neon colors amp up the fun factor—definitely my go-to for bright, eye-popping cookies.
- Candy Eyeballs: The charming finishing touch that turns plain cookies into monsters with personality.
Variations
I love to switch things up depending on the occasion or what’s on hand. The Gooey Monster Cookie Recipe is super adaptable—you can tweak colors, add mix-ins, or even make it allergy-friendly. Experimenting is half the fun!
- Mix-in Madness: Sometimes I toss in mini chocolate chips or chopped nuts to add texture and extra flavor crunch.
- Dietary Swaps: For a dairy-free twist, try vegan butter and cream cheese alternatives; just watch the softness and adjust chilling time.
- Holiday Themes: Use seasonal food coloring like orange and black for Halloween or red and green for festive celebrations.
- Size Tweaks: Roll smaller balls for bite-sized monsters perfect for lunchboxes or bigger ones for a serious dessert.
How to Make Gooey Monster Cookie Recipe
Step 1: Whip Up the Creamy Batter
Start by beating the softened butter, vanilla extract, egg, and cream cheese together until your mixture is light and fluffy. This step is crucial because it’s what gives these cookies that melt-in-your-mouth softness. I usually use a hand mixer, and by mixing for about 2-3 minutes, I get a silky, smooth blend that just makes the next step easier and more fun.
Step 2: Combine with Cake Mix and Divide
Next, stir in the entire box of white cake mix until everything’s just combined. You don’t want to overmix here—just enough to get a smooth batter. Then, divide the dough evenly into bowls based on how many colors you want. I always do three or four colors for a wild rainbow effect that really wows my family.
Step 3: Add Neon Colors and Chill
Add a few drops of neon food coloring to each bowl and mix well until the color looks vibrant and evenly blended. This part always makes me smile—it’s like painting with batter! After mixing, pop those bowls into the fridge for about 30 minutes. Chilling the dough firms it up, making it easier to roll and helps keep the gooey texture intact when baking.
Step 4: Roll, Sugar Coat, and Bake
Once chilled, scoop and roll the dough into balls, then dip each one into powdered sugar. Don’t be shy with the sugar—it adds a delicate sweet crunch on the outside that’s just delightful. Place your sugar-coated balls on a greased cookie sheet and gently press them down a little to get a perfect monster shape. Bake at 350°F for about 10-12 minutes. Watch closely—the edges should set but center stay soft and gooey.
Step 5: Add Candy Eyeballs and Enjoy!
Right after the cookies come out warm from the oven, press the candy eyeballs on. They stick perfectly while the cookies are still soft. Honestly, this is the funnest part because you get to create your own goofy little monsters. Then, let them cool for a few minutes before digging in—and trust me, you’ll want to savor every gooey bite.
Pro Tips for Making Gooey Monster Cookie Recipe
- Use Softened Ingredients: Butter and cream cheese should be room temperature for easy mixing and smooth texture.
- Don’t Overbake: Take cookies out the moment edges look set; gooey centers firm up a bit as they cool.
- Chill for Easier Handling: Dough is sticky—chilling makes rolling and dipping much less messy.
- Apply Candy Eyes While Warm: This helps them stick perfectly without any glue or frosting.
How to Serve Gooey Monster Cookie Recipe
Garnishes
I usually keep the garnishing simple with candy eyeballs for maximum monster effect, but sometimes I sprinkle a tiny bit of edible glitter or colored sanding sugar before baking if I’m feeling fancy. It adds just a little sparkle that makes these cookies party-ready in no time.
Side Dishes
These cookies stand out on their own, but I love serving them alongside a cold glass of milk or even a cup of hot cocoa on chilly days. Sometimes, I pair them with a bowl of fresh fruit to balance the sweetness—everyone appreciates that refreshing contrast!
Creative Ways to Present
For kids’ parties, I arrange these colorful monsters on a large platter surrounded by tiny bowls with extra candy eyes, edible googly stickers, and different colored icings for a DIY decorating station. It’s such a crowd-pleaser! On Halloween, adding little paper “monster hands” under the cookies makes them extra spooky and fun.
Make Ahead and Storage
Storing Leftovers
I store any leftover Gooey Monster Cookies in an airtight container at room temperature. They stay nice and soft for up to 3 days—if they start to firm up, just let them sit out a bit or warm them slightly to bring back that gooey goodness.
Freezing
Freezing works great for this recipe! I freeze the dough balls pre-baking on a tray, then transfer them to a freezer bag. When you want a quick treat, just bake the frozen dough balls a couple of minutes longer. Leftover baked cookies freeze well, too—just wrap tightly and thaw at room temp.
Reheating
If your cookies have cooled and firmed up, a quick 10-15 second zap in the microwave softens them right back up. Alternatively, pop them into a preheated oven at 300°F for 5 minutes. Both ways bring that gooey texture back like magic.
FAQs
-
Can I make the Gooey Monster Cookie Recipe without cream cheese?
While cream cheese is key to achieving that irresistibly gooey texture, you can try substituting with full-fat Greek yogurt or sour cream, but keep in mind the texture and flavor might shift slightly. I recommend sticking with cream cheese for the classic gooeyness.
-
How do I prevent the cookies from spreading too much?
Chilling the dough before baking is the trick I discovered that really helps control spreading. Also, don’t press the dough balls too flat on the sheet—just a gentle pat to shape your monster cookie.
-
Can I use regular food coloring instead of neon?
Absolutely! Regular food coloring works fine, but the neon shades really make the Gooey Monster Cookie Recipe pop visually—perfect for themed events or if you want that playful vibe.
-
Can I make these cookies gluten-free?
You can try substituting with a gluten-free white cake mix, but make sure it’s one that behaves similarly to regular cake mixes to keep the right texture. I haven’t personally tried it yet, but many gluten-free mixes on the market work well in cookies.
Final Thoughts
When I first tried this Gooey Monster Cookie Recipe, I was amazed at how effortlessly colorful and soft these cookies were—and how much joy they brought to everyone who tasted them. It’s such a simple recipe, but it feels extra special because of those gooey centers and that whimsical monster look. I hope you give it a try in your kitchen and see how it can brighten your day just like it did mine. Trust me, once you make these, your family and friends will keep coming back for more. Happy baking!
Print
Gooey Monster Cookie Recipe
- Prep Time: 10 minutes
- Cook Time: 10 minutes
- Total Time: 50 minutes
- Yield: 24 cookies
- Category: Dessert
- Method: Baking
- Cuisine: American
Description
These Gooey Monster Cookies are soft, vibrant, and irresistibly sweet treats made with white cake mix, cream cheese, and colorful neon food coloring. Decorated with candy eyeballs, they are perfect for parties or fun baking sessions with kids, delivering a playful and delicious cookie experience.
Ingredients
Cookie Dough
- 1 box white cake mix
- 1/2 cup butter, softened
- 1/2 teaspoon vanilla extract
- 8 oz cream cheese, softened
- 1 egg
Decoration
- Powdered sugar, for rolling
- Neon food coloring, various colors
- Candy eyeballs
Instructions
- Prepare the dough: In a large bowl, beat together the softened butter, vanilla extract, egg, and cream cheese until the mixture is light and fluffy. This creates a smooth base for your cookie dough.
- Add the cake mix: Gradually mix in the white cake mix until fully incorporated, forming a dough that’s thick and ready to color.
- Divide and color the dough: Separate the dough evenly into multiple bowls according to the number of colors you want to use. Add neon food coloring to each bowl and mix until the color is vibrant and completely blended.
- Chill the dough: Cover the colored dough bowls and chill them in the refrigerator for 30 minutes. This helps the dough firm up for easier handling.
- Shape and coat cookies: Once chilled, roll the dough into small balls. Dip each ball into powdered sugar to coat lightly, which adds a sweet exterior and prevents sticking.
- Arrange and bake: Place the coated dough balls on a greased cookie sheet, then gently pat them down to slightly flatten. Bake in a preheated oven at 350°F (175°C) for 10-12 minutes until the edges are set but the center remains soft.
- Add candy eyeballs: While the cookies are still warm, press candy eyeballs onto the tops to create fun monster faces. Allow cookies to cool slightly before serving. ENJOY!
Notes
- Use neon food coloring to achieve bright, vibrant cookie colors.
- Chilling the dough is important to prevent spreading during baking.
- Press candy eyeballs on warm cookies so they stick properly.
- Store cookies in an airtight container to maintain softness.
- If cream cheese is too soft, cookies could be too flat; ensure it’s just softened.
Nutrition
- Serving Size: 1 cookie
- Calories: 120 kcal
- Sugar: 12 g
- Sodium: 150 mg
- Fat: 6 g
- Saturated Fat: 3.5 g
- Unsaturated Fat: 2 g
- Trans Fat: 0 g
- Carbohydrates: 16 g
- Fiber: 0.5 g
- Protein: 1 g
- Cholesterol: 25 mg


