
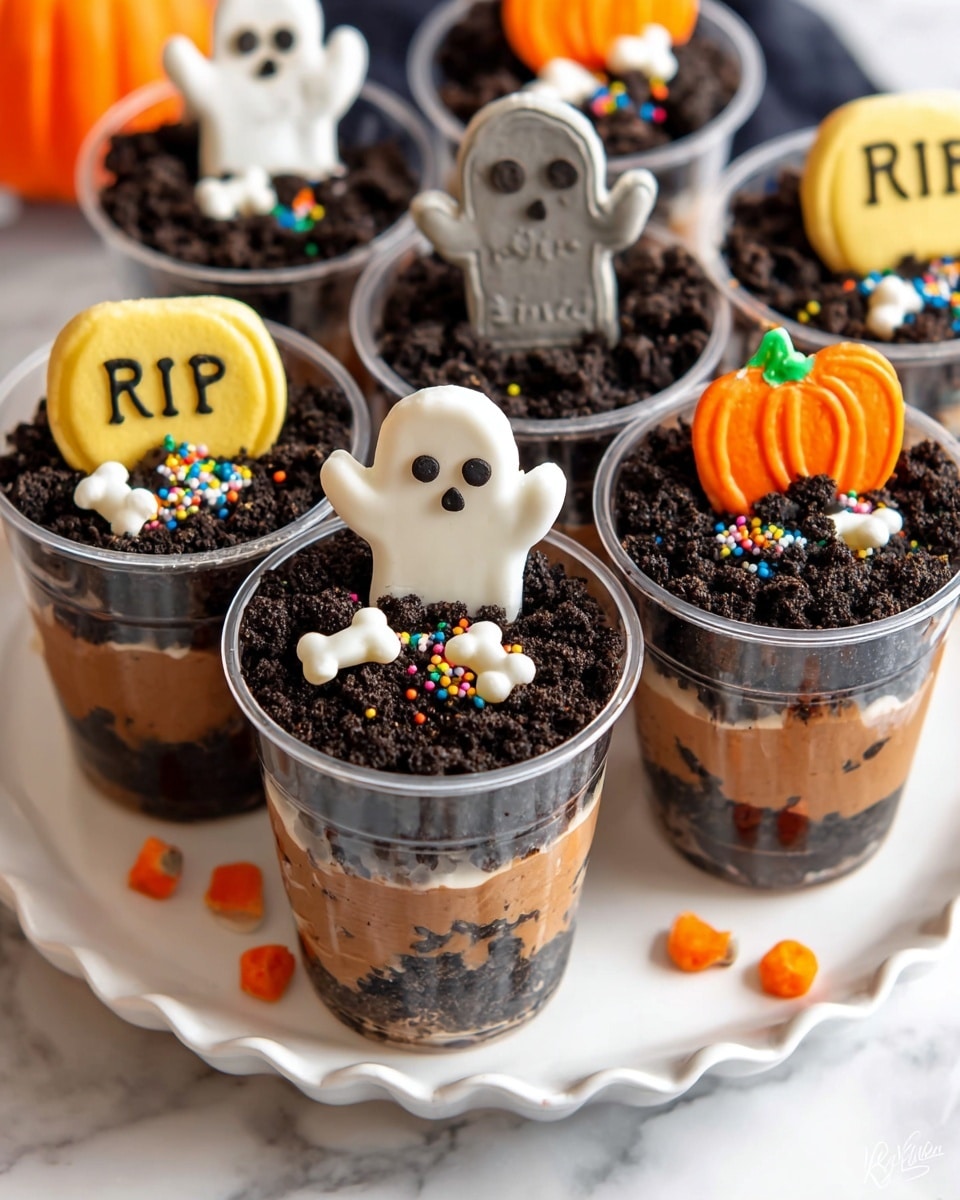
If you’re on the hunt for a Halloween treat that’s playful, delicious, and just a little bit spooky, you’ve got to try this Halloween Dirt Cups Recipe. I absolutely love how this dessert combines creamy chocolate pudding, crunchy Oreo “dirt,” and fun Halloween decorations to create a spooky treat that’s a guaranteed crowd-pleaser. Whether you’re making this for a kids’ party or a festive family dessert, you’ll find it super easy to put together and totally irresistible.
Why You’ll Love This Recipe
- Hands-On Fun: Layering the pudding and Oreo crumbs feels like a creative little project, especially fun for kids (and adults!) to help with.
- Foolproof Flavor Combo: Chocolate pudding and crushed Oreos are a match made in dessert heaven, and the added chocolate syrup takes it over the top.
- Festive and Customizable: You can decorate these however you want—ghost Peeps, “RIP” cookies, pumpkins—making it a standout at any party.
- Make-Ahead Friendly: Prepare these the day before your event and save yourself stress on Halloween day.

Ingredients You’ll Need
Choosing the right ingredients really makes this Halloween Dirt Cups Recipe shine. Using family-size Oreos ensures plenty of “dirt” to go around, and instant pudding keeps things quick and simple. The frozen whipped topping adds that luscious creaminess without extra fuss.
- Oreos: Classic cookies that give you that ideal crumbly “dirt” texture when crushed.
- Milk: Needed to bring the instant chocolate pudding to life.
- Instant chocolate pudding mix: Quick and smooth, no cooking required, which is a lifesaver.
- Frozen whipped topping: Adds creamy lightness and folds beautifully into the pudding.
- Chocolate syrup: Used twice—mixed in for streaks of rich cocoa flavor and drizzled on top for moisture and shine.
- Milano cookies and black decorator icing: Great for creating spooky “RIP” grave markers.
- Ghost Peeps, pumpkin candies, Halloween sprinkles: Fun decorations that bring this dessert to life and up the festive factor.
Variations
I love making this Halloween Dirt Cups Recipe my own by switching up the toppings or mixing in some extra flavors to surprise everyone. Play around with it to suit your taste or dietary needs—it’s super forgiving!
- Dairy-Free Version: I once swapped out the pudding for a coconut milk-based pudding and used dairy-free whipped topping—still totally delicious and creamy.
- Peanut Butter Twist: Try mixing in a swirl of peanut butter with the pudding for a nutty surprise that my family went crazy for.
- Extra Crunch: Add some chopped nuts or crushed pretzels to one of the Oreo layers for a fun texture contrast.
- Colorful Fun: Instead of the chocolate theme, use orange or green food coloring in the pudding for an extra Halloween pop.
How to Make Halloween Dirt Cups Recipe
Step 1: Whip Up the Chocolate Pudding Base
Start by combining the instant chocolate pudding mix with 4 cups of cold milk in a large bowl. Whisk it vigorously for 2-3 minutes until it thickens nicely, then let it stand for 5 minutes to set. Once that’s ready, fold in the thawed whipped topping gently—this keeps the pudding super creamy and fluffy, which is exactly what you want for that dirt cup texture.
Step 2: Add Chocolate Syrup for Extra Flavor
Now, pour half a cup of chocolate syrup into the pudding mixture. Stir just a few times until streaks appear—you don’t want to mix it completely, as those swirls give a cool marbled effect and pockets of rich chocolatey goodness throughout the dessert. Cover and toss it in the fridge to chill while you prepare the Oreo “dirt.”
Step 3: Make the Oreo Dirt
This is my favorite part—you get to blitz Oreo cookies until they resemble crumbly, dark soil. I like using a food processor for this, but a blender works too if you do it in small batches. Tip: Don’t over-process or it’ll turn into a paste. You want a loose, crumbly texture like actual dirt to layer perfectly with the pudding and keep that satisfying crunch.
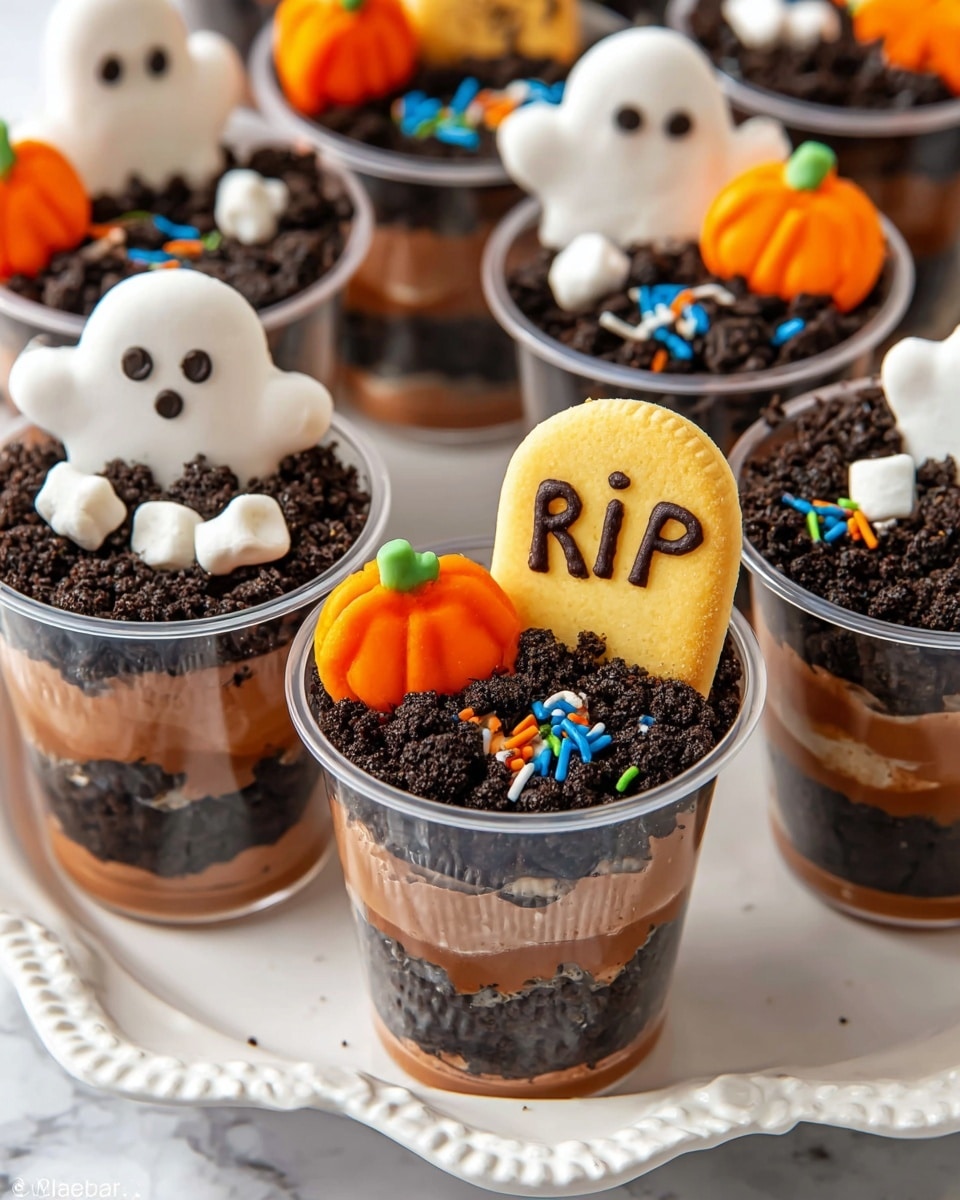
Step 4: Layer Your Dirt Cups
Start with around 2 tablespoons of the Oreo crumbs at the bottom of each cup. Then spoon in about 1/4 cup of your chilled pudding mixture. Repeat with another layer of Oreo crumbs and pudding. Finish with a tablespoon of dry Oreo crumbs on top to create that perfect dirt look. This layering is not only fun but the contrast between creamy and crunchy is what makes this recipe so addictive.
Step 5: Mix Remaining Chocolate Syrup with Oreo Crumbs
Take the rest of the Oreo crumbs and stir in the remaining 1/2 cup of chocolate syrup. It’ll get clumpy and moist-looking—that’s exactly what you want here because this will mimic freshly dug graves when sprinkled on top of the cups.
Step 6: Decorate with Spooky Details
This is where the Halloween magic happens. Use black icing to decorate Milano cookies with “RIP,” place ghost Peeps on some cups, and scatter mini pumpkin candies and Halloween sprinkles on top. I have to say, the first time I assembled these, my kids couldn’t stop giggling. It’s like bringing a little Halloween story to life in each cup!
Pro Tips for Making Halloween Dirt Cups Recipe
- Crumb Consistency Matters: Pulse Oreos just enough for dirt-like crumbs—too fine and it loses that fun texture.
- Keep Pudding Chilly: Chill the pudding before layering to help it set nicely and prevent sogginess.
- Timing for Toppings: Add cookie crumbs and candy decorations right before serving to keep that fresh crunch and crisp look.
- Cup Choice: I find using 9-ounce plastic cups easy to serve and perfect portion size, but mason jars add a nice rustic touch if you want to fancy it up.
How to Serve Halloween Dirt Cups Recipe
Garnishes
I always keep a stash of ghost Peeps and mini pumpkins on hand because they add the perfect whimsical touch. Decorating a few cups with “RIP” Milano cookies instantly elevates the spooky vibe. Plus, Halloween sprinkles add a fun pop of color and texture that everyone loves.
Side Dishes
These dirt cups pair wonderfully with simple sides like caramel apples or spiced cider for a full Halloween spread. I also like serving them alongside a savory snack like popcorn tossed with pumpkin spice seasoning to balance out the sweetness.
Creative Ways to Present
One year, I set up a “graveyard” platter by placing the finished cups on a tray lined with black fabric and adding little plastic spiders and faux tombstones around. For a kids’ party, arranging them with mini plastic shovels and bones made the whole dessert experience interactive and a total hit.
Make Ahead and Storage
Storing Leftovers
I store leftovers covered tightly with plastic wrap in the fridge. Just a heads up—the Oreo crumbs will soften and lose some crunch after a day, but adding a fresh sprinkle of crushed Oreos on top before serving freshens things up nicely.
Freezing
I don’t recommend freezing these because the whipped topping and pudding can change texture, getting watery or icy when thawed. Trust me, the freshness of chilled dirt cups is part of the magic!
Reheating
These are best served cold straight from the fridge, so no reheating is needed. If you want to take them out of the fridge a few minutes before serving, that helps soften the pudding slightly for an extra creamy bite.
FAQs
-
Can I make Halloween Dirt Cups Recipe without a food processor?
Absolutely! If you don’t have a food processor, put Oreos in a sturdy plastic bag and crush them with a rolling pin until you get dirt-like crumbs. It takes a little elbow grease but works perfectly.
-
How long can Halloween Dirt Cups stay fresh in the fridge?
They’re best eaten within one day for the freshest crunch. After that, the Oreo crumbs start to soften, but you can add crushed Oreos on top to refresh the texture.
-
Can I use homemade pudding instead of instant?
Yes, you can! Homemade pudding tastes delicious here, but the instant mix keeps things quick and foolproof, which is why I usually go with it for this dessert.
-
What if I want to make this recipe vegan?
Try using vegan chocolate pudding, plant-based milk, and whipped coconut cream. Also, check that your Oreos and toppings are vegan-friendly. It takes a bit of tweaking, but the dirt effect comes through beautifully.
Final Thoughts
This Halloween Dirt Cups Recipe feels like a little adventure every time I make it—messy in the best way, playful, and guaranteed to draw smiles. I love how easy it is to assemble yet looks impressively festive and tastes downright dreamy with that mix of chocolate, cream, and crunchy cookie “dirt.” If you’re looking for a fun, no-fuss dessert to bring Halloween magic to your table, you really can’t go wrong here. Trust me—once you try it, you’ll keep coming back for more!
Print
Halloween Dirt Cups Recipe
- Prep Time: 30 minutes
- Cook Time: 0 minutes
- Total Time: 30 minutes
- Yield: 18 servings
- Category: Dessert
- Method: No-Cook
- Cuisine: American
- Diet: Vegetarian
Description
Halloween Dirt Cups are a fun and spooky no-bake dessert perfect for Halloween parties. Layers of crushed Oreo cookies resemble dirt, combined with creamy chocolate pudding and whipped topping, decorated with festive Halloween candies for a playful treat.
Ingredients
Base Ingredients
- 2 (19 ounce) family size packages of Oreos
- 4 cups milk
- 2 (3 ounce) packages instant chocolate pudding mix
- 16 ounces frozen whipped topping, thawed
- 1 cup chocolate syrup, divided
Decorations
- Milano cookies
- Black decorator icing
- Ghost Peeps
- Pumpkin candies
- Halloween sprinkles
Instructions
- Prepare the pudding: In a large bowl, whisk together the instant chocolate pudding mix and 4 cups of milk for 2-3 minutes until combined. Let the mixture stand for 5 minutes to thicken, then gently fold in the thawed whipped topping until evenly incorporated.
- Add chocolate syrup to pudding: Pour ½ cup of chocolate syrup into the pudding mixture and stir a few times until you see streaks of syrup throughout. Cover the pudding and chill it in the refrigerator until ready to assemble.
- Make cookie dirt: Place Oreo cookies in a food processor or blender and pulse until they become a fine crumb resembling dirt. You may need to do this in batches. Transfer the crumbs to a large bowl.
- Layer the cups: Using about 9-ounce dessert cups, start by adding a small layer (about 2 tablespoons) of Oreo cookie crumbs to the bottom. Next, spoon in about ¼ cup of the pudding mixture. Repeat the layering with more cookie crumbs and pudding. Finish with 1 tablespoon of cookie crumbs on top to mimic dirt.
- Prepare clumpy topping: Combine the remaining ½ cup of chocolate syrup with the leftover cookie crumbs and stir until clumpy and moist. Set aside for decorating.
- Decorate the cups: Use black decorator icing to write “RIP” on Milano cookies and place them in some cups. Add ghost-shaped Peeps to other cups. Top all cups with the clumpy cookie crumb mixture to resemble freshly dug graves. Sprinkle mini pumpkin candies and Halloween sprinkles over the top.
- Serve or store: Serve the dirt cups immediately or refrigerate until serving time. If storing, wait to add cookie and candy toppings until just before serving to prevent sogginess.
Notes
- Use disposable 9-ounce plastic cups or similar-sized mason jars for serving.
- Prepare up to one day in advance, but avoid making them earlier to prevent the Oreo layers from becoming soggy.
- Store leftovers covered in the refrigerator; add fresh crushed Oreos on top before serving again if needed.
Nutrition
- Serving Size: 1 cup (about one dessert cup)
- Calories: 310
- Sugar: 29g
- Sodium: 180mg
- Fat: 15g
- Saturated Fat: 8g
- Unsaturated Fat: 5g
- Trans Fat: 0.2g
- Carbohydrates: 38g
- Fiber: 2g
- Protein: 4g
- Cholesterol: 10mg
