
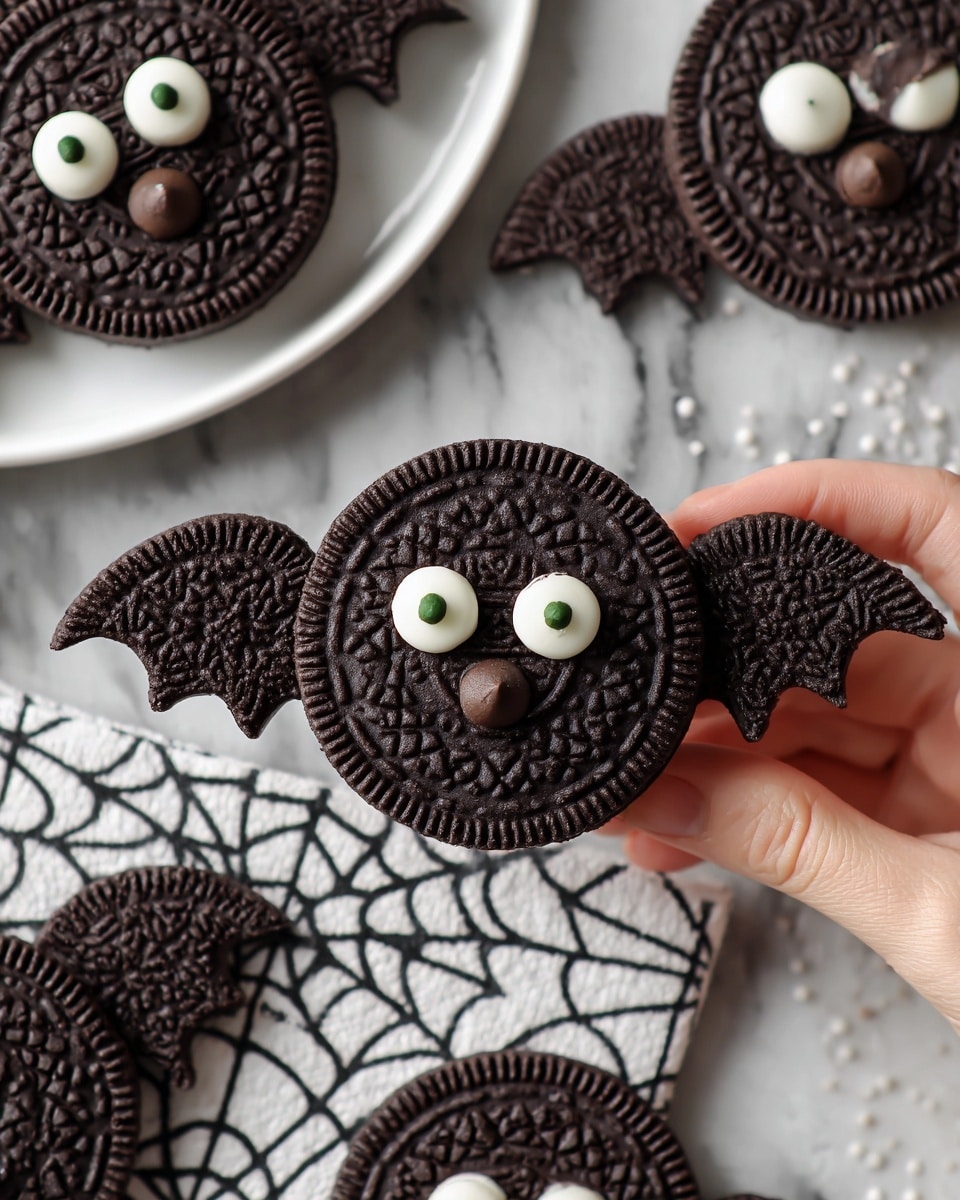
If you’re on the hunt for a fun, spooky treat that’s as easy as it is adorable, you’re in for a treat with this Halloween Oreo Bat Cookie Recipe. These little bat-shaped goodies are perfect for Halloween parties or just a festive snack to get you in the spooky spirit. I absolutely love how simple they are to put together, yet they impress everyone who sees them—especially kids who go crazy for the candy eyes and chocolate horns!
Why You’ll Love This Recipe
- Super Simple Assembly: You don’t need fancy baking skills — just some Oreos, chocolate, and candy eyes to create these spooky bats.
- Fun for All Ages: Kids and adults alike enjoy making and eating these Halloween treats, making it a fantastic group activity.
- Quick to Make: The whole process takes less than 40 minutes, so you can whip up a batch even last minute.
- Eye-Catching Presentation: Those cute candy eyes and chocolate horns really make these Oreo bats stand out on any dessert table.

Ingredients You’ll Need
For this Halloween Oreo Bat Cookie Recipe, the ingredients are straightforward and simple, but each plays an important role in creating that spooky bat effect. I usually find it’s best to grab Double Stuf Oreos, which give you extra cream to help attach the wings.
- Oreo cookies (Double Stuf): The classic black cookie serves as the bat’s body and wings, and the extra cream helps everything stick.
- Candy eyes: Adds character and cuteness that brings the bats to life — you can find these in most craft or baking sections around Halloween.
- Mini semisweet chocolate chips: For melting and decorating — they act like glue and create the bat’s horns and help hold the wings on.
Variations
One of the things I love about this Halloween Oreo Bat Cookie Recipe is how easy it is to customize. Whether you’re looking to switch up the flavors or work around dietary needs, there’s lots of room to get creative.
- Use different cookie flavors: Try chocolate mint Oreos or golden Oreos for a fun twist — my family once had a blast with pumpkin spice Oreos for an extra seasonal touch.
- Swap candy eyes: If you’re short on candy eyes, mini white chocolate chips with a dab of melted chocolate make great substitutes.
- Make them gluten-free: Gluten-free sandwich cookies work just as well; I tested this once with gluten-free Oreos, and the bats turned out equally delicious.
- Add edible glitter or sprinkles: For a party vibe, sprinkle some Halloween-themed glitter or orange and purple sprinkles before the chocolate sets.
How to Make Halloween Oreo Bat Cookie Recipe
Step 1: Prep Your Workspace and Oreos
Start by lining a baking sheet with parchment paper—this makes cleanup a breeze and prevents the bats from sticking. Then carefully separate 10 Oreo cookies into halves. Using a butter knife, scrape off the cream filling from these halves; these are the wings, so no cream needed here. I like to be gentle to avoid cracking the cookies but it’s okay if they have a few cracks since they’ll be stuck together later.
Step 2: Break the Remaining Oreos and Pair Wings
Take the other 20 Oreo halves — these still have cream on them and will form the bats’ bodies. Break each half in two smaller pieces for the wings. Pair these pieces up by size so each wing looks symmetrical. This is where a little hand-eye coordination comes in, but don’t stress—it’s okay if they’re a bit uneven. You’ll love how quirky each bat becomes.
Step 3: Melt the Chocolate
Set aside about ¼ cup of mini chocolate chips for decorating later. Melt the rest in a microwave-safe bowl using the defrost or low setting. Microwave in 30-second increments, stirring after each, to avoid burning. I discovered this trick after the first time I scorched my chocolate and had to start over! Smooth, melted chocolate is essential as this will act like the “glue” to assemble and decorate your bats.
Step 4: Assemble Your Oreo Bats
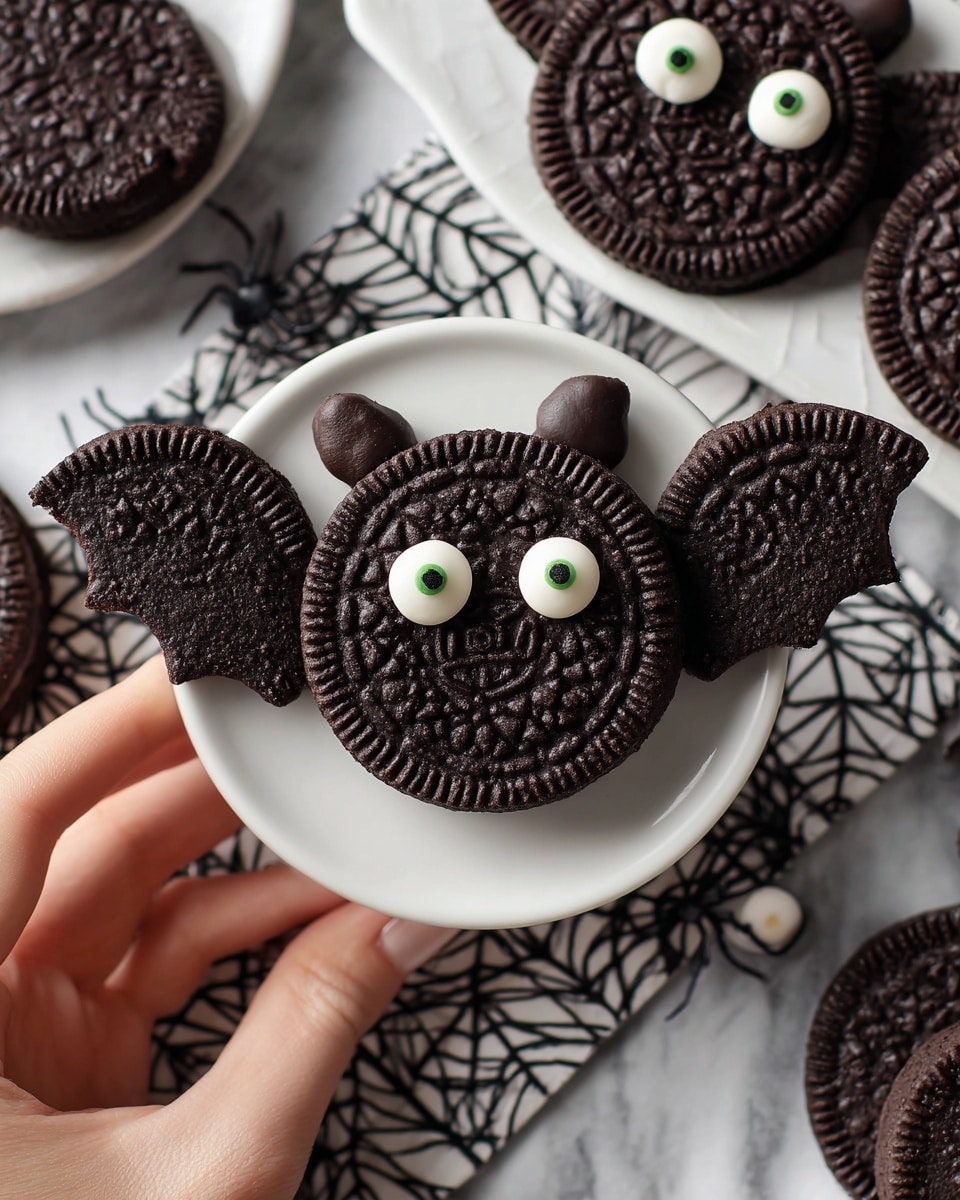
Using one clean Oreo half (with cream), dollop a small amount of melted chocolate in the center. Quickly attach two wing halves with no filling to either side, pressing gently to stick. Then top with another filled Oreo half to sandwich everything together. Place your assembled bat on the parchment-lined baking sheet. This sandwich method makes sure the wings stay in place—trust me, I tested the wing “flapping” several times to get it just right.
Step 5: Add Horns and Eyes
Grab a toothpick or skewer and use it to “paint” tiny dabs of melted chocolate near the top of the bat’s head. Stick on two mini chocolate chips here for the horns. Next, apply a little melted chocolate in the center of the bat’s face and gently press two candy eyes on top. Repeat with remaining Oreos. If you’re worried about the eyes sliding off, adding a tiny dot of melted chocolate on the back works wonders.
Step 6: Let Your Bats Set
Allow the chocolate to harden completely before serving. To speed things up, pop the tray of bats in the refrigerator. I always keep mine cold especially if I’m serving outdoors or in a warm room—nobody wants melty bats! Once set, these Halloween Oreo Bat Cookies are ready to haunt your dessert table.
Pro Tips for Making Halloween Oreo Bat Cookie Recipe
- Choose Double Stuf Oreos: The extra cream filling really helps the wings stick better and makes the bat sturdier.
- Don’t overheat your chocolate: Stir frequently and melt in short bursts so the chips don’t burn and go grainy.
- Work quickly when assembling: Melted chocolate sets fast, so have all your pieces ready before you start gluing bats together.
- Keep bats refrigerated: This avoids melting, especially if your kitchen is warm or humid.
How to Serve Halloween Oreo Bat Cookie Recipe
Garnishes
For garnishes, I like to dust the serving platter with a little powdered sugar “moonlight” effect—it makes the black bats pop visually. You can also sprinkle on some orange and black Halloween sprinkles or edible glitter for extra festive vibes. If you’re feeling playful, a few fake spider rings nestled nearby add to the spooky decor.
Side Dishes
These Oreo bats pair wonderfully with a tall glass of cold milk or a warm cup of hot cocoa—perfect for chilly October nights. For party spreads, place them next to pumpkin-shaped sugar cookies or mini candy corn cups for more Halloween flair. My friends rave about how the bites balance sweet, crunchy, and creamy all at once.
Creative Ways to Present
I once arranged these Oreo bats on a black plate lined with orange tissue paper, positioning them in a spiral to mimic a swirling bat vortex—everyone loved the spooky theme! Another fun idea is to display them on mini cupcake liners decorated like spider webs or pumpkins. For kids’ parties, I’ve even made bat-shaped “fingers” by stacking Oreos on sticks wrapped in ribbon for easy grabbing.
Make Ahead and Storage
Storing Leftovers
I store leftover Oreo bats in an airtight container in the fridge. This keeps them fresh and stops the chocolate from melting or the cookies from getting soft. They stay delicious for up to 5 days, so feel free to make a batch ahead for your Halloween bash.
Freezing
Freezing these little guys is totally possible but I recommend placing them in a single layer on a baking sheet first so the chocolate hardens without smushing them. Once firm, transfer to a sealed freezer bag or container. When you’re ready to eat, thaw them in the fridge to avoid condensation on the chocolate.
Reheating
Since these are no-bake, reheating isn’t necessary. If your chocolate has softened, just chill them again in the refrigerator for 10-15 minutes and they’ll firm right back up.
FAQs
-
Can I use regular Oreos instead of Double Stuf for this recipe?
Absolutely! Regular Oreos work just fine, but since they have less cream filling, you might want to add a little frosting or some melted chocolate to help secure the wings better. Double Stuf just gives a sturdier hold and a creamier bite.
-
What’s the best way to melt the chocolate chips for the Oreo bats?
I prefer microwaving on a low setting in short intervals—about 30 seconds at a time—stirring between each. This method prevents the chocolate from burning and keeps it smooth for easy assembly. Alternatively, a double boiler works just as well if you want to be extra careful.
-
How long do I need to chill the Oreo bats for the chocolate to set?
Usually, about 10 to 15 minutes in the refrigerator does the trick. If you’re in a hurry, placing them in the fridge until the chocolate feels firm to the touch will ensure they hold together nicely.
-
Can I make this Halloween Oreo Bat Cookie Recipe ahead of time?
Yes! These Oreo bats keep well when stored in the fridge for several days, so you can prepare them a day or two ahead. Just keep them covered tightly to maintain freshness.
Final Thoughts
This Halloween Oreo Bat Cookie Recipe is one of my absolute favorite festive treats to whip up because it’s so simple yet packs a lot of visual punch—and trust me, you’ll get compliments. It’s perfect if you’re looking for a low-fuss recipe that still feels special and seasonal. If you give it a try, let me know how your bats turn out—and be ready for some happy, spooky snacking!
Print
Halloween Oreo Bat Cookie Recipe
- Prep Time: 30 minutes
- Cook Time: 0 minutes
- Total Time: 40 minutes
- Yield: 20 Oreo bats
- Category: Dessert
- Method: No-Cook
- Cuisine: American
Description
Create spooky and delicious Halloween Oreo Bat Cookies perfect for a festive treat. These easy no-bake cookies combine Double Stuf Oreos, candy eyes, and melted chocolate chips to form adorable bat shapes that are perfect for Halloween parties or a fun family baking activity.
Ingredients
Cookies
- 30 Oreo cookies, Double Stuf
Decoration
- 40 candy eyes
- ¾ cup mini semisweet chocolate chips
Instructions
- Prepare baking sheet: Line a baking sheet with parchment paper to place your assembled bat cookies later.
- Separate Oreo halves: Carefully separate 10 Oreo cookies to get 20 halves and gently scrape off the cream with a butter knife. These creamless halves will be used as the bat wings.
- Break wings: Break the 20 remaining Oreo halves without cream in half to create smaller wing pieces and pair them up by similar sizes.
- Melt chocolate: Set aside ¼ cup of the mini semisweet chocolate chips for decorating. Melt the remaining ½ cup in a microwave-safe bowl using the defrost or low setting. Heat in 30-second intervals, stirring well between each, until smooth and fully melted.
- Assemble bats: Attach the bat wings to one half of an Oreo cookie that still has cream on it by adding a small dollop of melted chocolate in the center to act as glue. Top with another Oreo half to sandwich the wings in place. Place the assembled bats on the lined baking tray.
- Create horns: Use a toothpick or skewer to dab a small amount of melted chocolate near the top of each bat’s head, then press two mini chocolate chips onto it to craft the bat’s horns.
- Add eyes: Dab more melted chocolate in the center of the bat’s face and stick two candy eyes onto the melted chocolate for the bat’s eyes.
- Set chocolate: Allow the chocolate to set completely at room temperature, or speed up the process by refrigerating the Oreo bats until firm.
Notes
- You can melt the chocolate chips using a double boiler or microwave; stir frequently to avoid scorching.
- Using Double Stuf or Mega Stuf Oreos with extra cream helps hold the bat wings better. If using regular Oreos, add frosting or melted chocolate to the filling for better adhesion.
- Keep assembled bats refrigerated to set the chocolate faster and maintain shape, especially in warm environments.
Nutrition
- Serving Size: 1 Oreo bat
- Calories: 110
- Sugar: 9g
- Sodium: 90mg
- Fat: 6g
- Saturated Fat: 3g
- Unsaturated Fat: 2g
- Trans Fat: 0g
- Carbohydrates: 14g
- Fiber: 1g
- Protein: 1g
- Cholesterol: 2mg


