
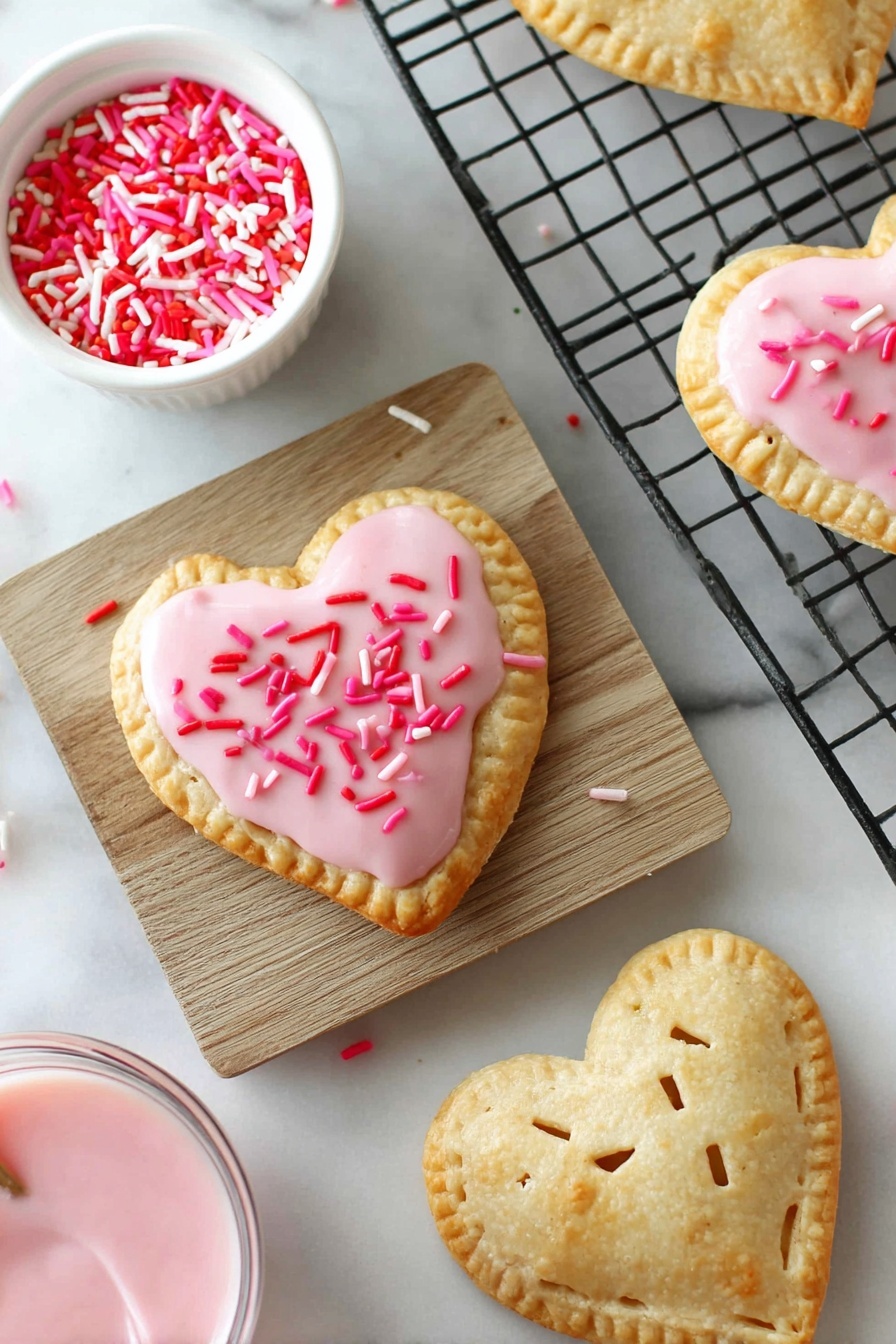
If you’re after a nostalgic treat that’s bursting with sweet berry flavor and flaky pastry, you’re in for a real delight with this Homemade Strawberry Pop Tarts Recipe. I absolutely love how these little heart-shaped treats come together quickly but deliver such a warm, handmade charm that you just can’t get from store-bought ones. Whether you’re making breakfast for the kids or a fun snack for friends, these pop tarts are guaranteed to make your kitchen smell amazing — and will have everyone coming back for seconds. Ready to dive in? Let’s get started!
Why You’ll Love This Recipe
- Simplicity: Uses premade pie crust, so you can whip it up fast even on a busy morning.
- Nostalgic sweetness: The strawberry jam filling is just the right balance of sweet and tart for that classic pop tart vibe.
- Fun to personalize: The heart shapes and colorful sprinkles make it perfect for sharing or special occasions.
- Great for beginners: Minimal ingredients, straightforward steps, and a foolproof result you’ll be proud of.

Ingredients You’ll Need
These ingredients come together effortlessly — premade pie crust makes a flaky base without fuss, and strawberry jam brings that classic flavor you’re craving. I recommend checking your jam’s sweetness level; if it’s super sweet, adjust your icing or sprinkles accordingly for balance.
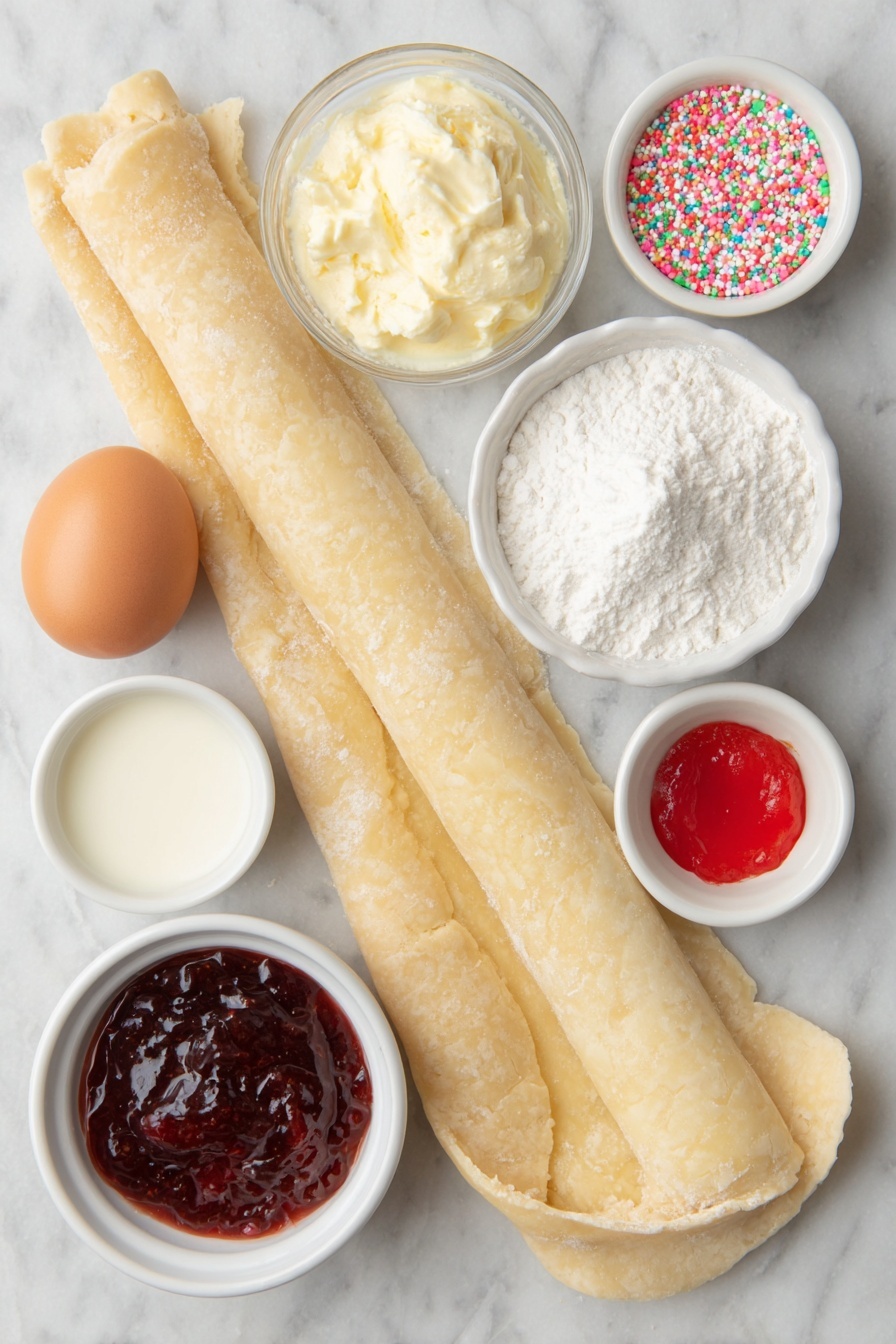
- Refrigerated Premade Pie Crusts: Bringing convenience without compromising flaky texture—make sure they’re fully thawed to avoid cracks.
- Strawberry Jam: Use your favorite brand or homemade jam for a fresh, fruity burst inside.
- Egg: For that golden egg wash, giving your pop tarts a beautiful sheen and sealing them perfectly.
- Confectioners Sugar: Key for smooth, sweet icing that complements the jam.
- Milk: Thins the icing to just the right consistency—whole milk adds richness, but any kind works.
- Vanilla Extract: Adds warmth and depth to the icing flavor.
- Red Food Coloring: Just a drop for that pretty pink hue in your glaze—optional but makes them pop.
- Sprinkles: Pink and red sprinkles add festive fun and a bit of crunch on top.
Variations
I love experimenting after I’ve nailed the basics — it’s easy to switch up flavors or cater to different dietary needs, and you can make this recipe your own with just a few tweaks.
- Flavor swaps: I’ve tried blueberry jam and even apricot, and they worked beautifully—feel free to use whatever jam your heart desires.
- Shape fun: Besides hearts, using stars or circles is great, especially if you have kiddos who want to help cut the dough.
- Gluten-free option: Using gluten-free premade pie crust works well; just watch your bake time as it may vary slightly.
- Vegan modification: Replace the egg wash with a little almond milk or melted coconut oil for a lovely golden finish.
How to Make Homemade Strawberry Pop Tarts Recipe
Step 1: Prep Your Oven and Work Surface
Start by preheating your oven to 400°F — it’s ready in no time and gives your pop tarts that perfect golden crust. While it heats up, unroll your pie crust on a clean surface sprinkled with a little flour or place a silicone baking mat or parchment on the counter for easy cleanup. Keeping the dough at room temperature helps prevent cracking when cutting shapes, so if it’s coming straight from the fridge, let it sit for a few minutes.
Step 2: Cut Hearts and Fill Them with Jam
Using a heart-shaped cookie cutter (about 3 to 4 inches wide works great), cut as many hearts as possible from your rolled pie crust. Don’t worry if you have little scraps; you can knead those back together and roll out again for more shapes. Place half of the hearts on a parchment-lined cookie sheet. Then, spoon about one tablespoon of strawberry jam into the center of each heart. I’ve found that no need to spread it perfectly — the jam evens out during baking, so just dollop it gently.
Step 3: Seal Your Pop Tarts
Beat one egg in a small bowl to make your egg wash. Carefully brush the edges around the jam-filled hearts—that’s the secret to a perfect seal. Then place another heart on top and press down gently with your fingers to stick the edges together. Use a fork to crimp around the border, which not only seals well but adds a cute decorative touch.
Step 4: Vent and Glaze Before Baking
With your fork, poke a few small holes into the centers of the top crusts to let steam escape while baking. This keeps the pastry flaky and prevents sogginess. Then, give the tops a brush with egg wash for that irresistible glossy golden finish. Slide your tray into the oven and bake for about 10 to 12 minutes — watch for that beautiful golden hue that tells you they’re done!
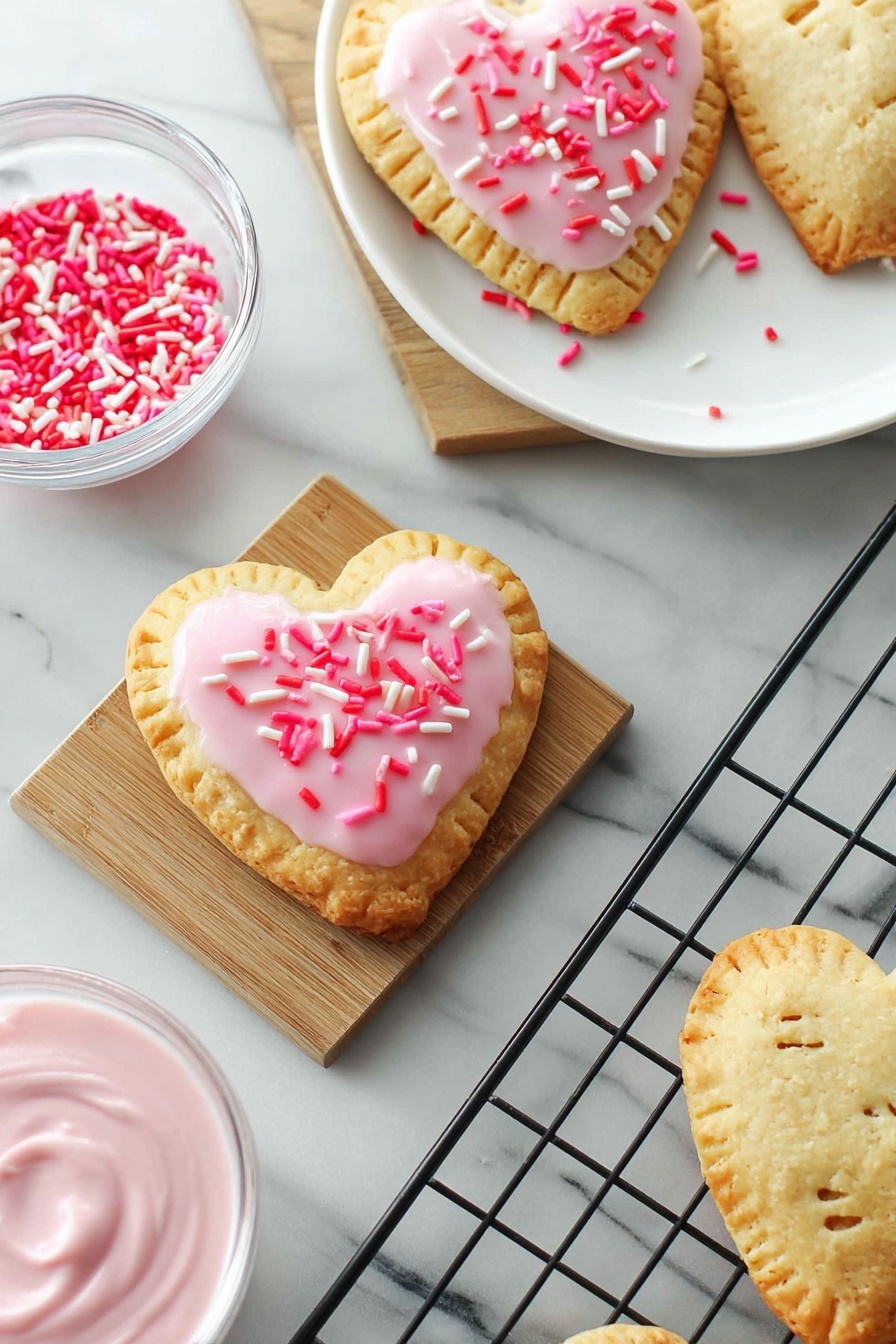
Step 5: Cool and Add Icing
Once baked, transfer the pop tarts to a wire rack so they can cool and set properly. While they cool, whisk together the confectioners sugar, milk, and vanilla until smooth. Add just one drop of red food coloring to keep it delicate and not overpowering. Spread the icing over the cooled pop tarts with the back of a spoon or small spatula, then sprinkle on your red and pink sprinkles for that extra pop of festive fun.
Pro Tips for Making Homemade Strawberry Pop Tarts Recipe
- Use Room Temperature Dough: I learned that letting the dough warm up a bit makes cutting and sealing much smoother, preventing cracks during baking.
- Don’t Overfill with Jam: Too much jam can ooze out and make the pastry soggy, so stick to about one tablespoon per tart for best results.
- Crimp Carefully: Press edges firmly with a fork to seal really well — this keeps the jam snug inside and stops leaks in the oven.
- Cool Before Icing: Always let your pop tarts cool completely on a rack before icing; otherwise, the glaze melts and runs off instead of setting nicely.
How to Serve Homemade Strawberry Pop Tarts Recipe
Garnishes
I love topping mine with festive red and pink sprinkles, especially around Valentine’s Day. You could also try tiny edible flowers or a dusting of powdered sugar for a more elegant touch. The icing adds sweetness, but the crunchy sprinkles give that fun texture contrast I adore.
Side Dishes
Pair your pop tarts with fresh berries or a simple yogurt parfait for a balanced breakfast. A cup of hot coffee or tea balances the sweetness nicely, or even a cold glass of milk for the kids. My family sometimes enjoys them alongside scrambled eggs or bacon for a more hearty brunch.
Creative Ways to Present
For birthdays or special gatherings, I arrange these pop tarts on a pretty platter with colorful napkins and fresh strawberry halves scattered around. Another fun idea is stacking them with layers of whipped cream and jam between for a playful “pop tart cake” that’s sure to wow your guests!
Make Ahead and Storage
Storing Leftovers
I store leftover pop tarts in an airtight container at room temperature, and they stay fresh for about 2 days. If you want them a little softer the next day, a quick 10-second zap in the microwave brings back that fresh-baked warmth nicely.
Freezing
These pop tarts freeze really well — just cool completely, then wrap each one individually in plastic wrap and pop them in a freezer bag. When you want to enjoy, thaw them at room temperature or heat briefly in the toaster oven for that fresh-baked feel anytime.
Reheating
I usually reheat my pop tarts in a toaster oven or conventional oven at 350°F for about 5 minutes until warm and crisp. Avoid microwaving too long or they get soggy. This way, you get that fresh, flaky crust with melty jam inside every time.
FAQs
-
Can I use homemade pie crust for this recipe?
Absolutely! Homemade pie crust adds a lovely personal touch and can taste even better, but using premade dough saves time and is just as delicious. If you use homemade, roll it out to about 1/8 inch thickness and chill slightly before cutting for easier handling.
-
How do I prevent the pop tarts from getting soggy?
Be careful not to overfill with jam, seal the edges well with egg wash, and poke vent holes in the top crust to help steam escape while baking—these steps keep your pop tarts flaky and prevent sogginess.
-
Can I make these ahead of time?
Yes, you can prepare and bake them ahead, then store at room temperature in an airtight container for up to 2 days. For longer storage, freeze them individually and reheat when ready to serve.
-
What can I use instead of red food coloring?
If you prefer natural options, a tiny bit of beet juice or strawberry puree can add a lovely pinkish hue to your icing. Just use sparingly to avoid changing the icing’s consistency.
Final Thoughts
This Homemade Strawberry Pop Tarts Recipe is one of those comforting little joy-makers I find myself coming back to again and again. It’s quick enough for weekday breakfasts but charming and delightful enough for special mornings. I love sharing them with family and friends because they’re simple, fun, and undeniably delicious — and I know you’ll enjoy making them as much as eating them. Trust me, once you’ve tasted these fresh, flaky, berry-packed treats, store-bought pop tarts just won’t compare. Give it a try, and watch those smiles grow!
Print
Homemade Strawberry Pop Tarts Recipe
- Prep Time: 15 minutes
- Cook Time: 10-12 minutes
- Total Time: 27-30 minutes
- Yield: 10 pop tarts
- Category: Breakfast
- Method: Baking
- Cuisine: American
Description
This homemade pop tarts recipe offers a delightful twist on the classic breakfast treat, featuring flaky premade pie crusts filled with sweet strawberry jam, and topped with a smooth, colorful icing and festive sprinkles. Perfect for a fun and easy-to-make breakfast or snack that anyone can enjoy.
Ingredients
Pop Tarts
- 2 Refrigerated Premade Pie Crusts (at room temperature)
- Strawberry Jam (about 10 tablespoons)
- 1 Egg (for egg wash)
Icing
- 1/2 Cup Confectioners Sugar
- 2 Tbsp Milk
- 1/2 Tsp Vanilla Extract
- 1 Drop Red Food Coloring
- Red and Pink Sprinkles (for topping)
Instructions
- Preheat Oven: Preheat your oven to 400°F to prepare for baking the pop tarts.
- Prepare Pie Crust: On a baker’s mat, parchment paper, or a floured counter, unroll the premade pie crusts carefully without tearing.
- Cut Shapes: Use a heart-shaped cookie cutter to cut out hearts from the pie crust. Place them onto a parchment-lined cookie sheet. Rotate the cutter to maximize the number of hearts you can cut. Knead leftover dough, roll again to about 1/8 inch thick, and cut additional hearts.
- Add Filling: Spoon about one tablespoon of strawberry jam into the center of half of the heart-shaped dough pieces. The jam does not need to be spread evenly; it will distribute during baking.
- Egg Wash: Beat the egg in a small bowl to create the egg wash. Brush the inside edges of the hearts with the egg wash to help them seal.
- Seal Pop Tarts: Place a plain heart-shaped dough piece on top of the jam-topped ones. Seal the edges together by pressing with your finger, then crimp with a fork all around.
- Vent and Brush: Use a fork to poke a few holes in the top crust of each pop tart to release steam while baking. Brush the tops with the remaining egg wash for a golden finish.
- Bake: Bake the pop tarts at 400°F for 10-12 minutes or until golden brown and flaky.
- Cool: Transfer the baked pop tarts to a wire rack and allow to cool completely before icing.
- Make Icing: In a bowl, whisk together confectioners sugar, milk, and vanilla extract until smooth. Add one drop of red food coloring and mix until evenly tinted.
- Ice and Decorate: Spoon the icing over the cooled pop tarts and smooth using the back of the spoon or a small spatula. Decorate with red and pink sprinkles as desired.
Notes
- Make sure pie crusts are at room temperature to prevent cracking when rolling and cutting.
- Use a light hand with the jam filling to avoid leakage during baking.
- Egg wash not only helps seal the edges but gives a beautiful golden shine.
- Allow pop tarts to cool thoroughly before icing to prevent melting.
- Customize fillings and colors of icing and sprinkles for seasonal or personal preferences.
Nutrition
- Serving Size: 1 pop tart
- Calories: 220
- Sugar: 12g
- Sodium: 180mg
- Fat: 11g
- Saturated Fat: 3g
- Unsaturated Fat: 7g
- Trans Fat: 0g
- Carbohydrates: 28g
- Fiber: 1g
- Protein: 3g
- Cholesterol: 35mg
