
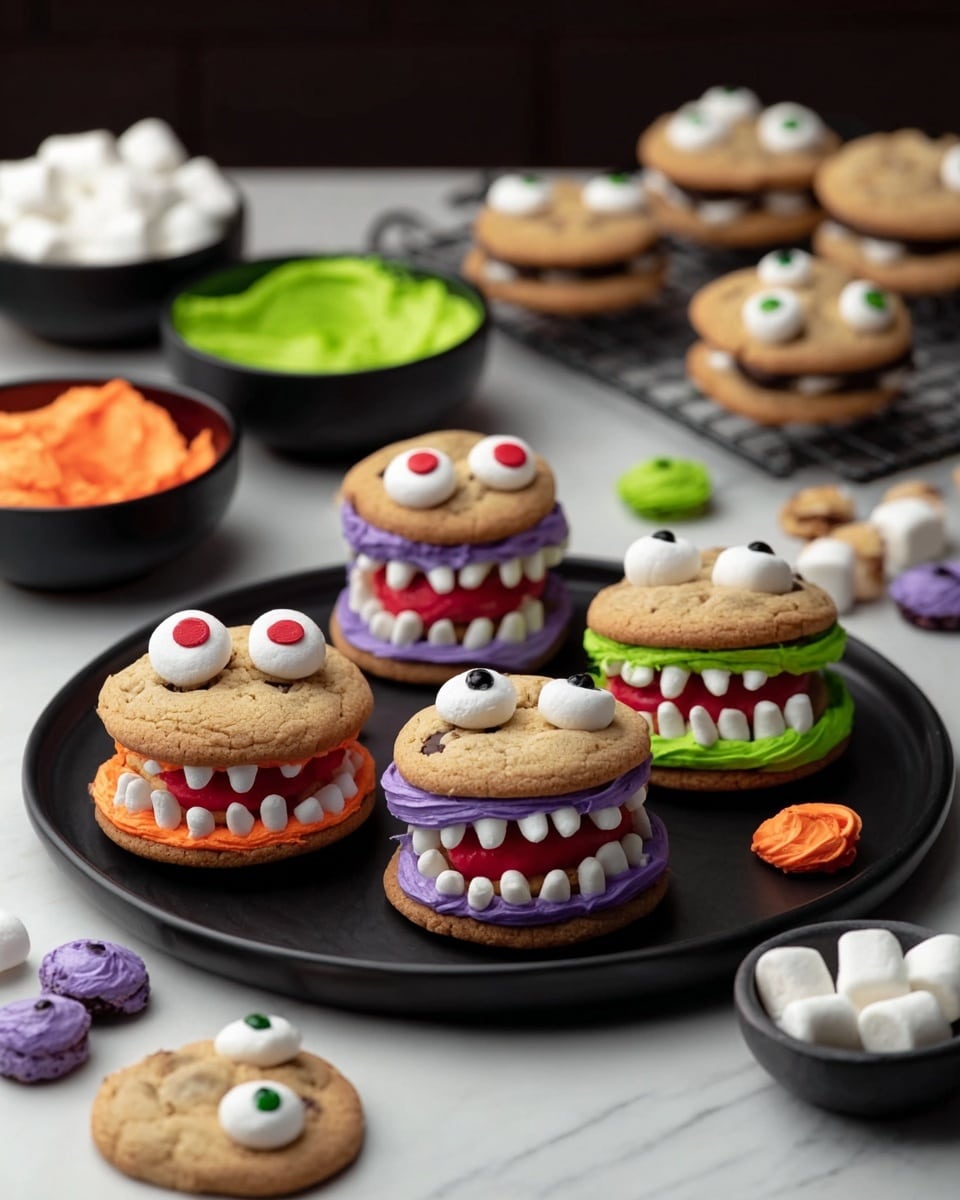
If you’re on the hunt for a cookie recipe that’s not just tasty but downright fun to make, you’ve got to try this Munching Monster Cookies Recipe. I stumbled upon this gem a while back, and honestly, it’s become a go-to for everything from Halloween parties to casual afternoons with the kids. You get these soft, chocolate chip cookie sandwiches, slathered with vibrant, colorful frosting, topped with marshmallow teeth and gummy eyeballs—yes, eyeballs! It’s playful, delicious, and trust me, everyone will be asking for seconds (or thirds!). So let me walk you through exactly how to nail these monsters in your own kitchen.
Why You’ll Love This Recipe
- Fun for All Ages: The vibrant colors and silly monster designs make baking a blast for kids and adults alike.
- Simple and Quick to Make: Using a cookie mix and ready-made frosting means less fuss but all the flavor.
- Customizable Creativity: You can easily swap colors or candy types to fit your party theme or mood.
- Perfect Party Treat: These cookies are showstoppers at gatherings and always get everyone talking (and munching!).

Ingredients You’ll Need
The ingredients come together with a bit of whimsy but are surprisingly straightforward. I love that it starts with a trustworthy cookie mix, making it easy for anyone to whip these up without needing to be a baking expert. Plus, the gel food colors really bring the monster faces to life, so don’t skimp on those—they make a huge difference!
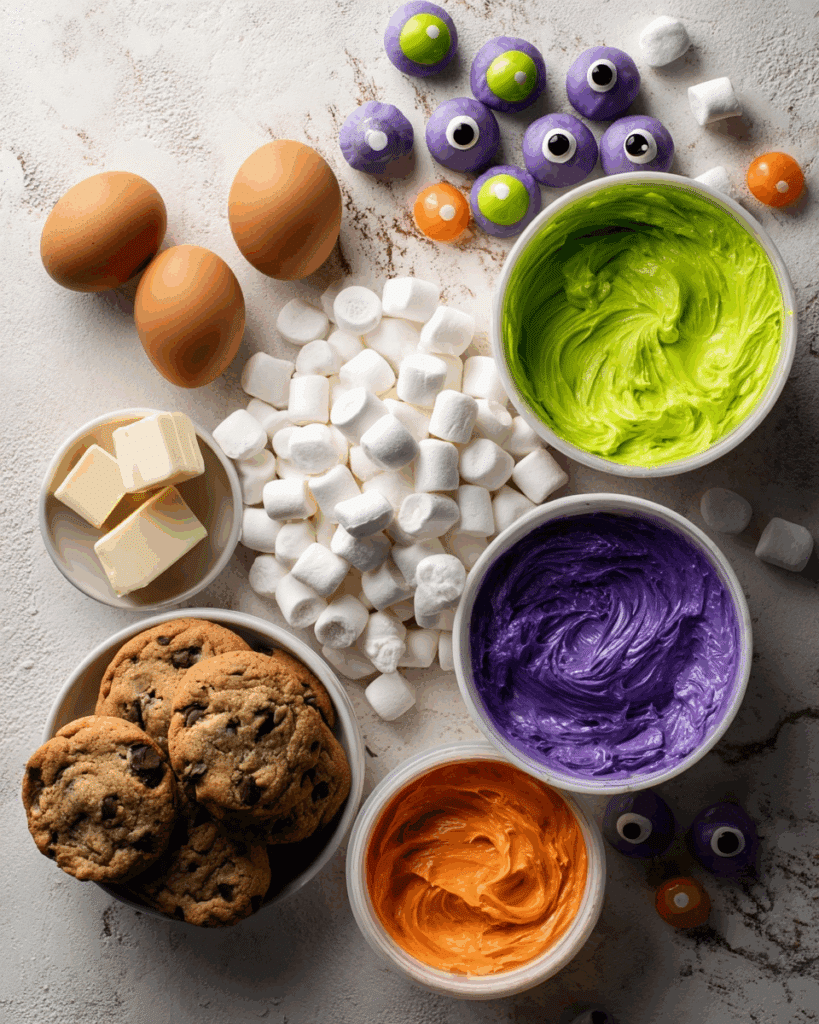
- Betty Crocker™ Chocolate Chip Cookie Mix: A classic base that guarantees soft, chewy cookies every time.
- Butter and eggs: Use the exact amounts called for on the cookie mix pouch for perfect texture.
- Betty Crocker™ Rich & Creamy Vanilla Frosting: Its creamy texture is perfect for sticking your mini marshmallow teeth and gummy eyeballs in place.
- Gel food colors (purple, green, and orange): These neon colors add that monster vibe—grab the neon gels for the brightest result.
- Miniature marshmallows: Little “teeth” and noses that add that fun monster detail.
- Dallies™ gummy eyeballs: These are the star of the show—don’t skip the eyeballs, they make these cookies come alive.
Variations
One of the best parts about this Munching Monster Cookies Recipe is how easy it is to tweak. I like to play around with the colors and candies depending on the season or party vibe. The frosting colors don’t have to be limited to the classic purple, green, and orange—you can go wild with pink or blue too. If you want to make these a little healthier, I’ve tried swapping out mini marshmallows for dried fruit bits with fun shapes.
- Frosting Colors: I experimented once with pastel shades for a springtime monster theme, and it was a hit with the kids.
- Candy Substitutions: Instead of gummy eyeballs, small chocolate chips or candy-coated chocolates work well if you can’t find the real things.
- Gluten-Free Version: Swap the cookie mix for a gluten-free variety and double-check your add-ins to keep it safe for everyone.
How to Make Munching Monster Cookies Recipe
Step 1: Bake Your Cookies Just Right
First things first: heat your oven to 375°F. Then follow the directions on your Betty Crocker™ Chocolate Chip Cookie Mix pouch to make regular-sized cookies. I always find using a cookie scoop helps keep them uniform in size, which makes the “monster sandwich” look much tidier. After baking, it’s super important to let your cookies cool completely, about 15 minutes. I learned the hard way that frosting warm cookies makes everything melt and slide off, and the monsters end up looking sad—no thanks!
Step 2: Color Your Frosting to Bring Monsters to Life
While the cookies cool, divide your vanilla frosting into three bowls, about 3/4 cup each. Add roughly 1/4 teaspoon of gel food color to each bowl—purple, green, and orange work best for that classic monster vibe. Stir well until the colors are vibrant and consistent. I like to put a dab of each color on a white plate to see how bright they are and adjust if needed. This step is where your monsters really start showing their personalities!
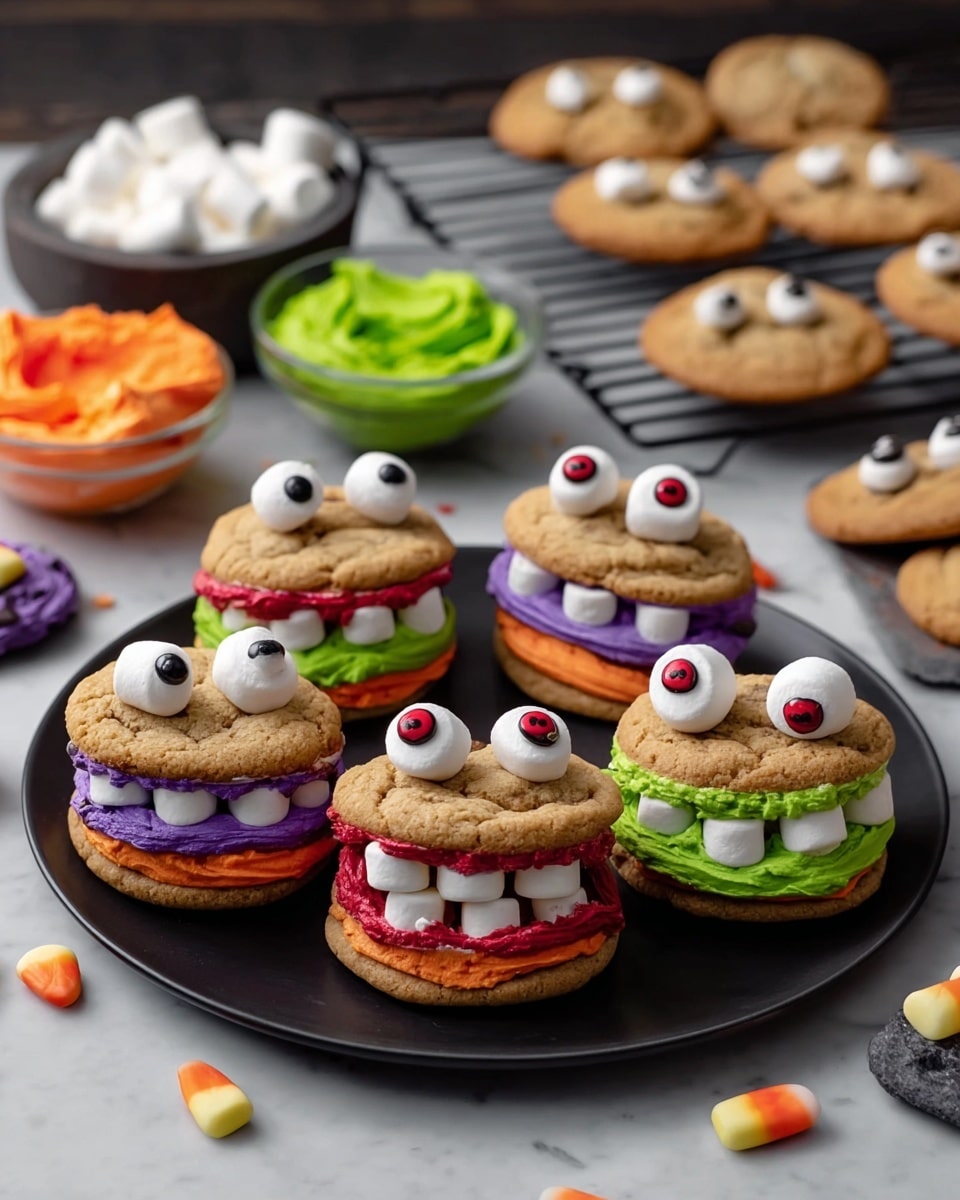
Step 3: Make The Monster Sandwiches with Teeth!
Grab two cookies, and frost the bottom of both with the same color frosting. Choose one to be the base and gently press about 6 mini marshmallows along the edge for teeth. Then place the second cookie on top, frosting side down, to create your yummy monster mouth. This part is so fun because you can make each monster’s teeth as goofy or fierce as you like. Just be gentle so your cookies don’t crack or crumble—if that happens, a little extra frosting can patch things up.
Step 4: Decorate Your Monsters with Eyes and a Nose
Spread a different frosting color on the top of your sandwich cookie, and then get ready to add those all-important finishing touches: gummy eyeballs and a mini marshmallow nose. I always set out a toothpick to help place the eyeballs just right, especially with little helpers around. Repeat this for each cookie, experimenting with different eye placements for goofy or scary expressions. It’s almost like painting faces, but way yummier!
Pro Tips for Making Munching Monster Cookies Recipe
- Cool Completely Before Frosting: I can’t stress this enough—warm cookies make frosting slide off so cool them fully.
- Use a Cookie Scoop: This keeps your cookies even in size so sandwiching them is easier and visually neat.
- Gel Food Colors for Bright Impact: I’ve tried liquid colors before, and gel always gives brighter, truer colors without thinning your frosting.
- Keep Gummy Eyes Fresh: Store eyeballs in a cool, dry place to avoid stickiness and ensure they maintain their cute shape.
How to Serve Munching Monster Cookies Recipe
Garnishes
I usually dust a light sprinkle of colored sugar around the serving plate to amp up the fun factor. Sometimes adding a few extra mini marshmallows or candy corn around the cookies ties in the Halloween or monster theme perfectly. A drizzle of chocolate syrup on the plate adds a little “monster slime” effect, which always makes the kids giggle.
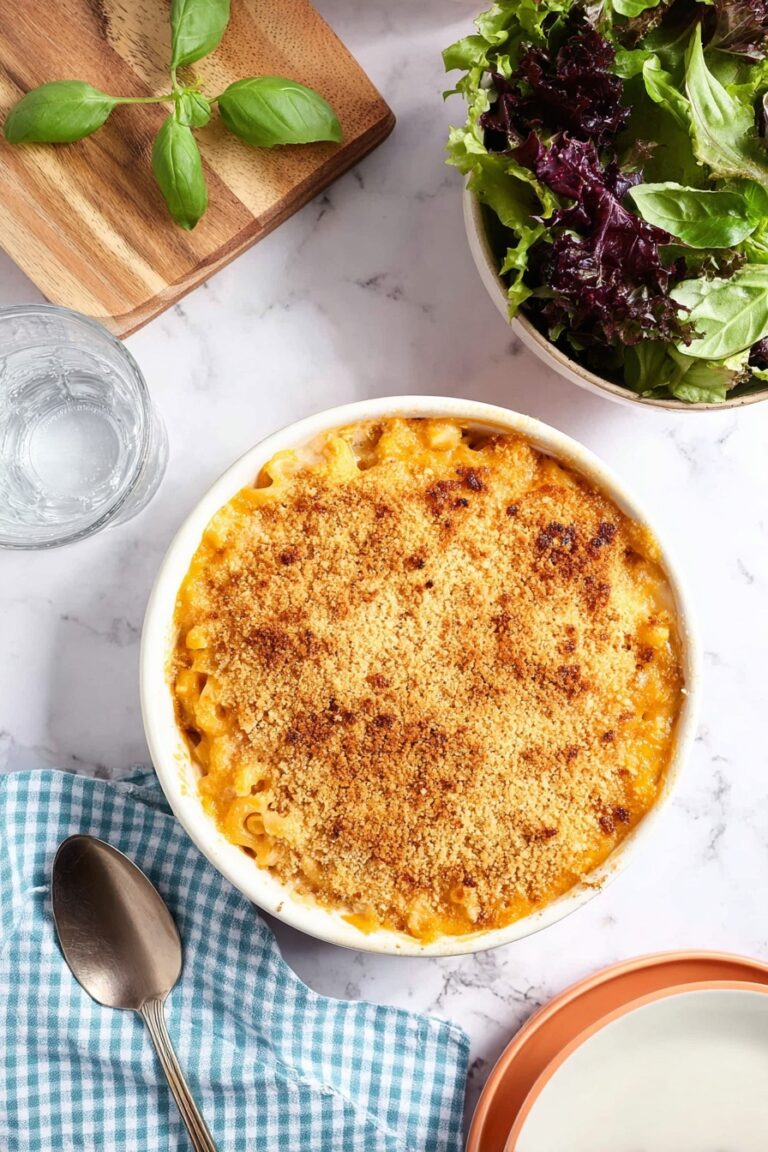
Side Dishes
These cookies are sweet and filling, so I like to pair them with something simple like a tall glass of cold milk or a pumpkin-spiced latte when it’s chilly out. At parties, I’ve served them alongside fruit skewers or veggie trays to balance out the sugar rush with something fresh and crisp.
Creative Ways to Present
For Halloween, I’ve displayed these Munching Monster Cookies on a multi-tiered cake stand with fake spider webs and little plastic spiders scattered about—talk about spooky cuteness! Another idea I love is arranging them on a big platter to form a monster face using different colored cookies and candies as decoration. It’s always a hit and gets all the compliments before people even take a bite!
Make Ahead and Storage
Storing Leftovers
After baking and decorating, store leftovers in an airtight container at room temperature. I usually layer parchment paper between cookies to keep the frosting and decorations intact. They stay fresh and soft for 3-4 days if you watch out for humidity or extreme heat that can make the marshmallows soggy.
Freezing
If you want to freeze these monsters, it’s best to do so before decorating. Freeze the baked cookies in a single layer on a baking sheet, then transfer to a freezer bag. When you’re ready, thaw completely before frosting and decorating so the frosting sticks beautifully. I’ve found freezing after decoration can squish and ruin the delicate marshmallow and gummy details.
Reheating
These cookies are best enjoyed fresh at room temperature—resist the urge to microwave as the marshmallows melt easily and lose shape. If you want a warm cookie experience, heat just the cookie halves before assembling the sandwich and decorating. I like this trick because the frosting stays cool and thick while the cookie is warm and comforting.
FAQs
-
Can I make the Munching Monster Cookies recipe completely from scratch without a mix?
Absolutely! You can use your favorite chocolate chip cookie recipe for the cookies, but this Betty Crocker™ mix really simplifies the process. Just be sure your cookies are sturdy enough to sandwich and hold the marshmallow “teeth” without crumbling.
-
What can I substitute if I can’t find gummy eyeballs?
No worries! Small chocolate chips, candy-coated chocolates, or even drawing eyes on white marshmallows with edible markers can work as fun alternatives. It’s all about your creativity and what you have on hand!
-
How do I keep the marshmallows from sticking together?
Storing marshmallows in a cool, dry spot helps, and working with them quickly when decorating is key. If you find they’re getting sticky, lightly dust your fingers with powdered sugar to separate them cleanly.
-
Can I prepare these cookies in advance for a party?
Yes! Bake the cookies a day ahead and keep them airtight. I recommend decorating the day of the event to keep the marshmallows and gummy eyeballs fresh and looking their best.
Final Thoughts
I absolutely love how this Munching Monster Cookies Recipe brings out the kid in me every time I make it. The mix of textures, the pop of colors, and the goofy monster faces never fail to make people smile—no matter their age! Whether you’re planning a themed party or just want a whimsical weekend baking project, these cookies deliver on fun and flavor. Give it a go, and I promise you’ll be the hero of your kitchen (and maybe your neighborhood!) in no time.
Print
Munching Monster Cookies Recipe
- Prep Time: 20 minutes
- Cook Time: 15 minutes
- Total Time: 60 minutes
- Yield: 18 cookies
- Category: Dessert
- Method: Baking
- Cuisine: American
Description
Munching Monster Cookies are a fun and colorful treat perfect for Halloween or any spooky-themed party. These whimsical sandwich cookies combine chocolate chip cookies with brightly colored vanilla frosting, miniature marshmallows for monster teeth, and gummy eyeballs for a playful finish. Easy to make and a hit with kids, these monsters munch their way into your dessert lineup with a burst of sweetness and creativity.
Ingredients
Cookie Mix
- 1 pouch (17.5 oz) Betty Crocker™ Chocolate Chip Cookie Mix
- Butter and egg called for on cookie mix pouch
Frosting & Decoration
- 2 1/2 cups from 2 tubs (16 oz each) Betty Crocker™ Rich & Creamy Vanilla Frosting
- Betty Crocker™ neon gel food colors (purple, green, and orange) – about 1/4 teaspoon each
- 1 1/3 cups miniature marshmallows
- 6 packages (0.71 oz each) Dallies™ gummy eyeballs (36 eyeballs total)
Instructions
- Prepare and bake cookies: Heat your oven to 375°F. Prepare the cookie dough using the Betty Crocker Chocolate Chip Cookie Mix according to the pouch instructions, using the specified butter and eggs. Drop or shape regular-size cookies on the baking sheet and bake as directed. Allow cookies to cool completely for about 15 minutes before decorating.
- Color the frosting: Divide the vanilla frosting evenly into 3 separate bowls, approximately 3/4 cup each. Mix 1/4 teaspoon of neon gel food coloring into each bowl to create three bright colors: purple, green, and orange. Stir well to combine the colors thoroughly in the frosting.
- Assemble monster teeth: Frost the bottoms of two cookies using the same colored frosting. On one cookie, press about 6 miniature marshmallows onto the frosting to serve as monster teeth. Place the second cookie on top, frosting side facing down, to form a sandwich cookie.
- Decorate the monsters: Spread a different color frosting on top of the sandwich cookie. Stick the gummy eyeballs onto the frosting to create monster eyes, and use a miniature marshmallow to form the monster’s nose. Repeat these decorating steps for all remaining cookies to complete your munching monsters.
Notes
- Cool cookies completely before frosting to prevent melting and sliding.
- Use gel food coloring sparingly to avoid frosting becoming too runny.
- Miniature marshmallows and gummy eyeballs can be found in the baking or candy aisle.
- These cookies can be stored in an airtight container at room temperature for up to 3 days.
- Consider using other colors of gel food color to customize your monsters.
Nutrition
- Serving Size: 1 cookie
- Calories: 220
- Sugar: 18g
- Sodium: 120mg
- Fat: 10g
- Saturated Fat: 5g
- Unsaturated Fat: 4g
- Trans Fat: 0g
- Carbohydrates: 29g
- Fiber: 1g
- Protein: 2g
- Cholesterol: 15mg


