

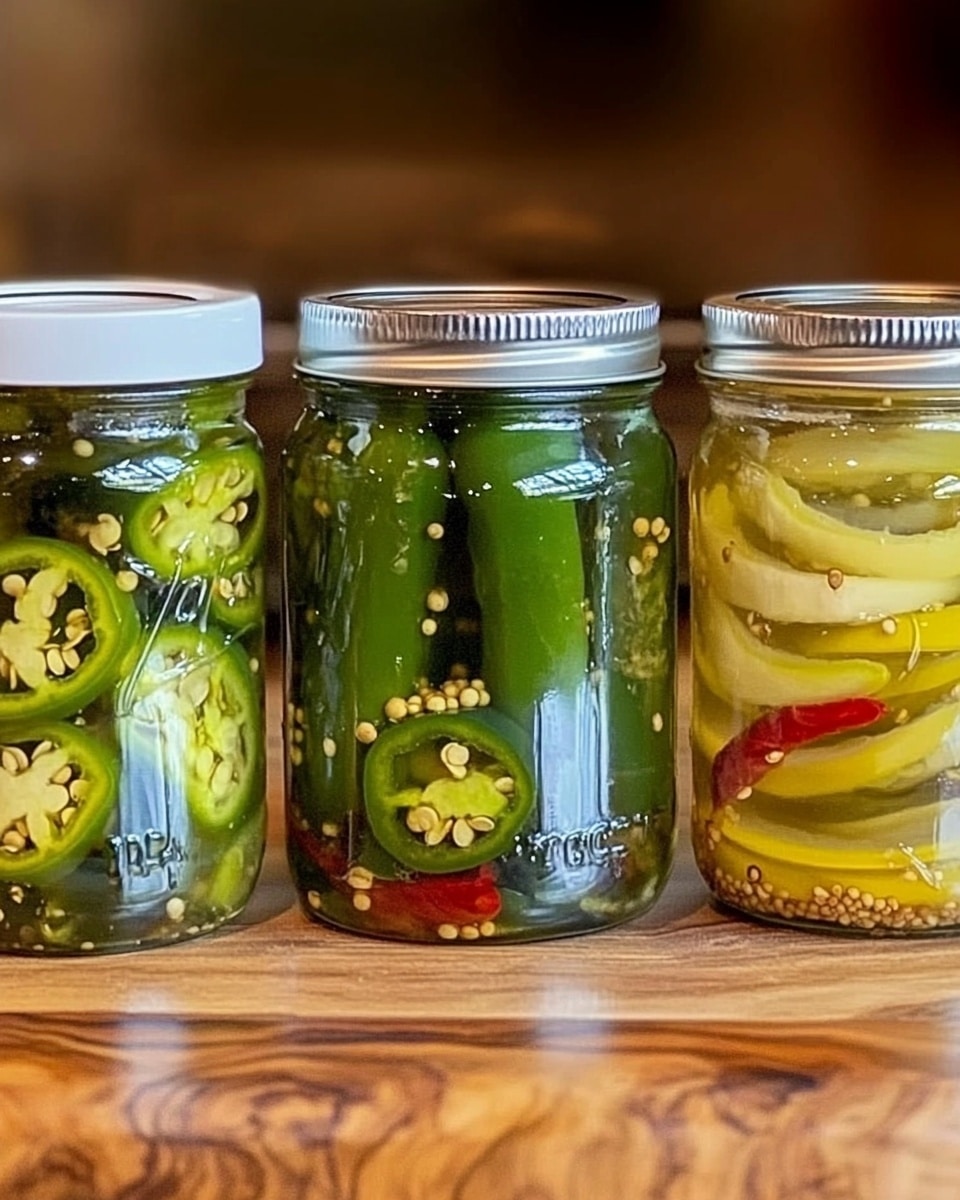
I absolutely love this Pickled Pepperoncini Peppers Recipe because it s such a simple way to elevate any meal with a tangy, spicy punch. Whether you re tossing these vibrant peppers on sandwiches, salads, or cheese boards, they bring that perfect balance of heat and acidity that keeps you coming back for more. Trust me, once you try making your own pickled pepperoncini peppers, you ll never want to buy the store-bought ones again – the freshness and flavor just can’t be beaten.
When I first tried this recipe, I was surprised by how quick and straightforward the process was, especially for something so flavorful. It works beautifully as a quick fix when you need a zesty side or a snack that packs a punch. Plus, making your own pickled pepperoncini peppers means you control the ingredients, so you can skip any unnecessary additives or preservatives. You re going to find that this recipe is both rewarding and super satisfying!
Why You’ll Love This Recipe
- Easy and Quick: You ll love how fast you can turn fresh pepperoncini into a flavorful treat without any fancy equipment.
- Customizable Flavor: This recipe is a perfect base that you can tweak to make it milder or spicier depending on your taste.
- Long-Lasting Snack: Pickled pepperoncini keep well in the fridge for weeks, giving you a ready-to-use zing whenever you want.
- Great for Any Meal: From sandwiches to salads, or even cocktails, these peppers add a vibrant flavor punch wherever you use them.

Ingredients You’ll Need
The ingredients for this pickled pepperoncini peppers recipe are straightforward but come together in a way that makes the flavors pop. I always suggest using fresh, firm peppers and good-quality vinegar to get that perfect tang.
- Pepperoncini Peppers: Fresh and crisp, these bring the mild heat and signature tang to your pickles.
- Garlic: Minced garlic adds a subtle aromatic depth without overpowering the peppers.
- Vinegar: I prefer white or apple cider vinegar for a clean, crisp brine.
- Water: Used to balance the vinegar s acidity so it isn t too harsh.
- Sugar: Just a touch to enhance flavor and mellow the sharpness.
- Kosher Salt: Essential for seasoning and making sure the brine is perfectly balanced.
- Turmeric: Offers a warm color and subtle earthiness, which I discovered really makes the peppers look beautiful.
- Ice: Adding ice cools down the brine quickly, preserving that fresh crunch.
Variations
I love encouraging you to make this recipe your own. Over time, I ve experimented with a few key tweaks that add fun twists to the classic pickled pepperoncini peppers recipe. You ll find customizing the spices or peppers to suit your preferences is part of the joy!
- Spicy Kick: I like adding a few red pepper flakes or swapping out some pepperoncini for jalapeños when I want more heat.
- Herb Infusion: Adding fresh herbs like dill or oregano can create a Mediterranean vibe that s delicious on Greek salads.
- No Sugar Version: If you want to skip sugar, a splash of honey or maple syrup works nicely or just omit it for a sharper bite.
- Different Peppers: Sometimes I use banana peppers instead of pepperoncini for a slightly sweeter note that still pickles beautifully.
How to Make Pickled Pepperoncini Peppers Recipe
Step 1: Prepare Your Peppers
Start by slicing your pepperoncini peppers into rings, discarding the stems. This is where the vibrant color and crunch come in, so use a sharp knife for clean cuts. I always recommend rinsing the peppers first if they seem dusty, then patting them dry – this helps keep the peppers crisp once pickled.
Step 2: Build the Brine
Combine vinegar, one cup of water, kosher salt, sugar, and turmeric in a saucepan over medium-high heat. Stir the mixture until the salt and sugar dissolve completely, then bring it to a gentle simmer. This simmering step is key to unlocking the flavors and blending them together perfectly.
Step 3: Add Garlic and Cool the Brine
Once your brine reaches a low simmer, take the pan off the heat and stir in the minced garlic. Then, add a cup of ice to the mixture and stir until it melts. This quick cooling step shocked me at first, but it really keeps the peppers crunchy by not cooking them too much in hot brine.
Step 4: Jar and Refrigerate
Spoon the sliced peppers into mason jars, then pour the cooled brine over them, leaving about half an inch of headspace at the top for expansion. Seal the jars tightly, allow them to come to room temperature, then pop them in the fridge. You ll want to wait at least 24 hours before diving in, but the flavors really deepen after about a week-patience pays off!
Pro Tips for Making Pickled Pepperoncini Peppers Recipe
- Use Fresh Peppers: I ve learned that fresh, firm pepperoncini give the crispiest, most vibrant pickles-avoid any that feel soft or wrinkled.
- Don t Skip the Ice: Adding ice to cool the brine quickly was a game-changer for me; it keeps the peppers crunchy and bright.
- Layer Flavors: Stirring in garlic only after removing from heat preserves its fresh, pungent flavor that complements the vinegar perfectly.
- Seal Properly: Hand-tightening lids works great for refrigerator pickles to avoid pressure buildup, keeping your peppers safe and tasty.
How to Serve Pickled Pepperoncini Peppers Recipe
Garnishes
I love to add fresh parsley or dill on top when serving pickled pepperoncini – it adds a pop of color and fresh herb aroma that complements the tangy peppers beautifully. A sprinkle of coarse sea salt just before serving can also enhance their flavor and add texture.
Side Dishes
These pickled peppers are my go-to accompaniment for grilled meats, antipasto platters, and vibrant Mediterranean salads. I ve also found they pair wonderfully with soft cheeses and crusty bread, making them ideal for casual snacking or fancy entertaining.
Creative Ways to Present
For special occasions, I like to serve pickled pepperoncini peppers in clear glass bowls surrounded by colorful olives, sliced cured meats, and cheeses-this creates an inviting and festive spread. I ve even used them as a zesty topping on mini bruschettas for cocktail parties.
Make Ahead and Storage
Storing Leftovers
I keep my leftover pickled pepperoncini peppers in the fridge in airtight jars, and they typically last about 3 to 4 weeks. Over time, the flavors intensify, which is wonderful, but I always make sure to use clean utensils when grabbing a few to avoid contamination.
Freezing
Freezing isn t ideal for pickled pepperoncini peppers since the texture tends to get mushy upon thawing. I ve tried it before and found that keeping them refrigerated is definitely the best way to maintain their crispness and flavor.
Reheating
Since these pickled peppers are best served cold or at room temperature, I don t usually reheat them. But if you want to, a quick warm-up in a small pan just to take the chill off is fine, though it softens the crunch a bit.
FAQs
-
How long do pickled pepperoncini peppers last in the fridge?
When stored properly in airtight jars, homemade pickled pepperoncini peppers typically last 3 to 4 weeks in the refrigerator. Beyond that, they might lose their crunch and flavor quality.
-
Can I use banana peppers instead of pepperoncini?
Absolutely! Banana peppers are actually a fantastic substitute that offer a slightly sweeter flavor while still holding up well to pickling. Many people prefer them for a milder taste.
-
Do I need to sterilize the jars for this recipe?
Since these pickled pepperoncini peppers are stored in the fridge and not shelf-stable, sterilizing jars isn t necessary. Just make sure your jars and lids are clean to keep your pickles fresh and safe to eat.
-
How soon can I eat the pickled peppers after making them?
Technically, you can start enjoying them after 24 hours, but the flavor really improves after about a week in the fridge when all the tangy, garlicky goodness infuses deeply.
Final Thoughts
This Pickled Pepperoncini Peppers Recipe is one of those simple kitchen wins that never gets old for me. It s perfect for adding a flavorful crunch and bright zing to so many dishes-you ll find yourself reaching for these peppers more and more. I encourage you to give this recipe a try and make your own punchy, fresh pickles at home; once you do, it might just become a staple in your fridge like it is in mine!
Print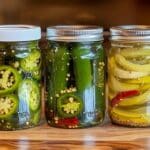
Pickled Pepperoncini Peppers Recipe
- Prep Time: 10 minutes
- Cook Time: 10 minutes
- Total Time: 2 hours 20 minutes
- Yield: 4 pints
- Category: Condiment
- Method: Stovetop
- Cuisine: American
Description
This recipe for Pickled Pepperoncini Peppers offers a tangy and mildly spicy way to preserve pepperoncini or banana peppers. With a simple brine of vinegar, water, sugar, salt, turmeric, and garlic, these pickled peppers are easy to prepare and develop deeper flavors after resting in the fridge. Perfect as a topping, condiment, or snack, these pickled peppers add a vibrant, zesty punch to sandwiches, salads, and antipasti platters.
Ingredients
Peppers
- 1 lb pepperoncini peppers or banana peppers, sliced into rings
Brine
- 2 cup vinegar
- 1 cup water
- 1 tbsp sugar
- 1 tbsp Kosher salt
- 1/4 tsp turmeric
- 2 cloves garlic, minced
- 1 cup ice
Instructions
- Prepare Peppers: Slice the pepperoncini or banana peppers into rings, discarding the stems. Place the sliced peppers into clean mason jars and set aside.
- Make Brine: In a saucepan, combine the vinegar, 1 cup water, Kosher salt, sugar, and turmeric. Bring the mixture to a gentle simmer over medium-high heat, stirring occasionally to fully dissolve the salt and sugar.
- Add Garlic and Cool Brine: Once the brine reaches a low simmer, remove the pan from heat. Stir in the minced garlic. Then add 1 cup of ice to the pan and stir until it melts to cool down the brine.
- Fill Jars with Brine: Pour the cooled brine over the sliced peppers in the jars, leaving about ½ inch of headspace at the top. Seal the jars with lids, tightening them by hand to create a seal.
- Cool and Refrigerate: Let the jars come to room temperature, then refrigerate them. Allow the peppers to marinate for at least 24 hours before eating. For optimal flavor, allow them to rest in the fridge for up to one week.
Notes
- Pickled peppers will stay fresh in the refrigerator for about 3-4 weeks.
- Use clean, sterilized jars to ensure the best preservation and safety.
- The turmeric adds a subtle earthiness and bright color to the brine.
- You can substitute white vinegar with apple cider vinegar for a slightly different flavor profile.
Nutrition
- Serving Size: 1/4 pint (about 60 ml)
- Calories: 15
- Sugar: 1.5 g
- Sodium: 450 mg
- Fat: 0 g
- Saturated Fat: 0 g
- Unsaturated Fat: 0 g
- Trans Fat: 0 g
- Carbohydrates: 3 g
- Fiber: 0.5 g
- Protein: 0.3 g
- Cholesterol: 0 mg

