
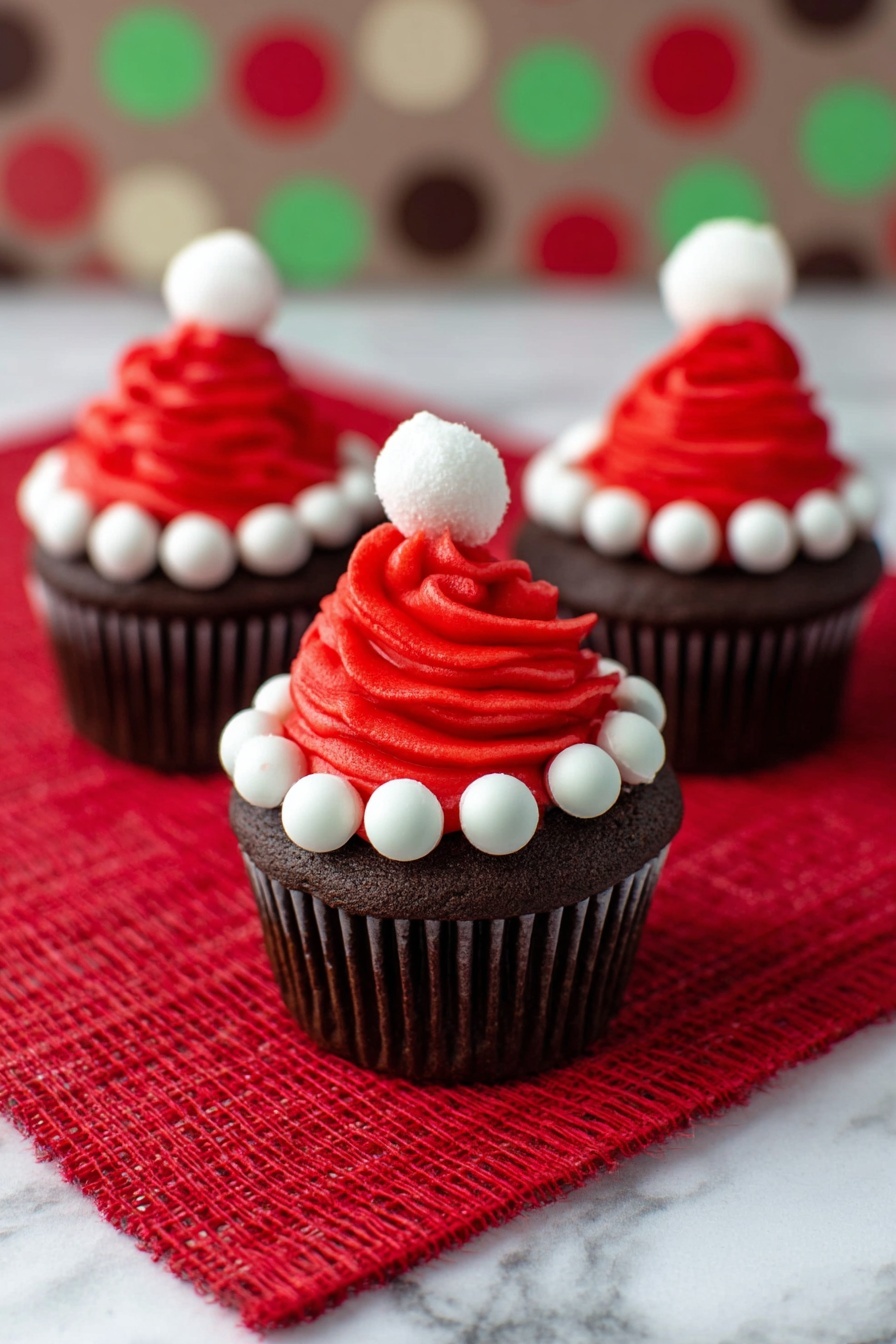
If you’re looking for an easy, charming dessert that instantly brings festive cheer, this Santa Hat Cupcakes Recipe is your new holiday go-to. I absolutely love how these cupcakes turn out—adorable little Santa hats perched right on top of your favorite cupcake flavor. Plus, they’re a total breeze to make, even if you’re not a seasoned baker. Stick with me, and I’ll share all my best tips so you can wow your family and friends this season without breaking a sweat.
Why You’ll Love This Recipe
- Super Simple to Make: Even if decorating isn’t your thing, these are foolproof and quick to assemble.
- Festive and Fun: Your family and guests will adore the cute Santa hats — perfect for holiday parties or school treats.
- Flexible Flavors: You can use any cupcake base, but I’ll share why white or chocolate work best to make those red hats pop.
- Minimal Ingredients: A handful of staples and a little frosting magic bring these holiday cupcakes to life.

Ingredients You’ll Need
One thing I love about the Santa Hat Cupcakes Recipe is how straightforward the ingredient list is. You’ll spot most of these in your pantry or local grocery store, and each plays a key role in creating the festive look and delicious flavor.
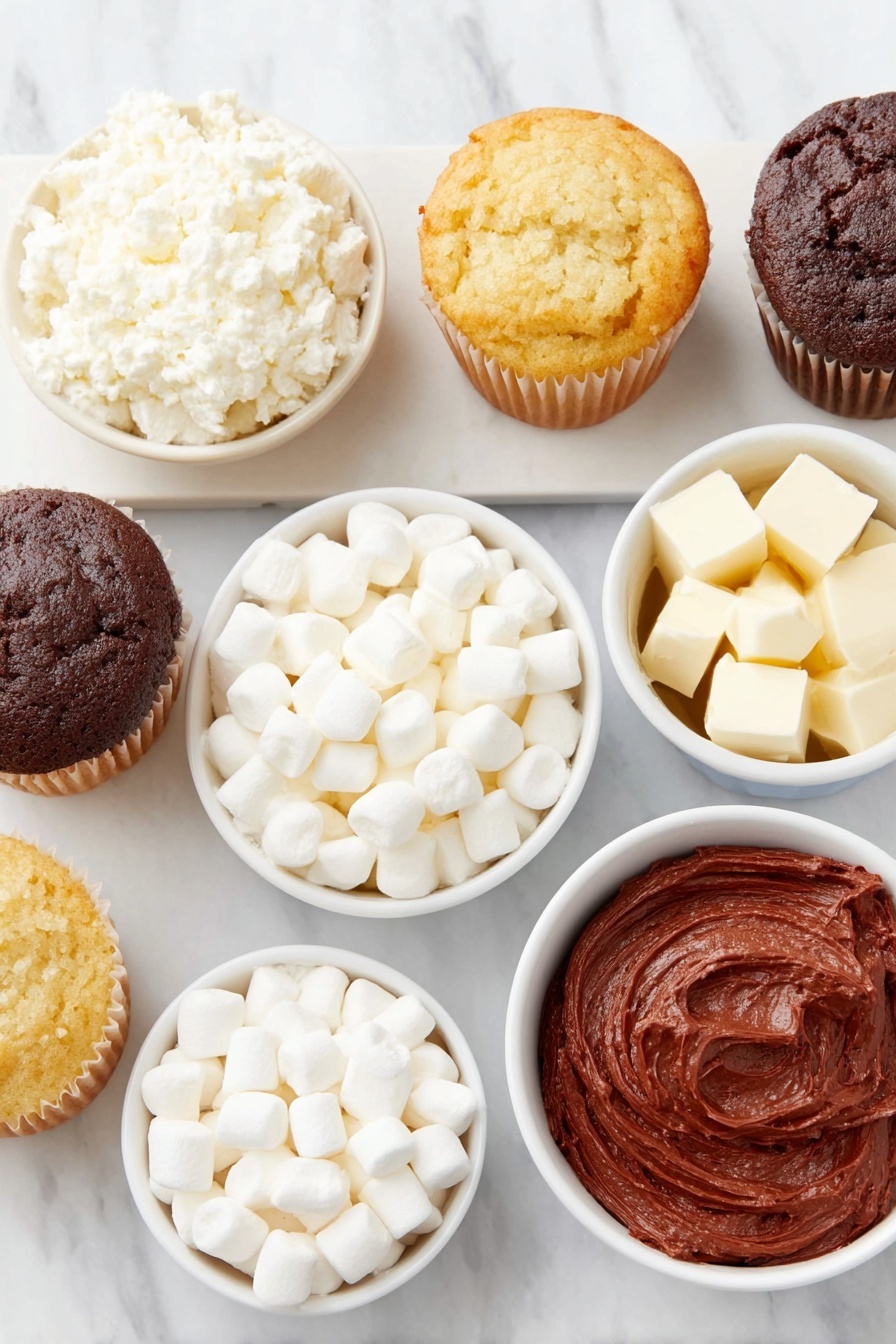
- Cupcakes: Use your favorite flavor; white or chocolate cupcakes really make the red frosting pop for that classic Santa look.
- Red Frosting: Choose a vibrant, creamy red frosting or tint your own – it’s the ‘hat’ color, so bright and smooth is key.
- Mini Marshmallows: Cutting these in half gives you perfect little ‘pom poms’ and ‘white trim’ for the hats.
- Wilton Decorating Tip #32 (optional): You don’t need fancy piping tips here, but this one helped me ‘pile’ the frosting neatly to mimic Santa’s hat shape.
- Disposable Frosting Bag: Makes piping faster and cleanup easier—you’ll thank me later!
Variations
I usually stick to the classic version of this Santa Hat Cupcakes Recipe, but there are plenty of ways to get creative. Sometimes, tweaking a simple ingredient or technique can make it feel totally fresh and perfectly suited to your crowd.
- Flavor Swaps: I swapped out red velvet cupcakes once and added cream cheese frosting tinted red—it was a delicious twist that impressed my guests.
- Vegan or Dairy-Free: Use plant-based cupcakes and vegan frosting to keep everyone happy without sacrificing the fun look.
- Chocolate Hats: For a more decadent treat, pipe dark chocolate ganache instead of red frosting—looks luxe and tastes amazing with marshmallow trim.
- No-Marshmallow Option: If marshmallows aren’t your thing, small white candies or piped white frosting dots make lovely alternatives for the hat trim.
How to Make Santa Hat Cupcakes Recipe
Step 1: Prep Your Supplies
First things first, cut all your mini marshmallows in half ahead of time—trust me, you’ll thank yourself when you’re deep in frosting. I keep them close so I’m not running back to the knife. Get your piping bag ready by attaching your tip (if you’re using one) and filling it with red frosting. A disposable bag makes cleanup a breeze, especially during holiday hustle.
Step 2: Make the Base Ring of Frosting
Start by piping a circular base of red frosting on top of each cupcake—this ‘hat brim’ holds the marshmallows in place. Don’t worry about being perfect; the rustic look actually adds charm. Then carefully press the halved mini marshmallows around this ring—they form the fluffy white trim of Santa’s hat. This step really brings the hat to life visually.
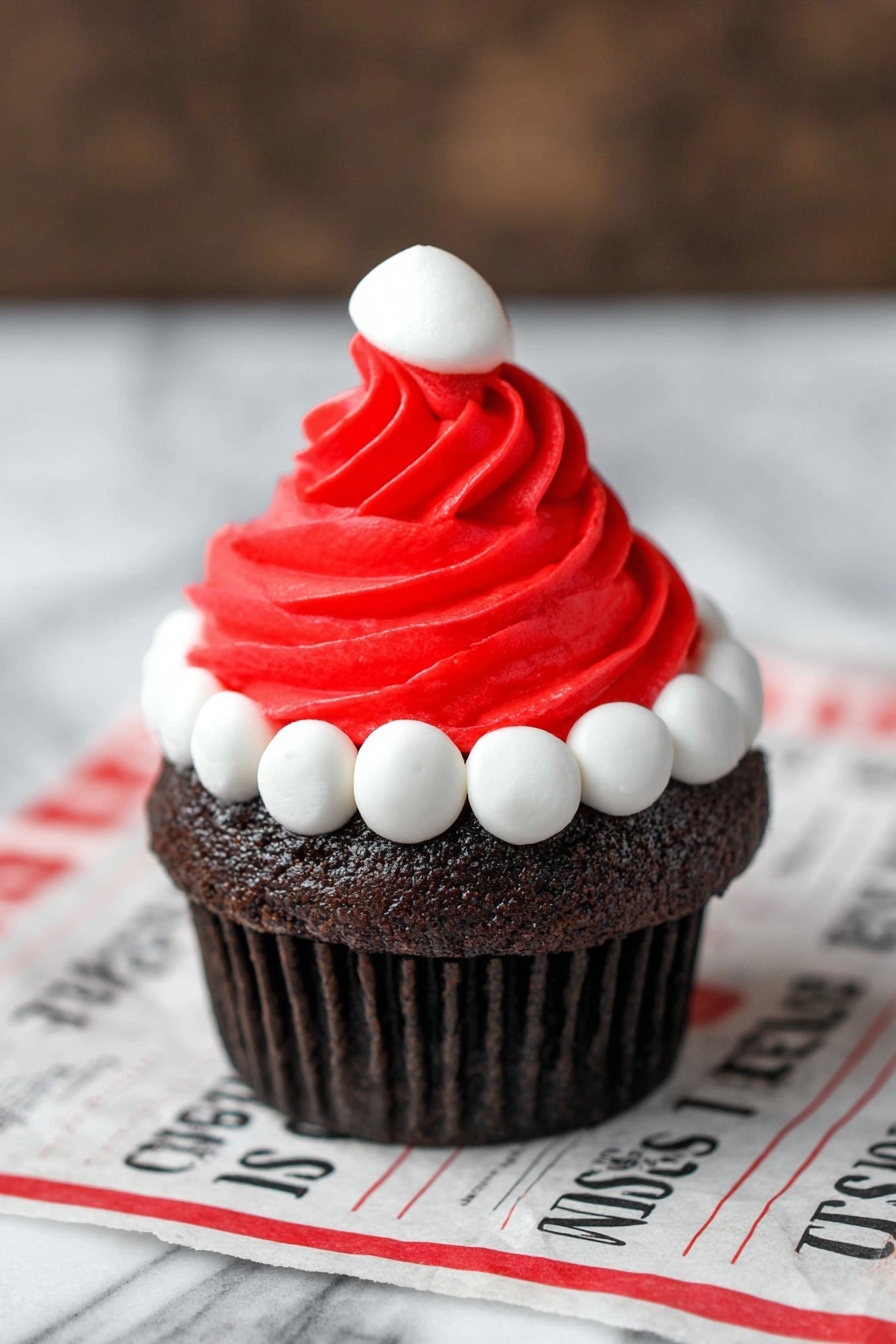
Step 3: Create the Santa Hat Shape
Now, fill in the center of the circle with more red frosting. Pipe a swirling, stacked frosting cone, going ’round and round’ to build the hat shape upward. I found going slowly and keeping a steady hand helps keep that signature hat look. Top the whole thing off with a single halved mini marshmallow—voila, the pom pom on Santa’s hat!
Step 4: Chill Before Serving
Place your masterpieces in the fridge for a few minutes so the frosting can set—this helps the hats hold their shape when folks start grabbing cupcakes off the platter. If you like, you can even prepare these a little ahead and store them chilled until your party.
Pro Tips for Making Santa Hat Cupcakes Recipe
- Cut Marshmallows Beforehand: I discovered this trick to speed up decorating and avoid sticky fingers mid-pipe.
- Use a Steady, Continuous Motion: When swirling the frosting cone, steady pressure makes those hats look professional and cute.
- Chill to Set: Leaving the cupcakes in the fridge before serving helps the frosting hold its shape on even warm days.
- Don’t Overfill Piping Bag: Filling it too full makes the frosting harder to control and can cause hand fatigue—start small and refill if needed.
How to Serve Santa Hat Cupcakes Recipe
Garnishes
I usually stick with the classic half marshmallows for the hat trim, but if you want an extra flair, you could sprinkle a light dusting of edible glitter or tiny white sugar pearls for a bit of sparkle. Personally, I love keeping it simple—those marshmallows add just the right amount of sweetness and fluffy texture.
Side Dishes
These cupcakes shine on their own, but if you’re serving a holiday spread, I like pairing them with fresh fruit platters, peppermint bark, or a mug of warm spiced cider. It balances the sweetness perfectly and keeps the vibe cozy and festive.
Creative Ways to Present
Here’s a fun idea I tried a couple years ago: arrange the Santa Hat Cupcakes Recipe on a large, festive platter with faux snow made from shredded coconut around them. Add little candy canes tucked in, and suddenly you have a winter wonderland dessert table centerpiece that wows guests before they even taste a bite.
Make Ahead and Storage
Storing Leftovers
I store leftover Santa Hat Cupcakes in an airtight container in the fridge. The frosting holds up well chilled, and the marshmallows stay fluffy. Just be sure to give them some time to come back to room temperature before serving for the best flavor and texture.
Freezing
Freezing these is possible but with a heads up: the marshmallows get a little chewy after thawing. I usually freeze undecorated cupcakes only, then frost and assemble the hats fresh when I’m ready. This helps keep everything tasting and looking its best.
Reheating
If you need to warm an already assembled cupcake, I gently bring it to room temp and avoid the microwave—it can melt the frosting. Instead, a short 5-minute sit in a slightly warm oven (about 150°F) does the trick without messing up your festive hats.
FAQs
-
Can I use store-bought cupcakes for this Santa Hat Cupcakes Recipe?
Absolutely! Store-bought cupcakes work perfectly, especially if you’re short on time. Just pick ones with a flat or gently domed top to make frosting and decorating easier.
-
What if I don’t have mini marshmallows — any substitutes?
You can swap mini marshmallows for tiny white candies or even pipe small white dots of frosting around the base and top of the hat. The idea is to replicate that fluffy white trim, so get creative with what you’ve got!
-
How far ahead can I make Santa Hat Cupcakes Recipe?
I find making and assembling the cupcakes a day ahead works well if you keep them refrigerated in an airtight container. Just bring them to room temp before serving for the best taste and texture.
-
Can I make these cupcakes gluten-free?
Yes! Swap in your favorite gluten-free cupcake recipe or a gluten-free mix and use gluten-free marshmallows (read labels carefully). The decorating steps stay the same and no one will guess the difference.
-
What’s the easiest way to pipe the frosting if I’m a beginner?
If piping feels intimidating, simply fill a zip-top bag with frosting, snip a small corner, and pipe the frosting in circles and swirls. Using your finger or a small spatula to shape the cone afterward also works great!
Final Thoughts
I can’t recommend this Santa Hat Cupcakes Recipe enough for bringing joy and sweetness to your holiday celebrations. It’s one of those recipes that feels special but really isn’t complicated at all—and that’s what makes it a winner in my book. Whether you’re baking with the kids or prepping for a party, this recipe brings smiles every single time. Give it a try and let me know how your Santa hats turn out — I promise, people will be asking you for this recipe all season long!
Print
Santa Hat Cupcakes Recipe
- Prep Time: 10 minutes
- Cook Time: 0 minutes
- Total Time: 10 minutes
- Yield: 12 cupcakes
- Category: Dessert
- Method: No-Cook
- Cuisine: American
Description
These charming Santa Hat Cupcakes are a festive and fun treat perfect for holiday celebrations. Featuring any flavor cupcake base topped with vibrant red frosting and decorated with marshmallow ‘fur’ trim and a pom-pom, they’re easy to assemble and sure to delight guests of all ages.
Ingredients
Cupcakes
- 12 cupcakes (white or chocolate recommended)
Frosting and Decorations
- Red frosting (enough to generously frost 12 cupcakes)
- Mini marshmallows, halved (approximately 36 halves)
- Wilton decorating tip #32 (optional, for frosting application)
- Disposable frosting bag
Instructions
- Prepare Marshmallows: Pre-cut the mini marshmallows in half to create the fur trim and pom-poms for the Santa hat, ensuring you have enough ready before frosting.
- Fill Frosting Bag: Attach the Wilton decorating tip #32 (if using) to your disposable frosting bag and fill it with red frosting, preparing for easy application.
- Create Frosting Base: Pipe a circle base of red frosting on top of each cupcake to serve as the outline of the Santa hat.
- Add Marshmallow Fur Trim: Place the halved marshmallows around the red frosting circle, pressing gently so they adhere and form the fur trim of the Santa hat.
- Finish the Hat: Fill in the center of the circle with additional frosting, swirling upwards to form the conical shape of the Santa hat.
- Add Pom-Pom: Top each hat with a single mini halved marshmallow as the pom-pom, securing it gently with frosting.
- Set the Hats: Refrigerate the decorated cupcakes for a few minutes to allow the frosting to set before serving for best presentation and ease of handling.
Notes
- Using a piping tip is optional; you can apply frosting with a spatula or knife if preferred.
- Choosing white or chocolate cupcakes gives the best color contrast with the red frosting and white marshmallows.
- Halving the marshmallows ahead of time speeds up the decorating process.
- Store cupcakes in the refrigerator until ready to serve to maintain frosting stability.
Nutrition
- Serving Size: 1 cupcake
- Calories: 210
- Sugar: 20g
- Sodium: 110mg
- Fat: 9g
- Saturated Fat: 5g
- Unsaturated Fat: 3g
- Trans Fat: 0g
- Carbohydrates: 30g
- Fiber: 1g
- Protein: 2g
- Cholesterol: 25mg
