
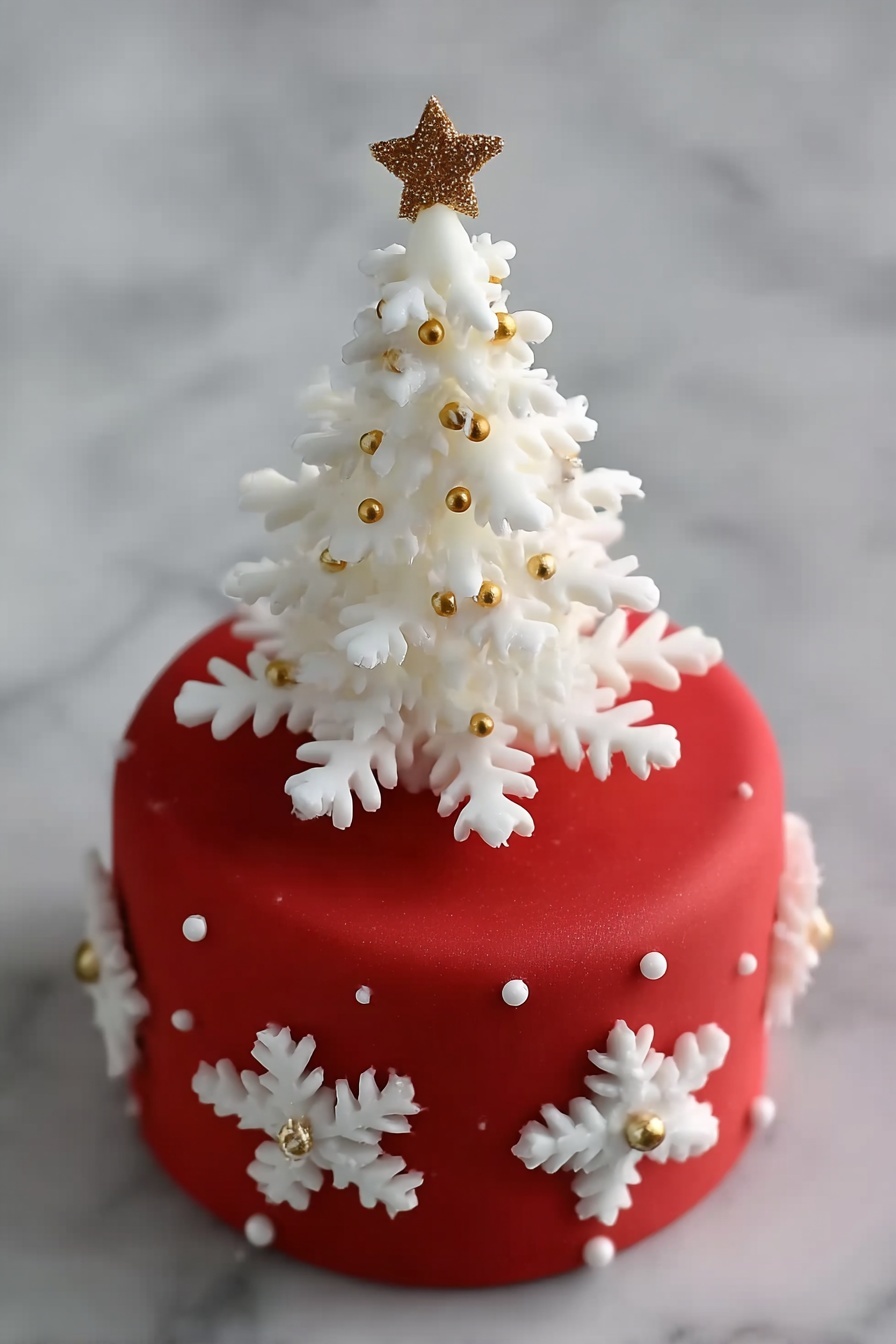
If you’re dreaming of a show-stopping holiday centerpiece, let me introduce you to the Sneeuwvlokken Kerstboom Taartdecoratie Recipe. This delightful snowy Christmas tree cake decoration is as charming as it is fun to make, and I’ll bet it’ll become your go-to for festive gatherings. It’s the kind of recipe that will have your friends asking for your secret—and I’m here to spill all the juicy details so you can recreate this magic in your kitchen.
Why You’ll Love This Recipe
- Elegant Festive Look: It creates a stunning miniature snowflake Christmas tree that instantly ups your holiday dessert game.
- Fun and Hands-On: You’ll enjoy assembling the layers like a little edible puzzle, perfect for getting the family involved.
- Customizable Details: With options for glitter, gold accents, and sugar pearls, you can tailor the look to suit your style.
- Lasting Impression: Every bite delights, and trust me, the sweet visual will make your holiday party unforgettable.

Ingredients You’ll Need
These ingredients come together beautifully to shape the snowy effect of your little Christmas tree, with a blend of smooth fondant and shimmering finishing touches that truly bring it to life. Picking quality fondant and a reliable edible glue makes all the difference.
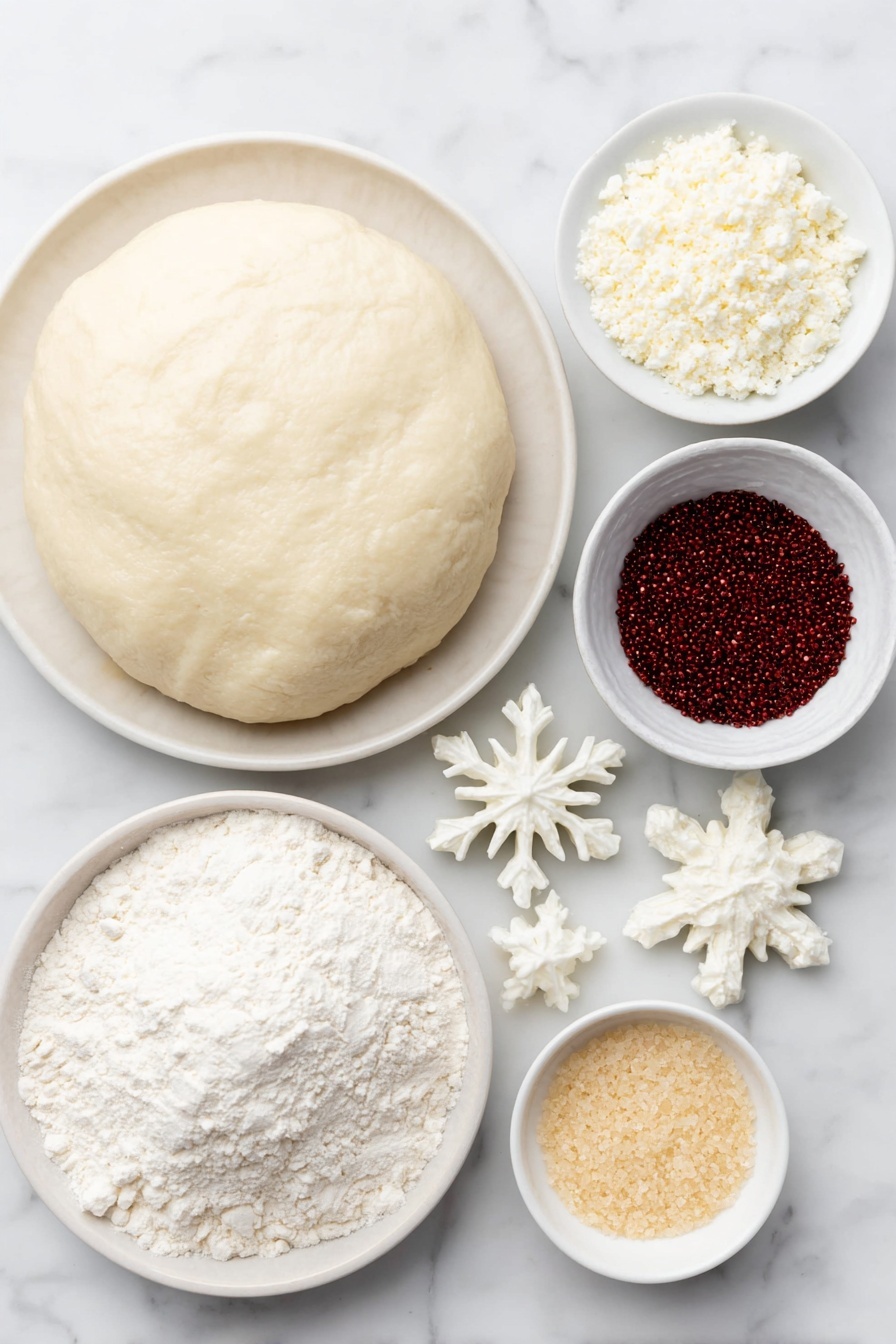
- Witte fondant: The base for your snowflakes; make sure it’s pliable and fresh for easier shaping.
- Rode fondant: Perfect for covering your mini cake, providing that gorgeous festive red background.
- Tylose: A lifesaver for firming up fondant so your decorations hold their shape perfectly.
- Sneeuwvlok plungers (3 maten): These snowflake cutters in three sizes bring nice variation and dimension to your tree.
- Uitstekker voor kleine sterretjes: To create the cute star you’ll place on top.
- Gouden mini parels: Add shimmering “baubles” that make your tree pop with elegance.
- Eetbare lijm: Essential for sticking your fondant layers and decorations without any mess.
- Glitters (e.g., Squires Kitchen Sparkledust): Adds that magical sparkle every snowy tree deserves.
- Gouden kleurpoeder (e.g., solar gold van Edable Art): For brushing golden accents on stars and details.
- Mini taartjes: These can be bought or made by cutting cake into small rounds—you’ll be amazed at how versatile they are.
- Sateprikker (± 10 cm): Your “trunk” and tool for assembling the cake decorations.
Variations
I like to switch things up based on the occasion or who I’m serving—sometimes I add a little edible silver glitter for a frosty effect, other times I swap gold for rose gold powder for a trendy twist. Feel free to make it your own!
- Color Variation: Once, I made these with green fondant snowflakes instead of white, which gave a lovely woodland vibe that my kids adored.
- Dietary Modification: For gluten-free friends, mini cakes can be swapped with gluten-free sponge, keeping everything safe and tasty.
- Difficulty Level: If you’re short on time, skipping edible glitters still yields a beautiful result—just focus on neat assembly.
How to Make Sneeuwvlokken Kerstboom Taartdecoratie Recipe
Step 1: Prep Your Fondant for Perfection
Start by reinforcing your white fondant with a pinch of tylose powder. This trick was a game changer for me—it keeps the fondant firm and prevents your snowflakes from sinking or warping over time. Grab a fondant ball about the size of an egg, knead in a tiny pinch of tylose really well, wrap it tightly in plastic, and let it rest for at least an hour. This gives you the perfect texture for crisp, sturdy decorations.
Step 2: Cut and Color Your Decorations
Cover your mini cake with red fondant—this is your Christmas tree “base.” Using your snowflake plungers in three sizes, cut out two snowflakes from each size from the white fondant. Don’t forget to poke a hole through each one with your sateprikker; I learned this the hard way after a few broken pieces during assembly. The holes ensure they’ll slide neatly onto your skewer without cracking. Brush your snowflakes lightly with edible glitter dust for that enchanting frost. Color your little star topper with golden powder for a warm, festive shine.
Step 3: Create Base Layers and Round Spacers
Next, cut out six small fondant circles in varying thicknesses—two each of 6mm, 4mm, and 2mm. These act as spacers and add depth between your snowflake layers so your tree looks full without being cramped. Remember to poke holes through these circles as well with your sateprikker, matching the snowflakes. Let all your pieces air dry for a few hours—this step really helps them hold their shape later on.
Step 4: Assemble Your Christmas Tree
Now comes the fun part! Working from largest to smallest, slide your first thick round onto the skewer, brush on a dab of edible glue, and add the largest snowflake. Follow with a smaller round, then a snowflake, stacking like shingles on a roof. Keep alternating rounds and snowflakes until they’re all layered. Cap it off with a small fondant cone (to resemble the tree top) and stick your golden star on top. This method creates a tiered, realistic tree shape that’s oh-so-satisfying.
Step 5: Add Sparkling Finishing Touches
For the “baubles,” I like using golden mini pearls applied with a tiny dot of edible glue. Use a toothpick to dab the glue so you don’t overwhelm the fondant. Tweezers come in handy here—precision is queen for this delicate step! Complete your design with white holly leaves and golden berry accents around the base of the cake, giving it that classic Christmas feel. You’ll impress everyone with how stunning and intricate your little snowy tree looks.
Pro Tips for Making Sneeuwvlokken Kerstboom Taartdecoratie Recipe
- Tylose Magic: Don’t skip adding tylose to your fondant—this is the secret to snowflakes that won’t sag or crack.
- Hole Size Matters: When poking holes in your fondant shapes, make them wide enough to slide onto the skewer but not so big they tear.
- Drying Patience: Let your fondant decorations dry for at least a few hours — trust me, it pays off with sturdy, flawless pieces.
- Glue Application: Use a toothpick for edible glue dots to avoid over-wetting and ruining your fondant surface.
How to Serve Sneeuwvlokken Kerstboom Taartdecoratie Recipe
Garnishes
I love adding a few extra white fondant holly leaves with golden pearl berries around the base—it’s such a simple but elegant garnish that ties the whole snowy theme together. Sometimes I sprinkle a touch of powdered sugar just before serving to replicate freshly fallen snow.
Side Dishes
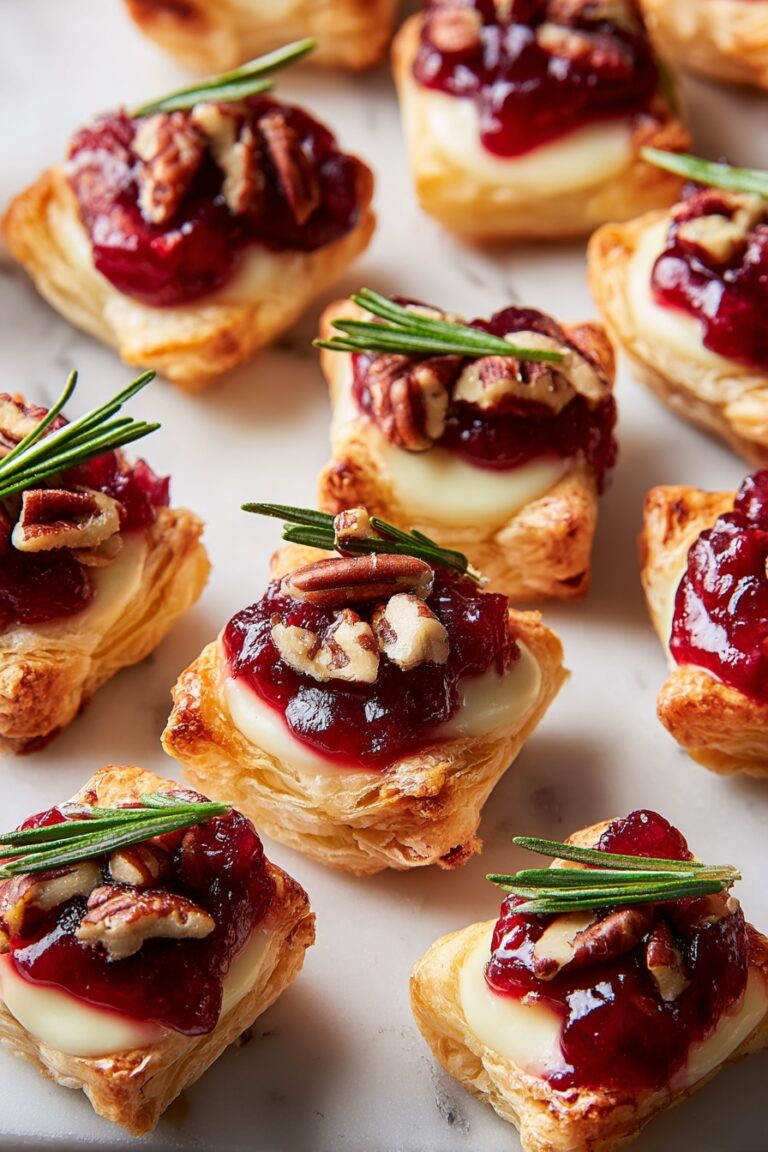
Pair this decoration with classic spiced mulled wine or a festive hot chocolate—it’s a sweet and cozy combo that keeps the Christmas spirit alive. Light Christmas cookies or fruitcake work beautifully as accompanying treats, rounding out your holiday spread.
Creative Ways to Present
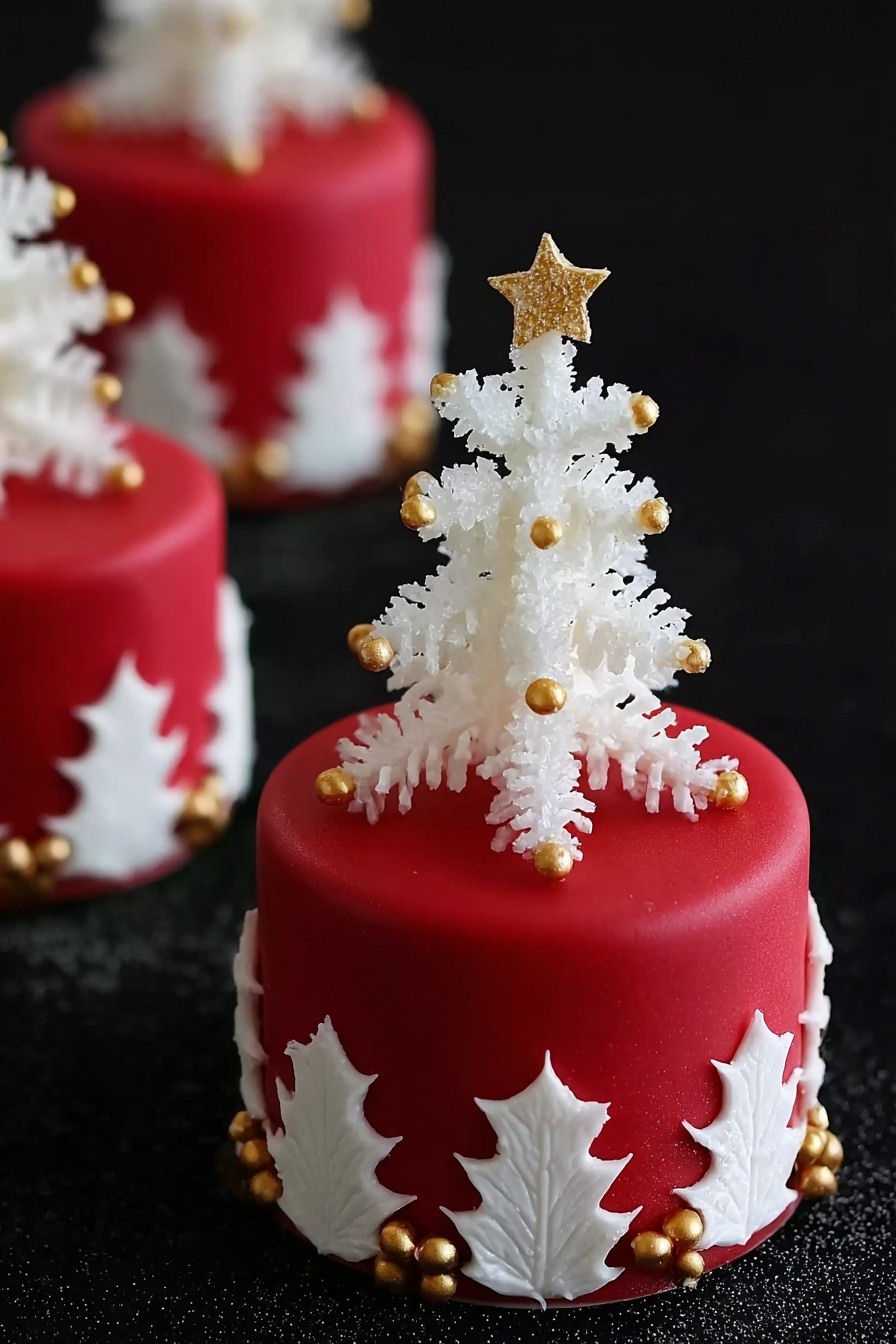
For a wow factor, I sometimes place the snowy tree atop a frosted cake stand surrounded by mini fairy lights— it truly turns into a dazzling centerpiece. Another fun idea is to make several mini trees as party favors or table place settings, adding a personal, edible touch for guests to admire and enjoy.
Make Ahead and Storage
Storing Leftovers
If you happen to have leftovers (and I doubt you will!), store them in an airtight container at room temperature in a cool, dry spot to maintain fondant texture. Avoid the fridge as moisture can soften your decorations and dull the shimmer.
Freezing
I don’t recommend freezing this decoration—it can change the texture of the fondant and cause cracks. It’s best enjoyed fresh or within a couple of days after assembling.
Reheating
Since this is a decorative piece, reheating isn’t necessary. Instead, gently handle the tree to avoid damaging the delicate fondant pieces. If your mini cake base needs warming, remove the decoration first, warm the cake separately, then reassemble.
FAQs
-
Can I use regular fondant without tylose for this recipe?
You technically can, but the fondant won’t harden as firmly without tylose, which may cause your snowflakes to sag or lose shape. I highly recommend adding tylose for sturdy decorations that last.
-
How long should I let the fondant decorations dry before assembling?
A few hours is ideal—at least 2 to 3 hours—but overnight is even better if you have the time. This ensures they’re firm and less likely to break during assembly.
-
What can I substitute for edible glitter if I don’t have any?
You can skip the glitter altogether or use a light dusting of powdered sugar for a fresh “snowy” look. Some edible pearl dusts or food-grade luster dusts also work great for adding subtle shine.
-
Is it okay to make these decorations a day in advance?
Absolutely! Making them the day before helps them dry perfectly and makes assembly quicker and smoother on party day. Just store them properly to avoid dust and humidity.
Final Thoughts
Honestly, the Sneeuwvlokken Kerstboom Taartdecoratie Recipe has become one of my favorite holiday projects because it marries creativity with a bit of indulgence—and the smiles it brings are priceless. Whether you’re decking your own table or gifting these charming trees to loved ones, this recipe has a warm, joyful charm that’s hard to beat. Give it a try this season—I promise you’ll love the sparkle and the joy it adds to your festivities.
Print
Sneeuwvlokken Kerstboom Taartdecoratie Recipe
- Prep Time: 1 hour 30 minutes
- Cook Time: 0 minutes
- Total Time: 1 hour 30 minutes
- Yield: 1 decorated mini cake with snowflake Christmas tree
- Category: Dessert Decoration
- Method: No-Cook
- Cuisine: Dutch
- Diet: Vegetarian
Description
Create charming and festive Sneeuwvlokken kerstboom mini cakes decorated with snowflake fondant shapes, edible glitter, and gold pearls. This detailed step-by-step recipe guides you through preparing hardened fondant pieces and assembling a delicate snowflake Christmas tree atop a mini cake, perfect for holiday celebrations and impressing your guests with beautiful edible decorations.
Ingredients
Fondant and Decorating Materials
- White fondant
- Red fondant
- Tylose powder (a small pinch per fondant ball)
- Snowflake plungers (3 sizes, two pieces of each size)
- Small star-shaped cutter
- Edible glue
- Golden mini sugar pearls
- Edible glitter powder (e.g., Squires Kitchen Sparkledust)
- Golden luster dust (e.g., Solar Gold by Edible Art)
- Sate stick (approximately 10 cm long)
Additional Supplies
- Mini cakes or mini tart bases (can also be cut out from a cake)
- Small round fondant cutouts (6 in total: 2 x 6 mm thick, 2 x 4 mm thick, 2 x 2 mm thick)
- Small fondant cone shape
- Plastic wrap for resting fondant balls
- Small holly leaf cutters and gold paint or dust for decoration
Instructions
- Prepare Fondant Base: Take a ball of white fondant about the size of an egg. Add a small pinch of tylose powder to it and knead thoroughly until well incorporated. Wrap the fondant tightly in plastic wrap and let it rest for at least one hour to harden. This step ensures the fondant dries hard and holds its shape without sagging.
- Cut Fondant Shapes: Cover your mini cake with red fondant as the base. Using your snowflake plungers, cut out 6 snowflakes total—two of each of the three different sizes. Also cut 6 small round discs in varying thicknesses (two each of 6 mm, 4 mm, and 2 mm). Use your cutter to make a small star and also prepare a small fondant cone (kegeltje) shape.
- Prepare Decoration Pieces: Using the sate stick, carefully make holes in every fondant piece—snowflakes, rounds, the cone, and star. Make sure the holes are big enough to slide them easily onto the stick without cracking the fondant during assembly. The holes allow you to stack and secure the pieces properly.
- Decorate Fondant Pieces: Dust the white fondant snowflakes and rounds with the edible glitter powder for a sparkling effect. Color the small star with the golden luster dust to make it vibrant and shiny. Allow all pieces to dry uncovered at room temperature for a few hours so they harden thoroughly.
- Assemble the Snowflake Tree: Start assembling the tree by sliding the largest round disc onto the skewer. Dab a bit of edible glue onto this base round to hold the biggest snowflake securely on top. Next, stack one of the medium-sized rounds, then a medium snowflake, then a smaller round, and then a smaller snowflake, working your way up from largest to smallest pieces in an overlapping roof-tile style. Finish the assembly by placing the small cone on top, securing it with edible glue, and then topping the cone with the golden star.
- Add Golden Pearls: Use a toothpick or the tip of the sate stick to carefully apply small dots of edible glue onto the snowflake tree branches. Using tweezers, place the small golden sugar pearls onto these glue spots to resemble holly berries and add festive sparkle.
- Final Decorations: Garnish the mini cake base with white holly leaves cut from fondant and paint or dust the leaves with gold color to match. Attach golden sugar pearls as berries on the holly leaves using edible glue. This completes your festive sneeuwvlokken kerstboom cake decoration, ready to impress your holiday guests.
Notes
- Tylose powder is essential to make the fondant harden and hold shape properly; do not skip or reduce this step.
- Make sure the holes you poke into the fondant pieces are large enough to prevent breaking when assembling on the skewer.
- Patience is key: allow pieces to dry thoroughly before assembly to avoid cracks or sagging.
- Use tweezers for placing mini sugar pearls for precision and to keep glue application neat.
- The red fondant covered mini cakes can be store-bought or homemade for convenience.
- You can substitute edible glitters and gold dust with similar products available locally.
Nutrition
- Serving Size: 1 mini cake with decoration
- Calories: 250
- Sugar: 30 g
- Sodium: 50 mg
- Fat: 5 g
- Saturated Fat: 3 g
- Unsaturated Fat: 2 g
- Trans Fat: 0 g
- Carbohydrates: 45 g
- Fiber: 1 g
- Protein: 1 g
- Cholesterol: 0 mg


