
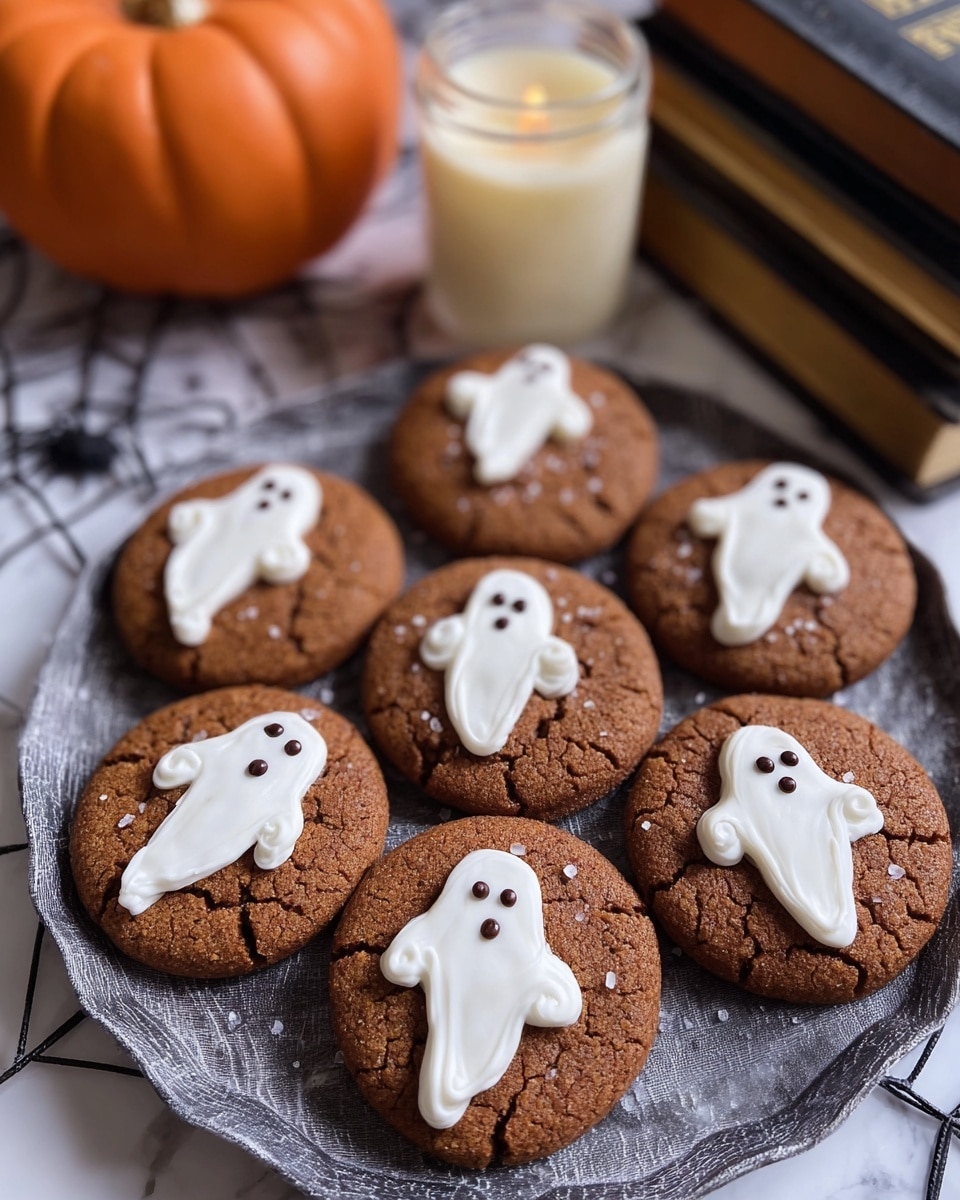
I absolutely love how this Spooky Ghost Brown Butter Pumpkin Cookies Recipe brings a touch of Halloween magic straight to your kitchen. These cookies aren’t just your average fall treat; the combination of nutty brown butter and warm pumpkin spices creates a chewy, irresistible base that pairs perfectly with the playful ghost-shaped white chocolate decoration. You’ll find that this recipe is not only fun to make but also a crowd-pleaser at any seasonal gathering.
When I first tried this recipe, I was amazed at how quickly it became a favorite in my family’s Halloween lineup. What makes the Spooky Ghost Brown Butter Pumpkin Cookies Recipe so worth trying is how it balances the rich flavors of brown butter and pumpkin with a simple yet charming decorating technique that anyone can master. Plus, the cookies hold up well for sharing with neighbors or as a festive treat for classroom parties!
Why You’ll Love This Recipe
- Unique Flavor Combo: Brown butter adds a rich, nutty depth that pairs beautifully with pumpkin for a cozy taste sensation.
- Fun & Festive Decorating: The ghost design made with white chocolate and candy melts is easier than it looks and perfect for Halloween.
- Perfect Texture: These cookies come out chewy yet soft, which means they stay delicious for days without getting hard.
- Great for Sharing: Whether it’s a party treat or a handout for trick-or-treaters, they’re always a hit.

Ingredients You’ll Need
Each ingredient in the Spooky Ghost Brown Butter Pumpkin Cookies Recipe plays a key role in making these cookies flavorful and festive. I always recommend using quality white chocolate and candy melts for decorating, as they melt smoothly and harden nicely for clean ghost shapes.
- Brown Butter and Maple Chewy Pumpkin Cookies: Use a reliable pumpkin cookie base like the one from Butternut Bakery to get that perfect chewy texture and rich flavor.
- White Chocolate: Choose good quality melting wafers or chocolate chips that melt easily and harden smoothly for decorating.
- Black Candy Melts: Essential for piping the spooky little eyes and mouth on your ghostly cookies.
- Piping Bag: A sturdy piping bag or a disposable ziplock helps you pipe neat, precise ghost faces with the candy melts.
- Medium Cookie Scoop: Helpful for portioning your cookies evenly to bake consistently.
- Light Colored Baking Pans: Lighter pans promote even baking and prevent over-browning on the cookie bottoms.
Variations
I love experimenting with this Spooky Ghost Brown Butter Pumpkin Cookies Recipe to suit different tastes and occasions. Whether you’re looking for a dairy-free version or want to add a little extra spice, there are lots of ways to make it your own.
- Dairy-Free: I’ve swapped regular butter for vegan butter with great results, making these cookies friendly for dairy allergies without losing flavor.
- Extra Spice: Adding a pinch of cloves or nutmeg alongside the pumpkin spice mix adds depth—my family enjoys this little kick!
- Chocolate Chips: Sometimes I sprinkle mini semi-sweet chocolate chips into the cookie dough for extra melty pockets.
- Alternative Decorations: Instead of ghosts, try using colored candy melts for witches, pumpkins, or bats for a full Halloween cookie assortment.
How to Make Spooky Ghost Brown Butter Pumpkin Cookies Recipe
Step 1: Bake Your Pumpkin Cookies and Let Cool
Start with your batch of brown butter and maple chewy pumpkin cookies—either homemade or from the Butternut Bakery recipe. Make sure they’re fully cooled before decorating; if the cookies are warm, the chocolate will melt unevenly and won’t set properly. I like to bake mine on light-colored baking pans to avoid over-browning, and using a medium cookie scoop gives consistent sizes for even baking.
Step 2: Create the Ghost Shapes with White Chocolate
Melt your white chocolate wafers—Ghirardelli melting wafers are my go-to because they melt smoothly and taste fantastic. Spoon a small dollop on the center of each cooled cookie, then use the back of a small spoon to gently drag downward, creating a ghostly silhouette. I highly recommend practicing this technique on parchment paper first; it helps you get a feel for the pressure needed without picking up cookie crumbs. Remember, light pressure is your friend here!
Step 3: Harden the White Chocolate
Let the white chocolate layer harden completely, which usually takes about 20-30 minutes at room temperature. You can speed this up by placing the cookies in the fridge, but watch out for condensation if you don’t eat them right away, as that can affect texture.
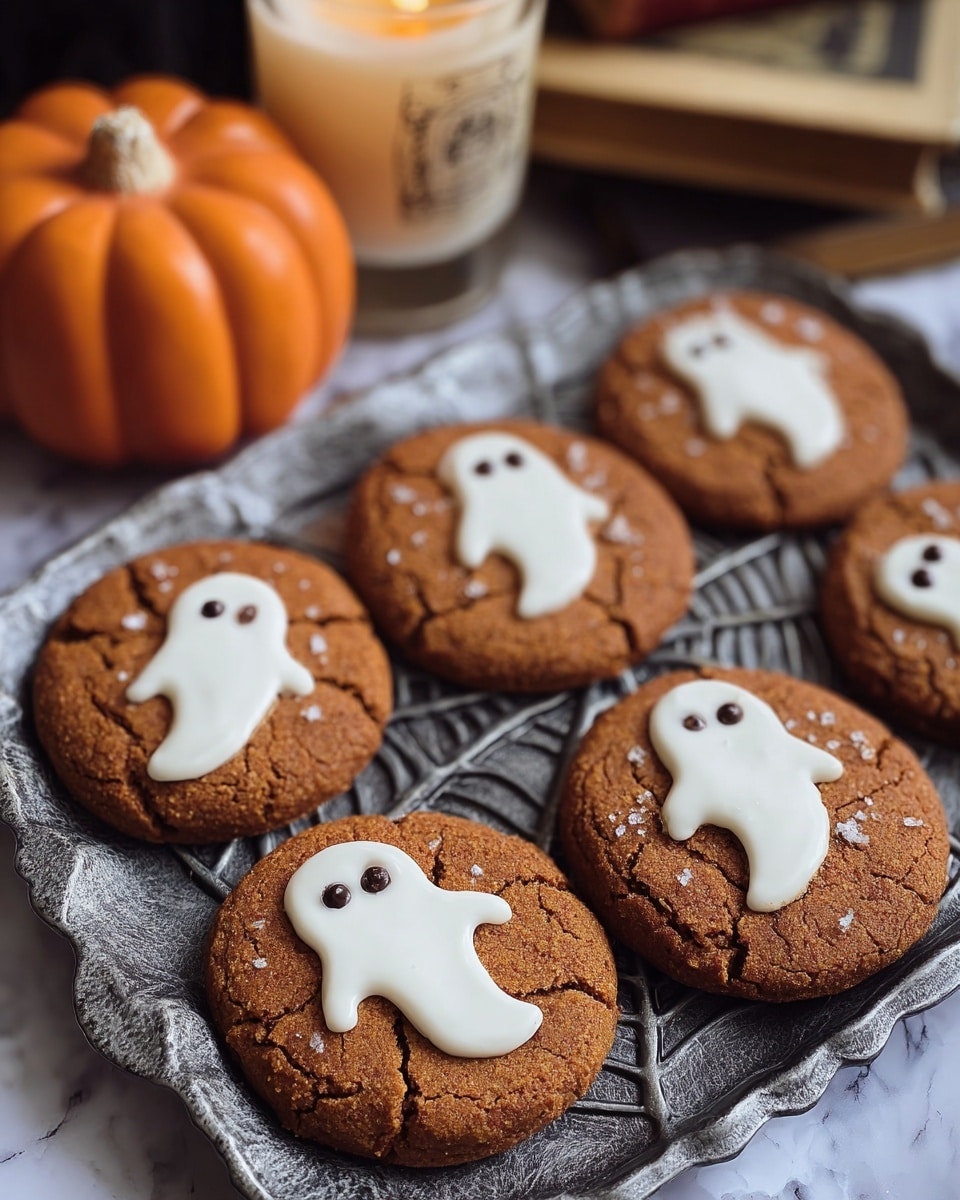
Step 4: Pipe the Ghost Eyes and Mouth
Melt the black candy melts in short bursts in the microwave, stirring between each to avoid overheating. Pour the melted candy into a piping bag or a sturdy ziplock bag with a small corner snipped off. Pipe tiny dots for the eyes and a small oval or “O” shape for the mouth on each ghost. This step is where the cookies truly come alive! After piping, allow the candy melts to dry fully—this usually takes around 15-20 minutes.
Step 5: Enjoy Your Spooky Ghost Creations!
Once everything is set, your Spooky Ghost Brown Butter Pumpkin Cookies are ready to impress. These make great gifts, party snacks, or just a charming little afternoon treat. Trust me, the combination of flavors and that cute ghost decoration makes them almost too good to resist!
Pro Tips for Making Spooky Ghost Brown Butter Pumpkin Cookies Recipe
- Use Room Temperature Cookies: Decorating on cookies that are completely cool prevents the chocolate from melting too thin and maintains crisp ghost shapes.
- Practice Your Ghost Strokes: Try dragging the spoon slowly and lightly on parchment first to get the ghost silhouette just right without picking up cookie crumbs.
- Choose the Right Piping Bag: I prefer a sturdier piping bag over ziplock bags for more control when making tiny eyes and mouths.
- Avoid Overheating Candy Melts: Melt in short bursts and stir frequently to keep a smooth texture and avoid clumping.
How to Serve Spooky Ghost Brown Butter Pumpkin Cookies Recipe
Garnishes
I usually keep garnishes simple—just the classic black candy melt eyes and mouth—but sometimes I add a tiny pinch of edible glitter for a subtle shimmer that makes the ghosts look extra magical. A light dusting of powdered sugar can also add a sleepy ghostly “mist” effect.
Side Dishes
These cookies pair wonderfully with a warm spiced cider or a rich chai latte for a cozy fall snack. I also love serving them alongside a bowl of creamy pumpkin soup for a full seasonal treat experience.
Creative Ways to Present
For Halloween parties, I like to arrange the cookies on a black or orange serving platter scattered with candy corn and mini pumpkins. Tying a festive ribbon around a stack of cookies makes for a charming gift. Last year, I took it up a notch by placing cookies in clear cellophane bags with a Halloween tag—neighbors loved the personal touch!
Make Ahead and Storage
Storing Leftovers
I store leftover cookies in an airtight container at room temperature. They stay chewy and fresh for up to 5 days. If you notice the white chocolate decorations start to soften, I’ll pop them in the fridge for a few minutes to firm back up before serving.
Freezing
These cookies freeze beautifully! I usually freeze them undecorated in a single layer on a baking sheet, then transfer them to a freezer-safe container or bag. Decorate after thawing to keep the ghost shapes crisp and fresh.
Reheating
If you want to refresh chilled cookies, just let them come to room temperature before eating. I avoid microwaving decorated cookies to protect the white chocolate ghosts from melting. If you prefer warm cookies, try warming the dough portion before decorating.
FAQs
-
Can I use regular chocolate chips instead of white chocolate for the ghosts?
Regular chocolate chips usually don’t melt as smoothly or hold shape as well as white melting wafers or candy melts, so I recommend sticking with white chocolate wafers designed for melting to get smooth, even ghost shapes.
-
Do I have to use brown butter for the pumpkin cookies?
Brown butter adds a rich, nutty flavor that elevates the pumpkin cookies, but if you’re short on time, regular melted butter will work. Just know the final flavor won’t be quite as deep or caramel-like.
-
How long do these pumpkin cookies stay fresh?
Stored in an airtight container at room temperature, these cookies stay fresh and chewy for about 4 to 5 days. Beyond that, they can dry out, so freezing undecorated cookies is a smart option.
-
Can I make these cookies gluten-free?
Yes! You can substitute the flour for a gluten-free all-purpose blend. Just be sure your flour blend contains xanthan gum or a similar binder to keep the cookies chewy and not crumbly.
-
Any tips for piping the black candy melts?
Melt the candy melts in short bursts and stir well each time. Use a sturdy piping bag and cut a very small tip off the corner. Practice piping on parchment first to get a feel for how much pressure to apply for tiny, neat dots.
Final Thoughts
This Spooky Ghost Brown Butter Pumpkin Cookies Recipe is truly one of my favorite ways to celebrate the cozy fall season with a little dash of Halloween fun. The mix of comforting pumpkin flavor, the subtle nuttiness from brown butter, and the whimsical ghost decorations just can’t be beat. I hope you’ll give this recipe a try—and maybe even make it a new tradition to share with your friends and family. I promise, once you taste them, these cookies will become a cherished seasonal staple!
Print
Spooky Ghost Brown Butter Pumpkin Cookies Recipe
- Prep Time: 15 minutes
- Cook Time: 20 minutes
- Total Time: 1 hour 15 minutes
- Yield: 12 cookies
- Category: Dessert
- Method: Baking
- Cuisine: American
Description
Create festive and charming Spooky Ghost Brown Butter Pumpkin Cookies using chewy pumpkin cookie bases decorated with white chocolate ghosts and black candy melt facial features. Perfect for Halloween celebrations, these cookies combine rich brown butter flavor with creamy chocolate decoration for a delightful treat.
Ingredients
Base Cookies
- 1 batch Brown Butter and Maple Chewy Pumpkin Cookies (prepared as per Butternut Bakery recipe)
For Decorating
- White chocolate (such as Ghirardelli melting wafers), quantity sufficient for coating 12 cookies
- Black candy melts, about 1/4 cup for piping facial features
- Piping bag or ziplock bag for piping
Helpful Tools
- Medium cookie scoop
- Light colored baking pans
- Small spoon for shaping white chocolate ghosts
Instructions
- Bake the base cookies: Prepare and bake one batch of Brown Butter and Maple Chewy Pumpkin Cookies according to the Butternut Bakery recipe, using a medium cookie scoop and light colored baking pans. Allow the cookies to fully cool before decorating to ensure the chocolate decorations set properly.
- Melt the white chocolate: Using a microwave or double boiler, melt the white chocolate wafers until smooth and glossy. Take care not to overheat.
- Apply white chocolate ghosts: Place a small dollop of melted white chocolate onto the center of each cooled cookie. Using the back of a small spoon, gently drag downward with light pressure to create a ghost shape. Practice this motion on parchment paper beforehand to master the technique.
- Harden the white chocolate: Allow the white chocolate to set completely at room temperature or in a cool place, until hardened.
- Melt the black candy melts: In a microwave-safe container, melt the black candy melts until smooth. Pour into a piping bag or sturdy ziplock bag and cut a small tip off the corner for controlled piping.
- Pipe ghost faces: Pipe small dots for eyes and a mouth onto each white chocolate ghost on the cookies. Be precise to give each ghost an expressive face.
- Dry and serve: Let the black candy melt decorations fully dry and harden before serving or packaging the cookies to maintain design integrity. Enjoy your spooky treats!
Notes
- Apply very light pressure when spreading the white chocolate ghosts to avoid disturbing the cookie surface and creating uneven texture.
- Practicing the ghost shape on parchment paper before decorating the actual cookies helps you perfect the technique.
- Using light colored baking pans prevents cookie bottoms from over-browning and ensures consistent baking.
- Allow complete cooling of cookies before starting chocolate decoration to avoid melting or smearing.
- Store decorated cookies in an airtight container in a cool, dry place to preserve freshness and decoration.
Nutrition
- Serving Size: 1 cookie
- Calories: 180
- Sugar: 15g
- Sodium: 110mg
- Fat: 9g
- Saturated Fat: 5g
- Unsaturated Fat: 3g
- Trans Fat: 0g
- Carbohydrates: 22g
- Fiber: 1g
- Protein: 2g
- Cholesterol: 15mg
