
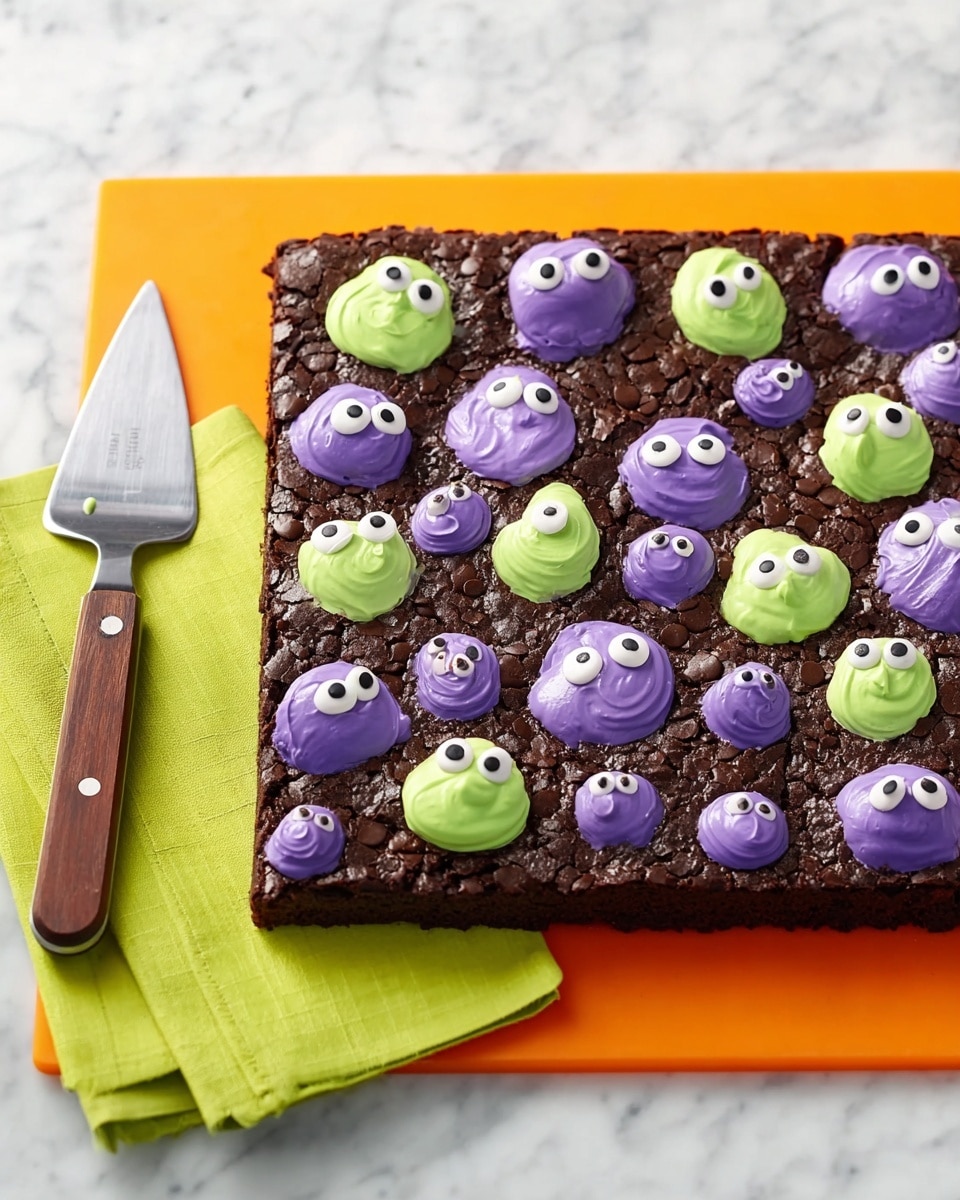
If you’re hunting for a fun and delicious treat to wow your guests this season, let me share this **Spooky Halloween Brownies Recipe** that always steals the show at my Halloween parties. Trust me, these brownies are not just tasty—they’re downright creepy-cute with their neon frosting mounds and candy eyeballs that make every bite feel like a mini Halloween party. Whether you’re baking with kids or need a last-minute dessert that’s both spooky and quick, this recipe has your back.
Why You’ll Love This Recipe
- Super Easy: Uses a boxed brownie mix, so you can whip it up even on a busy day.
- Fun Decoration: Neon frosting and candy eyeballs make these brownies irresistibly festive.
- Crowd-Pleaser: The combination of rich chocolate and creamy frosting gets rave reviews every time.
- Kid-Friendly: Perfect for baking with little helpers who love Halloween themes.

Ingredients You’ll Need
The magic of this Spooky Halloween Brownies Recipe is how simple ingredients come together for a jaw-dropping dessert. You’ll mostly rely on store-bought goodness — brownie mix and ready frosting — which cuts down prep time and keeps it foolproof. Just a few additions bring it all to life.
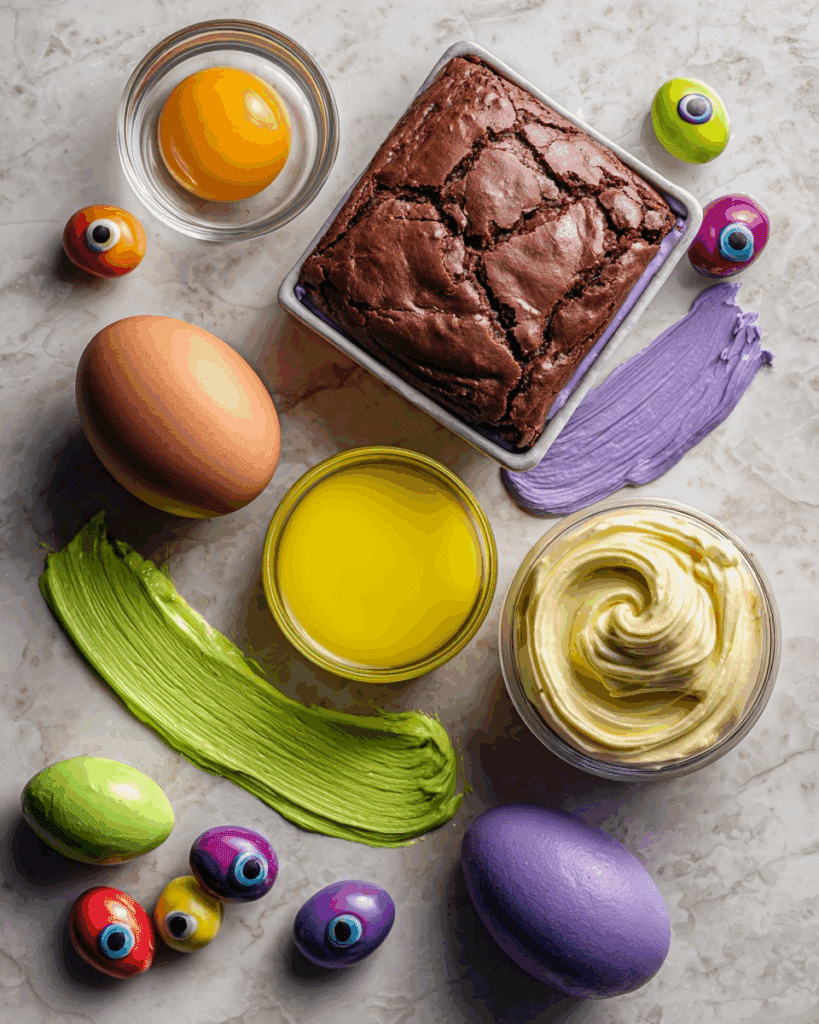
- Betty Crocker™ Delights Supreme Triple Chunk Brownie Mix: This mix is loaded with chocolate chunks that make the brownies extra gooey and decadent.
- Water, vegetable oil, and egg: These are the standard wet ingredients called for by the brownie mix; fresh eggs make the brownies fluffier.
- Betty Crocker™ Rich & Creamy Vanilla Frosting: Using a creamy vanilla frosting gives that perfect smooth base to color and dollop on top.
- Green and Purple Neon Gel Food Colors: These gels give bold colors with just a little dab—no bleeding, no mess.
- Betty Crocker™ Dessert Decorations Candy Eyeballs: Those creepy candy eyeballs add an awesome spooky effect that kids absolutely adore.
Variations
One thing I love about this Spooky Halloween Brownies Recipe is how easy it is to make it your own. I’ve tried a few variations over the years, and you’ll find it’s super flexible based on what you like or have on hand.
- Nutty Treat: Sometimes I add chopped walnuts or pecans into the brownie batter—my family goes crazy for the added crunch.
- Fruity Twist: Swirl some raspberry jam into the frosting before you color it for a subtle fruity surprise.
- Dairy-Free: If you’re catering to allergies, switch out the frosting for a dairy-free vanilla frosting option; it still works wonderfully.
- Spookier Decorations: Swap candy eyeballs for gummy worms or edible Halloween confetti to mix up the look.
How to Make Spooky Halloween Brownies Recipe
Step 1: Bake the Brownies to Perfection
Preheat your oven to 350°F (or 325°F if you’re using a dark or nonstick pan). Line a 9-inch square pan with foil, leaving extra edges over the sides so you can easily lift the brownies out later. Don’t forget to spray the foil with cooking spray—that’s one little trick I discovered that saves you from sticky situations. Prepare the brownie batter according to the box instructions, mixing in the water, oil, and egg. Pour it into your prepared pan and bake as directed, usually around 25-30 minutes. A tip here: check with a toothpick inserted in the center—it should come out with just a few moist crumbs for perfect fudgy brownies. Let it cool completely, about 1 hour 30 minutes. I know waiting is hard, but patience here is key for neat decorating!
Step 2: Lift and Prepare for Decorating
Once cooled, use the foil overhang to gently lift the entire slab out of the pan. Carefully peel away the foil and set the brownies on your favorite serving platter or cutting board. This step always impresses guests because the brownies come out in one perfect piece—so much cleaner than scooping from the pan!
Step 3: Create Your Neon Frosting Mounds
Divide 2/3 cup of vanilla frosting evenly into two small bowls. Add neon green gel food coloring to one bowl and neon purple gel to the other, mixing each until you get your desired vivid shade. Scoop each color into a small resealable plastic bag, seal it just enough so you can squeeze frosting out, then snip off about a 1/4-inch corner. Squeeze the frosting onto the brownie surface in little mounds, switching between green and purple, and vary the sizes to make it visually fun. This playful, colorful frosting is what really makes the Spooky Halloween Brownies Recipe stand out—it’s like edible Halloween art!
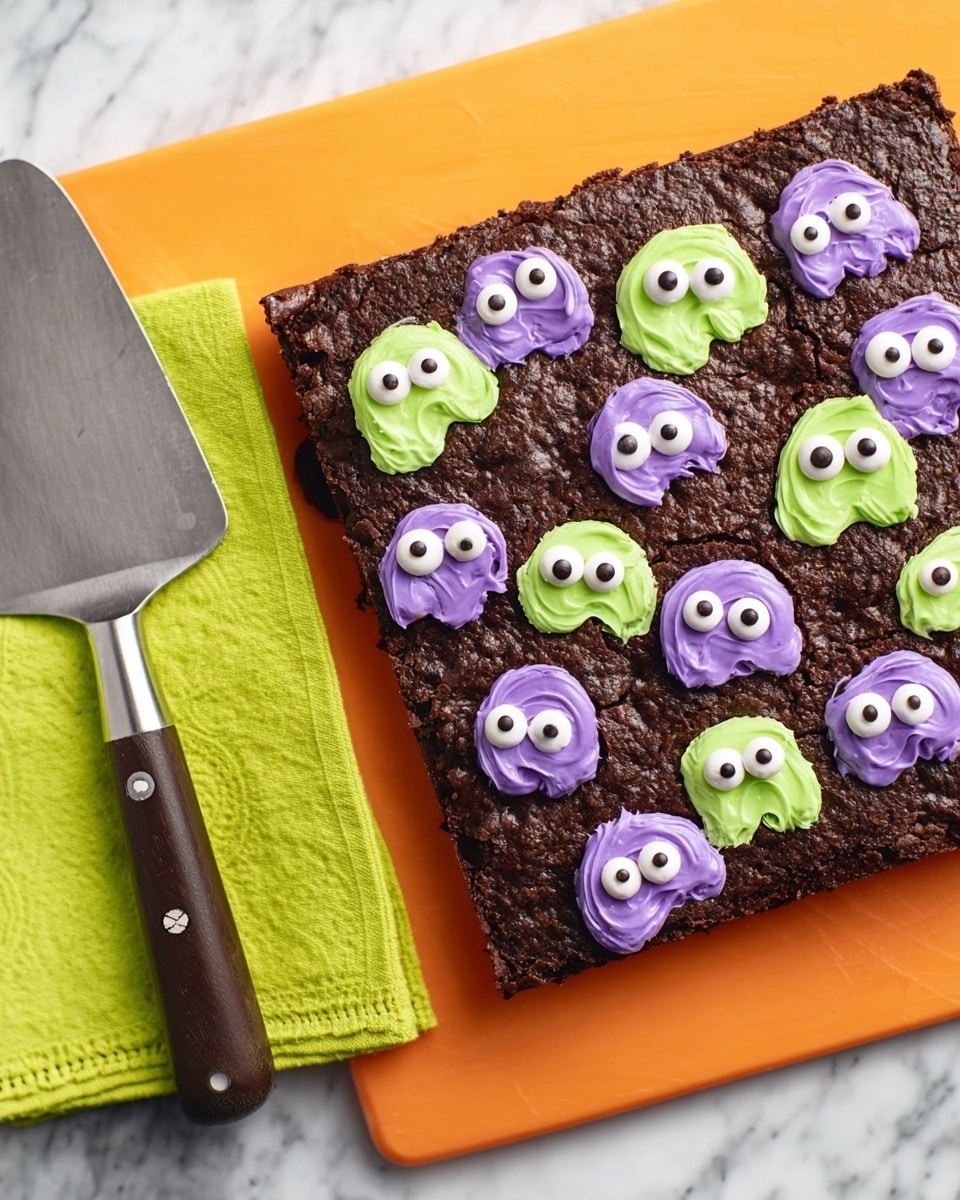
Step 4: Add Those Creepy Candy Eyeballs
While the frosting is still soft, press candy eyeballs on top of each mound. I love how the candy eyeballs peek out from the frosting like little monsters staring back at you—it always gets a giggle or two from kids and adults alike. After decorating, use a sharp knife to carefully cut into 4 rows by 4 rows for 16 festive servings. Store loosely covered at room temperature, but trust me, these don’t last long enough to worry about storage!
Pro Tips for Making Spooky Halloween Brownies Recipe
- Foil Liner Trick: Using foil with overhang makes it so simple to lift the brownies out without any crumbling—total lifesaver.
- Don’t Skip Cooling: Decorating warm brownies will have your frosting melting and colors running—cool completely for clean neon mounds.
- Gel Food Color Concentration: A little gel food color goes a long way; start with a small amount and build up to avoid overly runny frosting.
- Cutting Clean Slices: Wipe your knife clean between cuts for neat brownie squares and to keep those spooky eyeballs in place.
How to Serve Spooky Halloween Brownies Recipe
Garnishes
I love serving these brownies just as they are—the colorful frosting and candy eyeballs are enough to impress. But if I’m feeling extra festive, I sprinkle on some edible glitter or Halloween-themed sprinkles around the edges for that added sparkle and fun. A few strategically-placed gummy spiders can also elevate the spooky factor!
Side Dishes
Pair these brownies with a pumpkin spice latte or a cold glass of milk to balance the sweetness. If you want to add a bit more substance to your Halloween spread, serve alongside caramel apple slices or cinnamon-spiced popcorn for a well-rounded seasonal treat table.
Creative Ways to Present
I’ve hosted a few Halloween candy buffets where I placed these brownies on spooky serving trays surrounded by faux spider webs and flickering battery candles. You can also cut brownies into bite-sized cubes, put toothpicks in, and arrange them in a “monster eye” bouquet in a vase—super cute for parties and great conversation starters!
Make Ahead and Storage
Storing Leftovers
I usually store leftover brownies loosely covered at room temperature for up to 2 days—this keeps the frosting soft and the brownies moist. I try not to seal them too tightly because the frosting can get a bit sticky otherwise.
Freezing
If I want to save some for later, I freeze the brownies *before* frosting them. I wrap the unfrosted brownies tightly in plastic wrap and aluminum foil, then thaw completely before adding frosting and decorations. Freezing with frosting isn’t great because the colors tend to dull and decorations can get damaged.
Reheating
These brownies are best enjoyed at room temperature, so when reheating leftovers, I just bring them out of the fridge and let them sit for 20-30 minutes. If you want a warm bite, a quick 10-second zap in the microwave softens them nicely, but watch out—melting frosting can get messy!
FAQs
-
Can I make these brownies from scratch instead of using a mix?
Absolutely! While this Spooky Halloween Brownies Recipe uses a boxed mix for ease, feel free to use your favorite homemade brownie recipe. Just be sure your batter is thick enough to hold the frosting on top once cooled.
-
What if I don’t have neon gel food colors?
You can use regular gel or liquid food colors if that’s what you have, but neon gels give a brighter, bolder effect perfect for Halloween. If using liquid colors, add sparingly to avoid thinning out the frosting.
-
Can I prepare the brownies a day ahead?
Yes! You can bake and cool the brownies a day in advance. Wait to frost and decorate on the day you plan to serve them to keep the frosting fresh and colors vibrant.
-
How do I prevent the frosting from melting?
Ensure your brownies are fully cooled before frosting. Also, store the finished brownies at room temperature rather than in the fridge, as refrigeration can cause frosting to soften and run. If your house is warm, keep them in a cool spot.
Final Thoughts
I absolutely love how this Spooky Halloween Brownies Recipe combines simplicity with festive creativity. The first time I made these, my family couldn’t stop giggling at the candy eyeballs staring back at them, and I instantly knew it would become a Halloween staple in our home. If you want something quick yet impressive, with minimal fuss but maximum fun, give this recipe a try. It’s one of those treats that not only tastes amazing but creates little moments of joy (and a few spooky surprises) at your party. Happy baking, friend!
Print
Spooky Halloween Brownies Recipe
- Prep Time: 20 minutes
- Cook Time: 35 minutes
- Total Time: 2 hours 25 minutes
- Yield: 16 servings
- Category: Dessert
- Method: Baking
- Cuisine: American
Description
These Spooky Halloween Brownies are a fun and festive treat perfect for autumn celebrations. Made with Betty Crocker Triple Chunk Brownie Mix, these brownies are baked to a rich, fudgy perfection and then decorated with vibrant neon green and purple vanilla frosting mounds, topped with creepy candy eyeballs to create a hauntingly delightful dessert for Halloween parties.
Ingredients
Brownie Base
- 1 box (17.8 oz) Betty Crocker™ Delights Supreme Triple Chunk Brownie Mix
- Water, vegetable oil, and egg as called for on brownie mix box
Frosting
- 2/3 cup from 1 tub (16 oz) Betty Crocker™ Rich & Creamy Vanilla Frosting
- Betty Crocker™ Green Neon Gel Food Color
- Betty Crocker™ Purple Neon Gel Food Color
Decorations
- 50 Betty Crocker™ Dessert Decorations Candy Eyeballs (from 0.88-oz package)
Instructions
- Prepare and Bake Brownies: Preheat your oven to 350°F (or 325°F if using a dark or nonstick pan). Line a 9-inch square baking pan with foil, allowing the foil to extend over the edges for easy removal. Spray the foil-lined pan with cooking spray. Prepare the brownie batter as per the instructions on the box using the water, vegetable oil, and egg. Pour into the prepared pan and bake according to the package directions. Once baked, let the brownies cool completely, approximately 1 hour and 30 minutes.
- Remove Brownies from Pan: Once cooled, use the overhanging foil to lift the brownies out of the pan. Carefully peel the foil away and transfer the brownies onto a serving platter or cutting board for decorating.
- Color and Prepare Frosting: Divide 2/3 cup of vanilla frosting equally into two small bowls. Add neon green gel food color to one bowl and neon purple gel food color to the other, mixing each until you reach vibrant, desired shades. Spoon each colored frosting into separate small resealable plastic food-storage bags. Partially seal the bags and carefully cut off about 1/4-inch from one corner of each bag to create piping bags.
- Decorate Brownies: Pipe the colored frosting in mounded shapes over the top of the brownies, alternating between green and purple and varying the sizes of the frosting mounds for a spooky, uneven look.
- Add Candy Eyeballs: Place candy eyeballs on top of the frosting mounds to create a creepy, eye-catching effect perfect for Halloween.
- Cut and Store: Cut the brownies into 4 rows by 4 rows to yield 16 pieces. Store the decorated brownies loosely covered at room temperature to maintain freshness.
Notes
- Ensure the brownies are completely cooled before frosting to prevent melting the frosting.
- You can adjust the amount of food coloring to achieve the desired neon brightness.
- To make piping easier, warm the frosting slightly if it’s too stiff.
- If you don’t have candy eyeballs, small round candies or chocolate chips can be used as substitutes.
- These brownies are best enjoyed within 2-3 days when stored properly at room temperature.
Nutrition
- Serving Size: 1 piece (1/16 of recipe)
- Calories: 270
- Sugar: 22g
- Sodium: 150mg
- Fat: 14g
- Saturated Fat: 4.5g
- Unsaturated Fat: 7g
- Trans Fat: 0g
- Carbohydrates: 35g
- Fiber: 1g
- Protein: 2g
- Cholesterol: 25mg


