
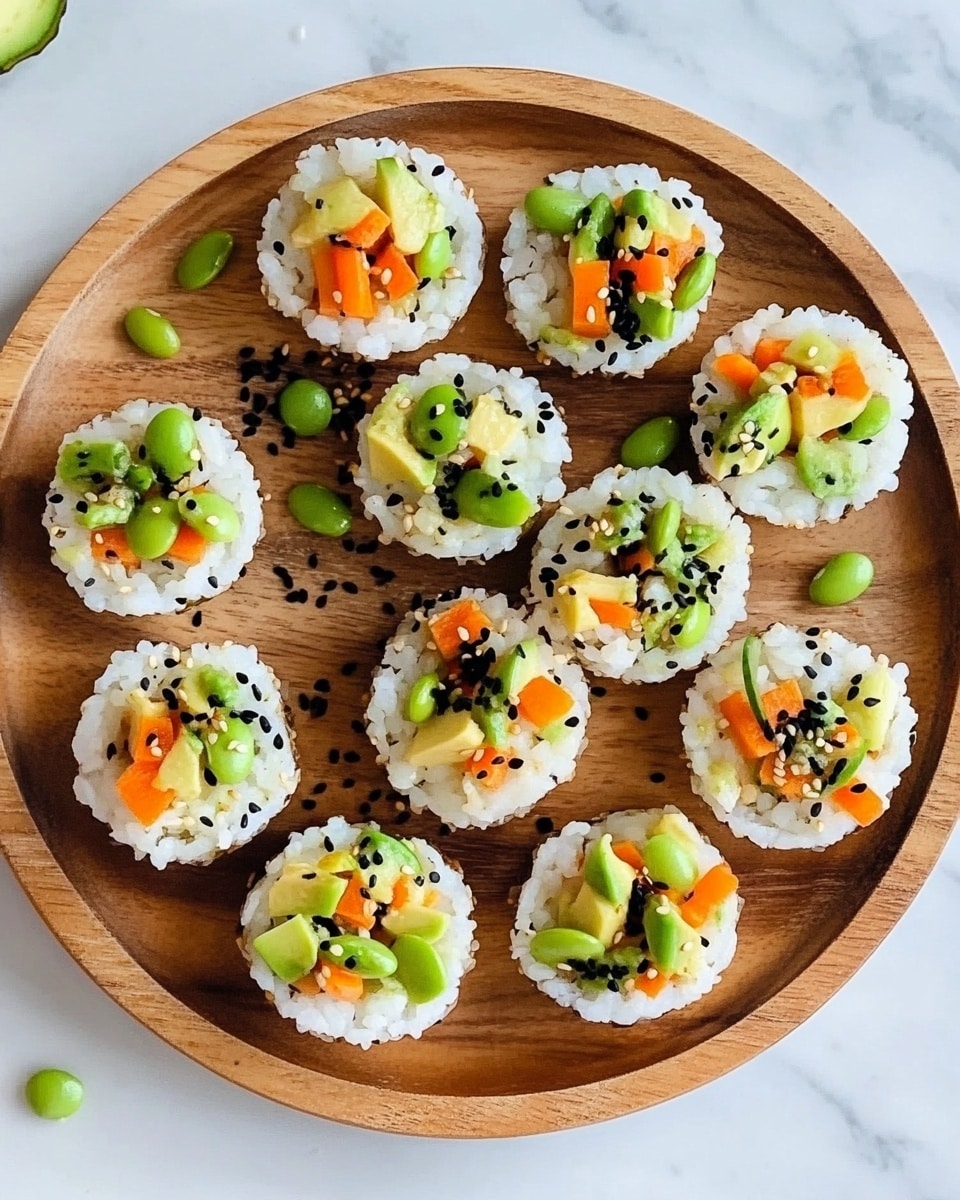
I absolutely love this Sushi Cups Recipe because it takes all the delicious flavors of sushi and turns them into easy-to-handle bite-sized cups that you can enjoy anytime. Whether you’re hosting a casual get-together or just craving something fun and fresh, these sushi cups bring a splash of color and flavor to the table without the fuss of rolling sushi.
When I first tried making sushi cups, I was amazed at how simple the process was—no rolling mats or tricky techniques, just tasty sushi ingredients combined in a creative way. You’ll find that this Sushi Cups Recipe is perfect for meal prep, snack time, or impressing friends with a unique appetizer that’s both healthy and satisfying.
Why You’ll Love This Recipe
- Simple and Fun to Make: No special sushi-making skills needed—just press, fill, and garnish.
- Customizable Flavors: You can swap veggies and sauces to suit your taste or dietary needs.
- Perfect for Entertaining: These bite-sized cups look beautiful on a party platter and are easy to serve.
- Healthy and Fresh: Loaded with veggies and avocado, plus a spicy mayo kick for flavor.

Ingredients You’ll Need
The ingredients for this Sushi Cups Recipe come together so well because sushi rice provides that perfect sticky base while the fresh veggies and avocado add crunch and creaminess. I always recommend using sushi-grade rice for that authentic texture, and fresh, raw-friendly veggies to keep things bright.
- Sushi Rice: Sticky and slightly sweet, it’s essential for keeping your cups intact.
- Water: For cooking the rice perfectly without it getting mushy.
- Chopped Veggies: Choose crunchy, raw options like carrots, cucumber, or bell peppers for freshness.
- Steamed Edamame (Mukimame): Adds little bites of protein and a vibrant pop of green.
- Avocado: Creamy texture to balance the crunch of veggies.
- Sauce (Soy, Tamari, or Coconut Aminos): Adds umami and helps tie the filling flavors together.
- Mayonnaise: The base for our spicy mayo topping, adding richness.
- Sriracha Sauce: For that spicy kick—adjust to your heat preference.
- Honey: Adds a touch of sweetness to the spicy mayo.
- Sesame Oil: Brings a fragrant, nutty flavor to the mayo.
- Black Sesame Seeds: Perfect for garnish and a subtle crunch.
Variations
I love making this Sushi Cups Recipe my own depending on what’s in my fridge or what my family prefers. Don’t hesitate to switch up the veggies or sauce to make it vegetarian, gluten-free, or tailor it to your spice level.
- Seafood Addition: I sometimes add cooked shrimp or raw tuna cubes right on top for a more traditional sushi vibe.
- Vegan Version: Swap the mayo for a vegan mayo and use tamari instead of soy sauce to keep it plant-based.
- Crunch Factor: Adding crushed tempura flakes or toasted nori strips can give a fun texture boost.
- Herb Twist: Fresh cilantro or shiso leaves added to the filling make it taste extra fresh and vibrant.
How to Make Sushi Cups Recipe
Step 1: Cook and Prep the Sushi Rice
Start by rinsing your sushi rice under cold water until it runs clear—this is key to remove excess starch and prevents your rice from getting gummy. Then, combine the rice and water in a pot, bring it to a boil, reduce to low heat, cover, and let it simmer for 20 minutes. One thing I’ve learned is not to peek under the lid while it cooks; patience really pays off here for perfectly tender rice.
Step 2: Form the Rice Cups
Once the rice is slightly cooled, scoop about 2 heaping tablespoons into each cup of your muffin tin. Press it down firmly to shape it well—you want the rice compacted so your sushi cups hold their form when you unmold them. I find chilling the rice cups in the fridge for 20 minutes helps them set and makes them easier to remove without falling apart.
Step 3: Prepare the Veggie Filling
While your rice chills, mix together the chopped veggies, edamame, diced avocado, and your sauce choice in a bowl. This filling is where you can really customize—feel free to toss in whatever raw veggies you love or have on hand. The sauce brings it all together with a savory balance that makes the flavors pop, so don’t skip it.
Step 4: Whip Up the Spicy Mayo
This spicy mayo is my favorite touch—it adds creaminess and a nice heat that gets everyone coming back for more. Just whisk together mayo, sriracha, your soy or coconut aminos, honey, and sesame oil until smooth. Taste and adjust the sriracha so it’s exactly how you like it. I usually go for a moderate kick that isn’t overpowering.
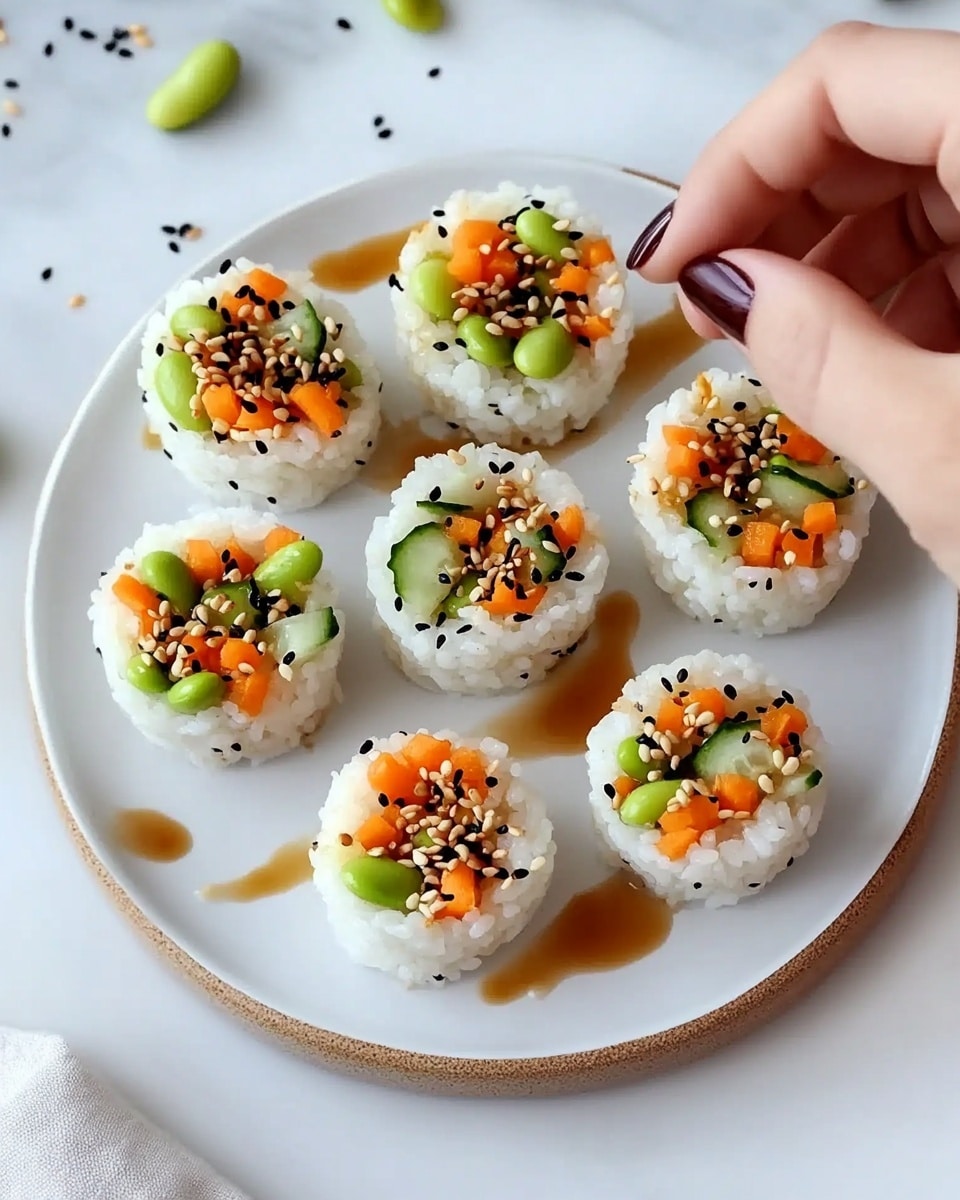
Step 5: Assemble the Sushi Cups
Take your chilled rice cups out of the fridge and spoon a generous heap of the veggie mixture on top of each. Then drizzle your spicy mayo over the filling and finish with a sprinkle of black sesame seeds for a toasty flavor and pretty look. The first time I made these, I was surprised at how quickly they disappeared at the party—everyone loved that mix of textures and flavors!
Pro Tips for Making Sushi Cups Recipe
- Rice Rinsing Matters: Take time to rinse the rice until the water runs clear for the best texture.
- Chill to Set: Don’t skip the chilling step after pressing rice—it helps the cups hold their shape.
- Customize Your Fillings: Feel free to swap veggies and adjust sauces to keep the recipe fresh and exciting.
- Don’t Overfill: Filling too much can make the cups unstable—keep a good ratio for easy serving.
How to Serve Sushi Cups Recipe
Garnishes
I love adding black sesame seeds not only for their subtle crunch but also for that classic sushi look. Sometimes I sprinkle a tiny bit of thinly sliced green onion or a few microgreens on top for freshness and color contrast—it really makes the cups pop on the plate.
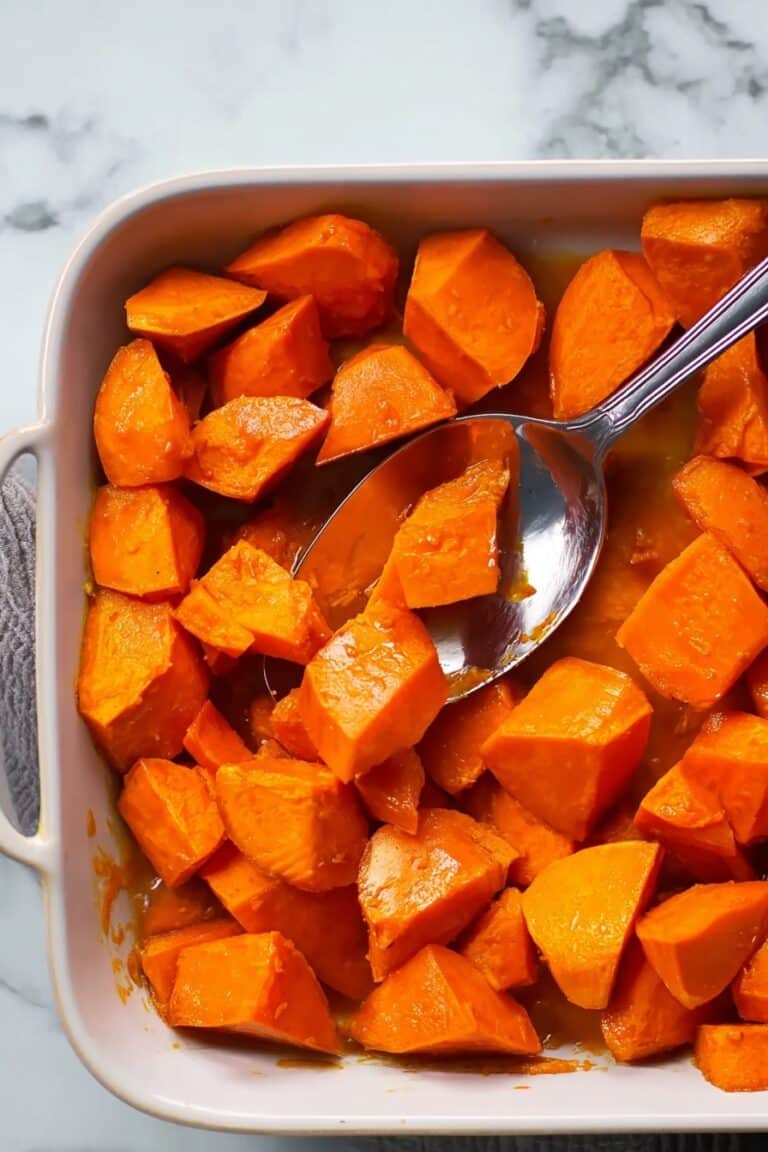
Side Dishes
I often serve these sushi cups alongside a simple miso soup or a light seaweed salad to keep the meal balanced and satisfying. A crisp cucumber salad with rice vinegar dressing also pairs beautifully and brings more brightness to the table.
Creative Ways to Present
For special occasions, I’ve arranged these sushi cups on a slate board with edible flowers and small bowls of soy sauce for dipping. You could also place them on individual little plates with chopsticks for a refined touch or use colorful silicone muffin liners to make them even more festive.
Make Ahead and Storage
Storing Leftovers
Leftover sushi cups can be stored in an airtight container in the fridge for up to 1 day. I recommend keeping the spicy mayo separate and only adding it right before serving to keep the cups from getting soggy.
Freezing
I haven’t had much success freezing sushi cups because the rice texture changes and veggies can get watery. For best results, it’s definitely a fresh-serve kind of snack!
Reheating
If you need to warm them up, I suggest gently microwaving the rice portion on low heat just until warm, then adding fresh filling and mayo after. This keeps textures from turning mushy or soggy.
FAQs
-
Can I use regular rice instead of sushi rice for this Sushi Cups Recipe?
While you can try, sushi rice is best because it’s stickier and holds together well when pressed into cups. Regular long-grain rice tends to be fluffier and less sticky, which might cause your cups to fall apart.
-
What’s the best way to remove the rice cups from the muffin tin?
I find gently running a small knife or offset spatula around each rice cup loosens it nicely. Cooling the cups in the fridge first also makes removal easier without crumbling.
-
Can I make the Sushi Cups Recipe ahead of time for a party?
Absolutely! Just prepare the rice cups and veggie filling in advance, store them separately, and assemble right before serving to maintain freshness and texture.
-
How spicy is the spicy mayo, and can I adjust it?
The spicy mayo has a mild kick that you can easily adjust by adding more or less sriracha according to your taste preferences. I recommend starting small and tasting as you go.
Final Thoughts
This Sushi Cups Recipe quickly became a favorite in my kitchen because it’s a fun twist on traditional sushi that’s easy to make and endlessly customizable. I love how fresh and colorful these bite-sized treats are—they make any meal feel special. Give it a try, and I’m sure you’ll enjoy making and sharing these sushi cups as much as I do with my friends and family!
Print
Sushi Cups Recipe
- Prep Time: 20 minutes
- Cook Time: 20 minutes
- Total Time: 40 minutes
- Yield: 12 sushi cups
- Category: Appetizer
- Method: Stovetop
- Cuisine: Japanese
- Diet: Vegetarian
Description
Delightful and easy-to-make Sushi Cups featuring perfectly cooked sushi rice formed into cups and filled with a fresh mixture of veggies, edamame, and creamy avocado, topped with a spicy mayo drizzle and black sesame seeds. A fun, bite-sized, and customizable twist on traditional sushi that’s perfect for parties or a light meal.
Ingredients
Sushi Ingredients:
- 1 cup sushi rice, rinsed
- 1 1/2 cups water
- 1/2 cup finely chopped veggies of your choice (carrots, cucumber, bell peppers, sprouts)
- 1/4 cup steamed mukimame (shelled edamame)
- 1/4 cup diced avocado (~1/2 small avocado)
- 1 tablespoon sauce of your choice (soy sauce, tamari, or coconut aminos)
Spicy Mayo Ingredients:
- 1/4 cup mayonnaise
- 1 teaspoon Sriracha sauce (adjust to taste)
- 1 teaspoon coconut aminos or soy sauce
- 1 teaspoon honey
- 1/2 teaspoon sesame oil
- Black sesame seeds, for garnish
Instructions
- Cook the Rice: In a medium pot, combine the rinsed sushi rice and water. Bring to a boil over high heat. Once boiling, reduce heat to low, cover the pot, and simmer for 20 minutes or until the water is absorbed and the rice is tender. Remove from heat and let it cool slightly.
- Form Rice Cups: Press about 2 heaping tablespoons of the cooked rice into each cup of a muffin tin. Press down firmly to compact the rice into the shape of a cup. Place the muffin tin in the refrigerator and chill for 20 minutes to allow the rice cups to set and hold their shape.
- Prepare Veggie Filling: In a mixing bowl, combine the finely chopped veggies, steamed edamame, diced avocado, and your choice of soy sauce or coconut aminos. Mix gently but thoroughly to blend all the flavors.
- Make Spicy Mayo: In another bowl, whisk together the mayonnaise, Sriracha sauce (adjust according to desired spiciness), coconut aminos or soy sauce, honey, and sesame oil until smooth and well combined.
- Assemble Sushi Cups: Remove the rice cups from the refrigerator. Spoon a generous tablespoon of the veggie filling into each rice cup. Drizzle the prepared spicy mayo over the filling, and finish by garnishing each cup with black sesame seeds for a lovely contrast and extra flavor.
Notes
- Feel free to customize the veggies to your liking, using other raw vegetables or even cooked seafood pieces for a different twist.
- Ensure the rice is well compacted in the muffin tin to keep the cups from falling apart when removed.
- If you prefer a milder sauce, reduce the amount of Sriracha in the spicy mayo or omit it entirely.
- Spicy mayo can be prepared ahead and stored in the refrigerator for up to 3 days.
- These sushi cups are best served fresh but can be kept refrigerated for up to 24 hours.

