
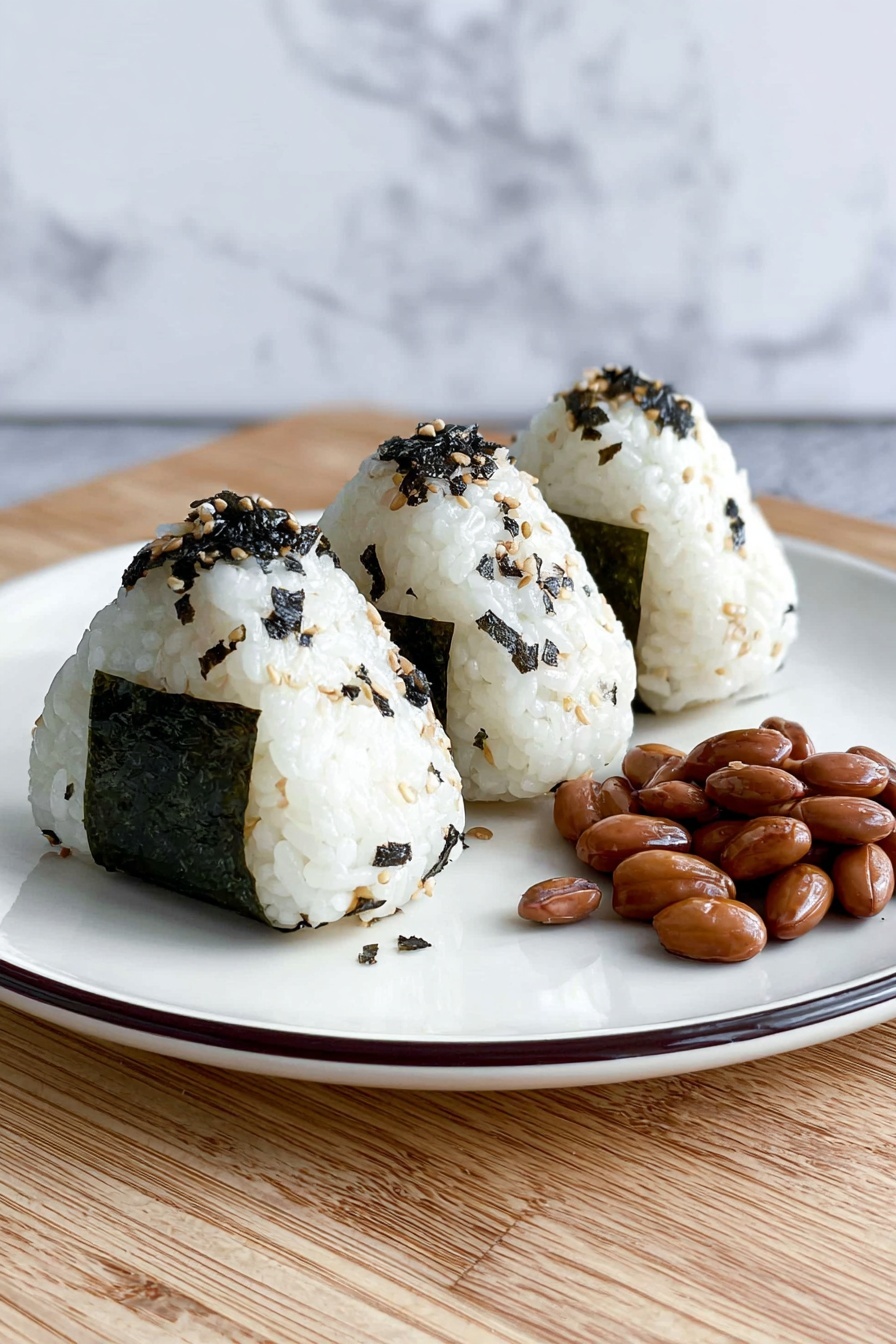
If you’re like me and love snacks packed with flavor yet simple to make, then you’re going to adore this Teriyaki Chicken Onigiri Recipe. These Japanese rice balls filled with sweet and savory teriyaki chicken are not only addictive but also perfect for lunchboxes, picnics, or when you just crave a comforting bite. I absolutely love how this turns out every time, and I’m excited to share all the tips and tricks so you can nail it in your kitchen, too!
Why You’ll Love This Recipe
- Flavorful Filling: The teriyaki chicken glaze is irresistibly sweet and savory, providing a juicy surprise inside each rice ball.
- Perfect Snack or Meal: These onigiris are portable and satisfying, ideal for a quick lunch or party appetizer.
- Beginner-Friendly: Even if you’re new to onigiri, the step-by-step technique makes shaping and assembling easy.
- Customizable: You can tweak the filling or toppings to suit your taste, making it your own comfort food.

Ingredients You’ll Need
These ingredients work beautifully together to create the perfect balance of texture and taste. From the sticky sushi rice that holds everything together to the luscious teriyaki chicken filling, each piece is a little bundle of joy.
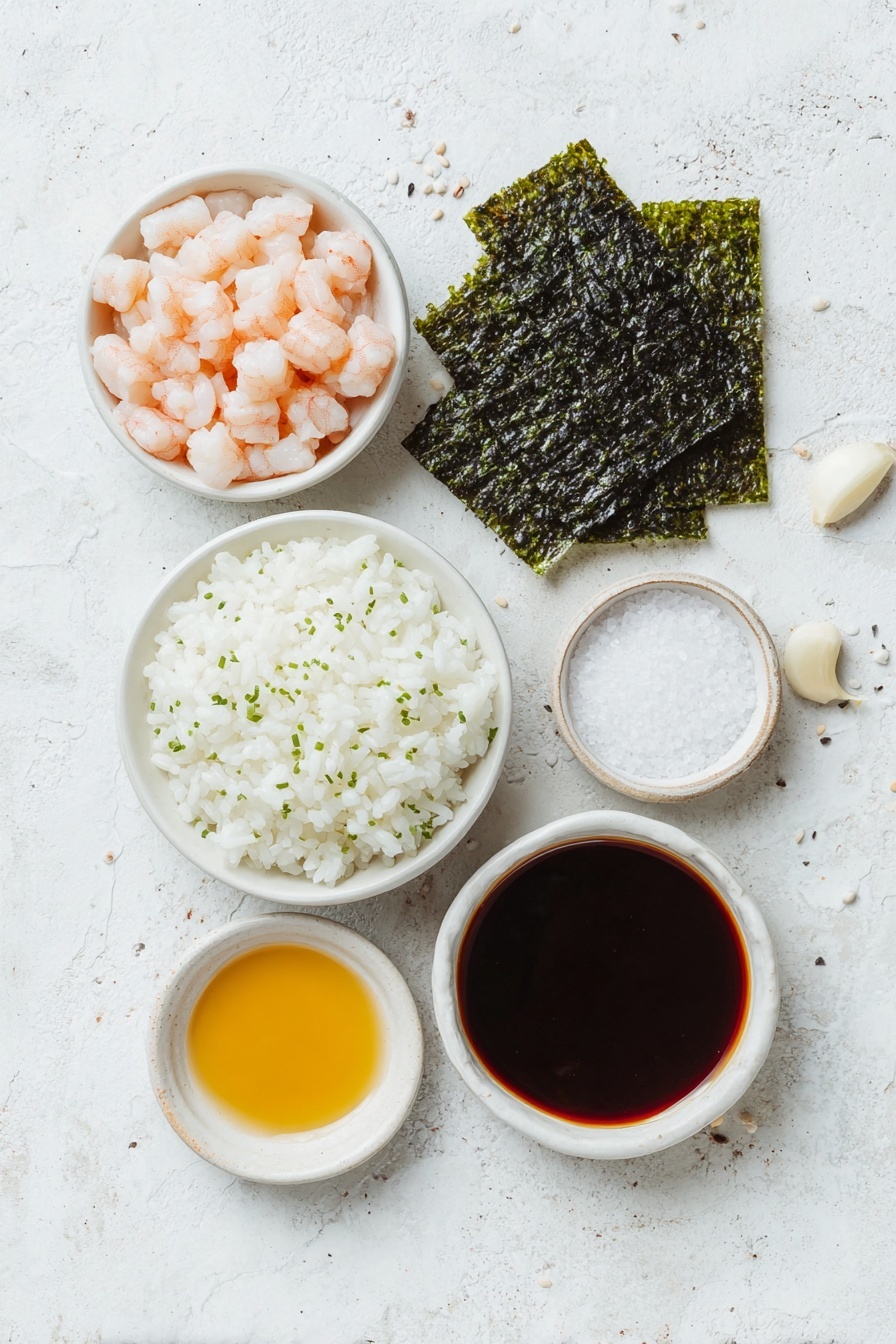
- Cooked Sushi Rice: Sushi rice is key for stickiness; it molds perfectly without falling apart.
- Fine Salt: Enhances overall flavor and seasons the rice gently.
- Furikake: This Japanese rice seasoning adds an extra kick — I sprinkle it on, but mixing in works well too.
- Boneless Skinless Chicken Meat: I prefer drumsticks for juiciness, but breast works fine too.
- Soy Sauce: Present in both marinade and sauce, gives savory depth.
- Sake or Water: Tenderizes chicken when marinating.
- Baking Soda: A secret ingredient to make chicken extra tender — don’t skip!
- Cornstarch: Helps thicken the marinade and gives chicken a great texture.
- Mirin: Adds a subtle sweetness and shine to teriyaki sauce.
- Brown Sugar: Furthers the sweet notes in the teriyaki glaze.
- Oil: For cooking chicken without sticking.
- Minced Garlic: Boosts flavor with a mild aromatic punch.
- Nori Sheet: Cut into small rectangles to wrap the onigiri for hold and that classic umami touch.
Variations
I love to switch things up based on what’s in my fridge or my mood. This Teriyaki Chicken Onigiri Recipe is a fantastic blank canvas, so feel free to make it your own!
- Vegetarian Variation: I sometimes swap the chicken with seasoned shiitake mushrooms sautéed in soy and mirin — surprisingly tasty!
- Spicy Kick: Add a little Sriracha or chili flakes into the teriyaki sauce for a nice heat boost that my family really enjoys.
- Different Fillings: Tuna mayo or grilled salmon are classic alternatives if you want to branch out from chicken.
- Rice Mix-In: Occasionally, I stir in some sesame seeds and chopped scallions to the rice for extra texture and freshness.
How to Make Teriyaki Chicken Onigiri Recipe
Step 1: Prepare the Rice Base
Start by cooking sushi rice according to package instructions — I usually rinse it well first to remove excess starch, which helps with the perfect sticky texture. Once cooked, mix in half a teaspoon of fine salt evenly through the rice. Experimentally, I sprinkled furikake on top after shaping before, but mixing it directly into the rice gives a more consistent flavor throughout.
Step 2: Marinade the Chicken
Cut your chicken into bite-sized pieces, and toss with soy sauce, sake (or water), baking soda, and cornstarch. That baking soda trick is a gem – it tenderizes the meat like magic. Refrigerate this mixture for about 30 minutes; this step really makes the meat juicy and flavorful.
Step 3: Make the Teriyaki Sauce and Cook Chicken
While the chicken marinates, mix soy sauce, mirin, and brown sugar in a small bowl to prepare your teriyaki glaze. Heat oil in a nonstick pan over medium-high heat, then add marinated chicken and cook until it’s done—about 2 to 3 minutes. Next, turn heat down to medium, throw in minced garlic for a quick 30 seconds, and pour in your teriyaki sauce. Keep cooking until the sauce thickens to a lovely shiny glaze. It’s best not to rush this part — patience here yields that perfectly sticky coating.
Step 4: Shape the Onigiri
This is the fun part! Wet your hands with water to prevent sticking, then scoop about a third of a cup of rice into your palm. Make a small well in the center, add a tablespoon of the teriyaki chicken filling, then cover with another third of a cup of rice. Press gently but firmly into a neat triangle shape — imagine giving it a little hug so it holds together. Finally, wrap a small strip of nori around the bottom for that umami punch and easier handling.
Step 5: Serve and Enjoy!
Serve the onigiri fresh for best texture. I love pairing them with some pickled ginger or a light miso soup on the side. Trust me, once you try this Teriyaki Chicken Onigiri Recipe, it’s going to become a favorite go-to!
Pro Tips for Making Teriyaki Chicken Onigiri Recipe
- Wet Your Hands: Always keep your hands wet when shaping rice balls – it stops the rice from sticking to your skin and makes shaping easier.
- Don’t Skip Baking Soda: I used to overlook this step, but adding baking soda to the marinade makes the chicken incredibly tender.
- Glaze Consistency: When cooking the teriyaki sauce, let it thicken fully into a glaze — it clings better to the chicken for maximum flavor.
- Wrap Nori Last: Add the nori just before eating to keep it crisp and flavorful, especially if you’re packing onigiri for later.
How to Serve Teriyaki Chicken Onigiri Recipe

Garnishes
I love adding a sprinkle of toasted sesame seeds or a little more furikake on top for an extra layer of flavor. Sometimes, a light brush of soy sauce on the outside adds a lovely sheen and umami pop that my family raves about.
Side Dishes
My go-to sides with these onigiri are simple — a bowl of miso soup, some pickled vegetables like cucumbers or radishes, and steamed edamame. These balance out the meal and keep it authentically Japanese.
Creative Ways to Present
When I made these onigiris for a casual party, I arranged them on a platter with colorful pickled veggies, and wrapped each with a cute piece of patterned wax paper. They become both a delicious and visual centerpiece that guests love to pick at while mingling.
Make Ahead and Storage
Storing Leftovers
I found that leftover onigiri keeps best wrapped tightly in plastic wrap and stored in the fridge for up to 24 hours. Rice can harden, so it’s best to enjoy soon after making for that soft, fresh texture.
Freezing
If I want to make ahead, I wrap individual onigiris tightly in plastic wrap then place them in a freezer bag. They freeze beautifully, then I thaw them overnight in the fridge when ready to eat.
Reheating
To reheat, I unwrap the plastic and warm the onigiri in the microwave for about 30 seconds to 1 minute until soft and warm. You can also steam them briefly — just be careful not to dry out the rice. I like to add the nori after reheating so it stays crisp.
FAQs
-
Can I use a different type of rice for this onigiri?
Sticky sushi rice is best because it holds together when shaped. Using long-grain rice isn’t recommended since it’s less sticky and can fall apart easily.
-
What if I don’t have mirin for the teriyaki sauce?
You can substitute mirin with a mix of sake and a little sugar, or even sweet white wine to mimic that mild sweetness and aroma.
-
How do I prevent the rice from sticking to my hands while shaping onigiri?
Wet your hands with water before shaping each onigiri, and you can even lightly salt your palms to add flavor and help with sticking.
-
Can I make Teriyaki Chicken Onigiri Recipe vegan?
Absolutely! Replace the chicken with tofu or cooked mushrooms, and use vegan-friendly sauces to keep that umami richness.
Final Thoughts
I hope you give this Teriyaki Chicken Onigiri Recipe a try soon—it’s one of those recipes I come back to over and over for its balance of simplicity, flavor, and comfort. Every time I make it, I’m reminded of cozy family meals and fun snacks on the go. Honestly, it feels special yet easy enough for any day. So grab your rice, chicken, and that irresistible teriyaki glaze — I’m cheering you on from my kitchen to yours!
Print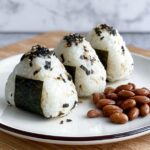
Teriyaki Chicken Onigiri Recipe
- Prep Time: 35 minutes
- Cook Time: 10 minutes
- Total Time: 45 minutes
- Yield: 4 servings
- Category: Snack
- Method: Stovetop
- Cuisine: Japanese
Description
Chicken Onigiri is a delightful Japanese rice ball filled with flavorful teriyaki chicken, seasoned sushi rice, and wrapped in crispy nori. This recipe combines tender marinated chicken glazed in a sweet-savory teriyaki sauce with perfectly seasoned sushi rice, making for a satisfying and portable snack or meal perfect for lunchboxes or picnics.
Ingredients
Rice
- 4 cups cooked sushi rice
- 1/2 teaspoon fine salt
- 2 tablespoons furikake (optional)
Chicken Marinade
- 1/2 pound boneless skinless chicken meat (drumsticks recommended)
- 2 teaspoons soy sauce
- 1 tablespoon sake (or water)
- 1/4 teaspoon baking soda
- 1 teaspoon cornstarch
Teriyaki Sauce
- 1 1/2 tablespoons soy sauce
- 1 tablespoon mirin
- 1 tablespoon firmly packed brown sugar
The Rest
- 1 tablespoon oil
- 1 tablespoon minced garlic
- 1 sheet nori, cut into small rectangles
Instructions
- Season the Rice: After cooking the sushi rice, mix in ½ teaspoon of fine salt and 2 tablespoons of furikake directly into the rice for even seasoning. This will enhance the flavor and texture of your onigiri.
- Prepare the Chicken Marinade: Cut the chicken into small bite-sized pieces. Place them in a bowl with 2 teaspoons soy sauce, 1 tablespoon sake (or water), ¼ teaspoon baking soda, and 1 teaspoon cornstarch. Mix thoroughly and refrigerate for 30 minutes to tenderize and flavor the meat.
- Make the Teriyaki Sauce: In a separate small bowl, combine 1 ½ tablespoons soy sauce, 1 tablespoon mirin, and 1 tablespoon brown sugar. Stir until the sugar is dissolved, creating a balanced sweet and savory glaze.
- Cook the Chicken: Heat 1 tablespoon of oil in a large nonstick pan over medium-high heat. Add the marinated chicken pieces and cook for 2-3 minutes until they are fully cooked through and slightly browned.
- Add Garlic and Thicken Sauce: Reduce heat to medium and add 1 tablespoon minced garlic to the pan. Cook for 30 seconds until fragrant. Pour the prepared teriyaki sauce into the pan and continue to cook, stirring occasionally, until the sauce thickens to a shiny glaze coating the chicken well. Remove from heat.
- Form the Onigiri: Wet your hands with water to prevent sticking. Scoop about ⅓ cup of the seasoned rice into your palm. Make a small indentation in the center and place 1 tablespoon of the cooked teriyaki chicken inside. Cover the filling with another ⅓ cup of rice and shape the whole into a compact triangle using your hands.
- Wrap with Nori: Take a small rectangle of nori and wrap it around the base or side of the formed onigiri to provide structure and a delicious umami flavor. Repeat for remaining onigiri.
Notes
- Use fine salt for seasoning the rice to ensure even distribution and a better taste.
- Furikake is optional but adds an extra layer of flavor; sprinkle it inside the rice or on top after shaping the onigiri.
- Wetting your hands with water is essential before shaping to prevent rice from sticking.
- The baking soda tenderizes the chicken and the cornstarch helps create a glossy texture once cooked.
- Make sure the teriyaki sauce thickens sufficiently to glaze the chicken well; this prevents the filling from being too wet.
- Onigiri can be enjoyed warm or at room temperature and makes for a great on-the-go snack or meal prep option.
Nutrition
- Serving Size: 1 onigiri (approx.)
- Calories: 280 kcal
- Sugar: 7 g
- Sodium: 600 mg
- Fat: 6 g
- Saturated Fat: 1 g
- Unsaturated Fat: 4 g
- Trans Fat: 0 g
- Carbohydrates: 40 g
- Fiber: 2 g
- Protein: 15 g
- Cholesterol: 45 mg


