
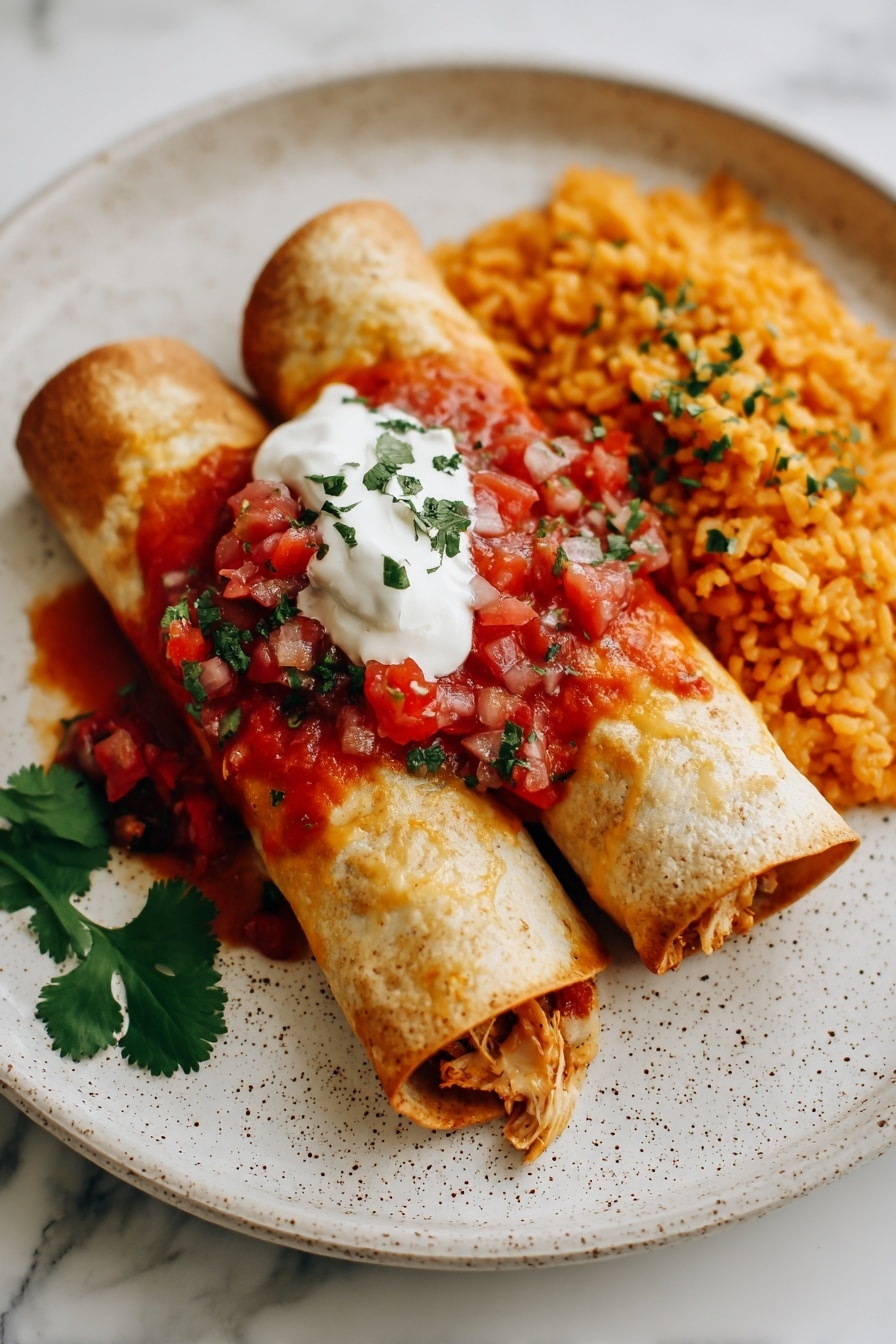
If you’re craving crispy, cheesy, and downright delicious Mexican-inspired comfort food, let me introduce you to The Best Chicken Chimichangas Recipe. I absolutely love these because they’re packed with juicy shredded chicken, melty cheeses, and that perfect crispy tortilla shell you just can’t resist. When I first tried making chimichangas at home, I used to worry about soggy edges or flavorless filling, but this recipe nails it every single time. Trust me, once you get these on your plate, you’ll keep coming back for more — and your family will go crazy for them too!
Why You’ll Love This Recipe
- Loaded with Flavor: The blend of spices, cheese, and salsa verde creates an irresistible savory filling.
- Crunchy Perfection: Pan-frying gives you that golden, crispy shell, way better than soggy baked options.
- Quick & Easy: Uses simple pantry staples and rotisserie chicken so you can whip this up fast.
- Family Favorite: Everyone from kids to adults loves these chimichangas—and they’re perfect for gatherings!

Ingredients You’ll Need
The key to The Best Chicken Chimichangas Recipe is balancing savory shredded chicken, melty cheese, and just the right spice kick. I always recommend using a good quality rotisserie chicken for ease and flavor, and fresh cheeses to get that creamy melt inside.
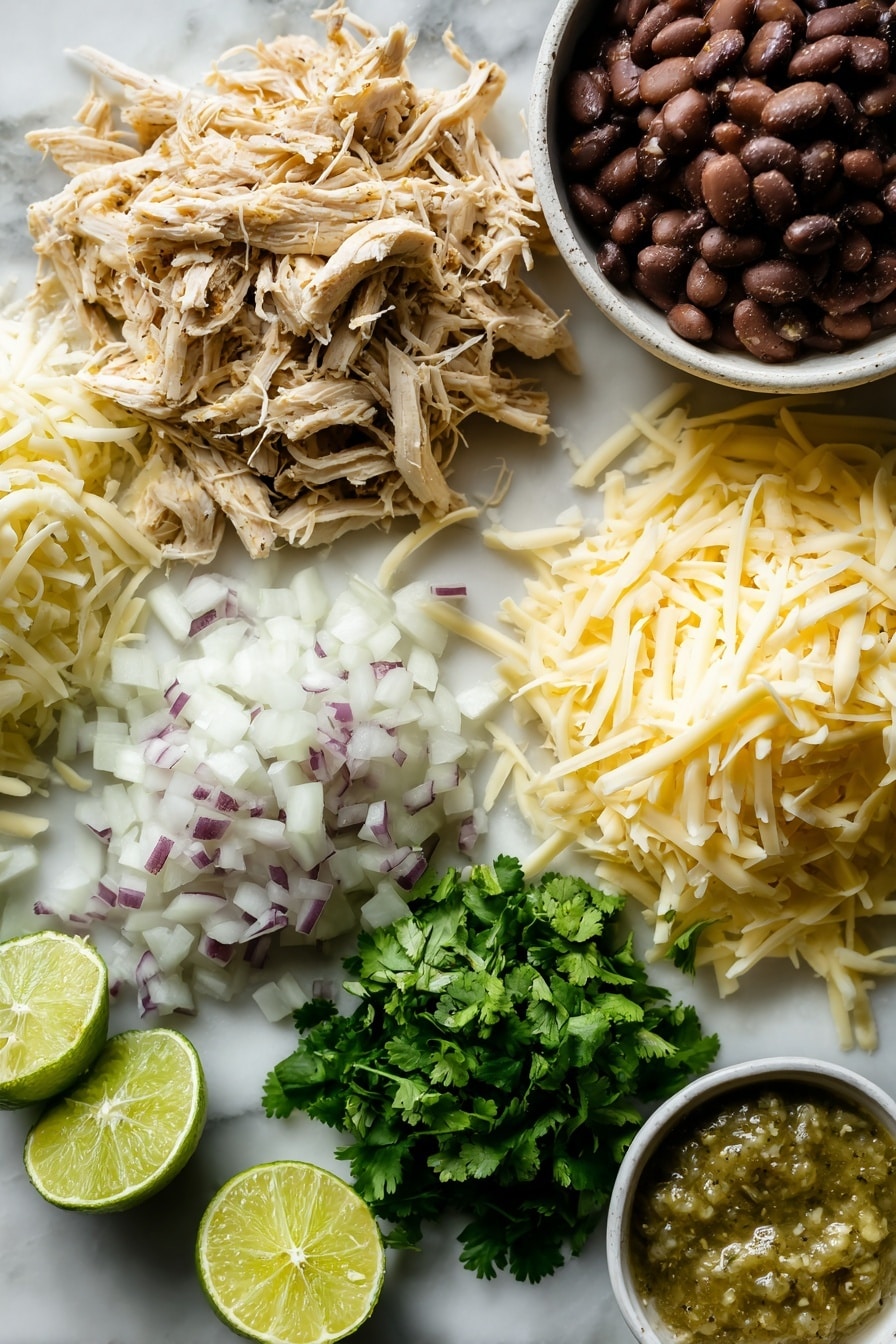
- Shredded chicken: Rotisserie chicken saves time and adds great flavor, or use your homemade shredded chicken if you prefer.
- Sweet onion: Adds a subtle sweetness and crunch when sautéed—don’t skip this step!
- Avocado oil: Perfect for frying because of its high smoke point and neutral taste.
- Chili powder, ground cumin, paprika: These spices bring warmth and depth; adjust amounts to taste if you like it spicier.
- Salsa verde: Provides tangy, herbal brightness that elevates the filling.
- Monterey Jack cheese: Melts beautifully, creating that gooey texture inside.
- Oaxaca cheese: If you can’t find it, mozzarella works—but Oaxaca gives the authentic creamy stretch.
- Fresh lime juice: Adds a touch of acidity to brighten the flavors.
- Flour tortillas (burrito size): Large and flexible, they wrap the filling snugly for easy frying.
- Refried beans: A creamy base layer inside that adds richness.
- Guacamole, sour cream, salsa, fresh cilantro: Essential garnishes to finish and freshen these up.
Variations
I love that The Best Chicken Chimichangas Recipe is easy to tweak based on what you have or prefer. I usually stick to the original, but sometimes I switch it up to suit moods or diet needs. Feel free to make it your own!
- Make it vegetarian: Replace the chicken with sautéed mushrooms or roasted veggies plus extra beans, and it’s just as satisfying.
- Spice it up: Add chopped jalapeños or a sprinkle of cayenne if you want more heat—my husband loves the kick.
- Cheese swaps: For a sharper flavor, try pepper jack or a mix of cheddar and mozzarella if Oaxaca cheese isn’t available.
- Oven-baked option: If you want to skip frying, brush the chimichangas with oil and bake until crispy, though frying really is better texture-wise.
How to Make The Best Chicken Chimichangas Recipe
Step 1: Sauté the Aromatics and Chicken
Start by heating a tablespoon of avocado oil over medium heat in your skillet. Toss in the diced sweet onion and let it cook until softened and fragrant—about 3-4 minutes. This brings out a subtle sweetness that balances the spices beautifully. Then, add the shredded chicken along with chili powder, cumin, paprika, salt, and pepper. Stir everything together well and cook for another 3-5 minutes so the chicken absorbs all those cozy flavors.
Step 2: Mix in Salsa Verde and Cheeses
Once your chicken mixture is ready, transfer it to a bowl. Now add the salsa verde—that tangy, zesty star of the show—along with both Monterey Jack and Oaxaca cheeses. Stir gently until the cheese just begins to melt into the warm chicken, creating that perfect creamy texture. Finish this off with a tablespoon of fresh lime juice to brighten everything up. This layer of flavor is what makes the filling so irresistibly good.
Step 3: Assemble Your Chimichangas
Lay a large flour tortilla flat on your work surface. Spread about ¼ cup of refried beans in the center as a creamy base. Then spoon roughly a quarter of the chicken and cheese filling on top. Now comes the folding trick: fold in the sides, then roll it up tightly from the bottom to encase all that goodness inside. This wrapping technique keeps everything snug during frying and prevents leaks—trust me, it makes a huge difference!
Step 4: Pan-Fry to Golden Perfection
Heat a thin layer of avocado oil in a skillet over medium heat—just enough to coat the bottom and crisp the tortillas without drowning them in oil. Place each chimichanga seam-side down first; this helps keep them sealed while frying. Cook each side for 2-3 minutes until golden and crispy, flipping carefully with tongs. If you’re making multiple batches, add more oil as needed to keep the crust perfectly crunchy.
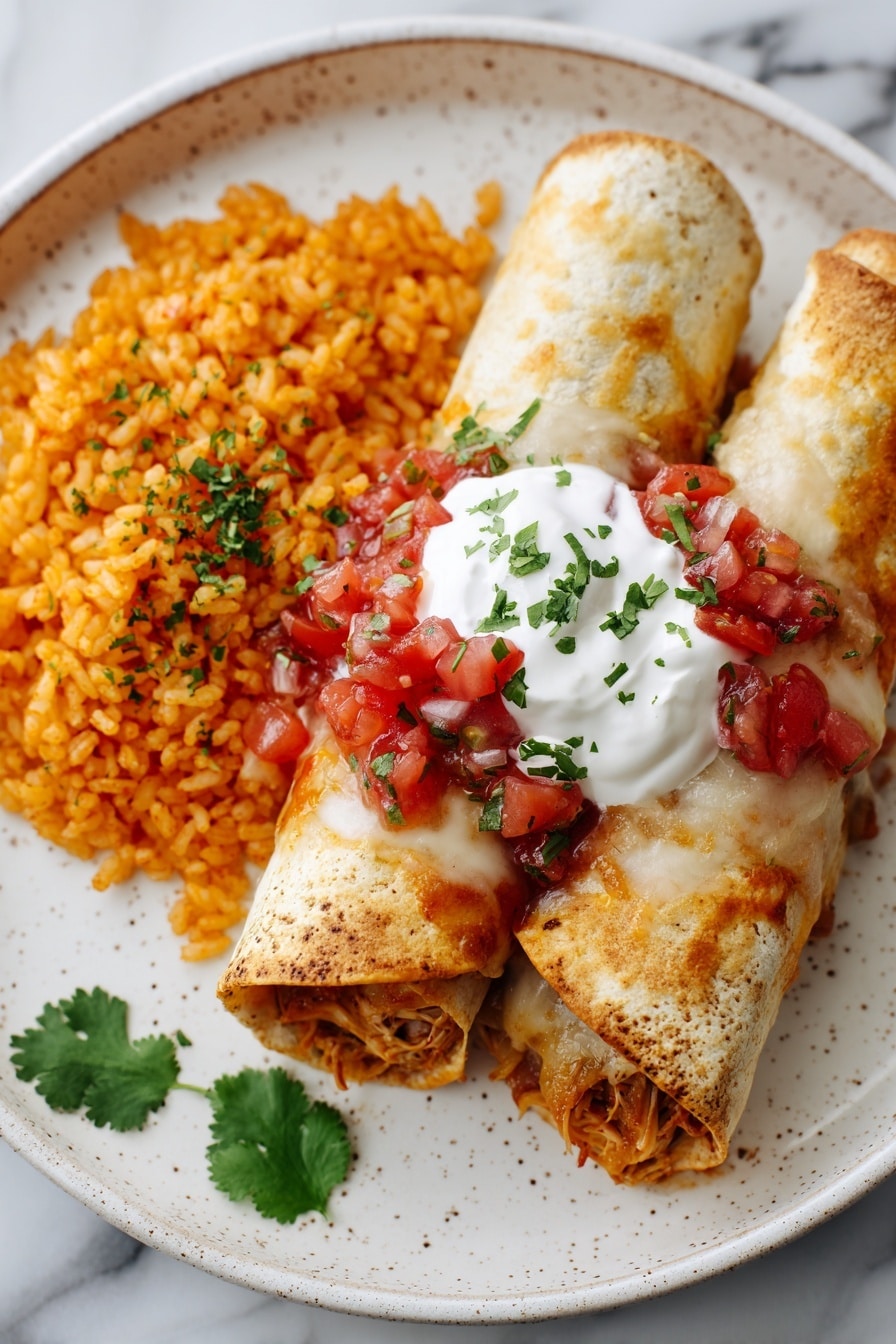
Step 5: Serve Hot with Your Favorite Toppings
Plate your crispy chimichangas and top with creamy guacamole, tangy sour cream, fresh salsa, and a sprinkle of chopped cilantro. These garnishes add freshness and coolness that contrast beautifully with the warm, cheesy filling. I like to serve these right away while they’re still crunchy, but leftovers are great too (more on that below!).
Pro Tips for Making The Best Chicken Chimichangas Recipe
- Use warm tortillas: I always warm my tortillas slightly before assembling to make them more pliable and easier to roll without tearing.
- Don’t overfill: Less is more when it comes to stuffing—overfilling can cause leaking and soggy edges after frying.
- Fry seam side down first: This prevents the filling from escaping and helps seal your chimichanga tightly.
- Control oil temperature: Medium heat keeps your chimichangas crisp without burning; too hot and they brown on the outside before heating through.
How to Serve The Best Chicken Chimichangas Recipe
Garnishes
I’m a huge fan of simple, fresh garnishes that add a cool contrast to the crispy, warm chimichangas. I almost always use guacamole, sour cream, and salsa, plus a sprinkle of fresh cilantro because it brightens every bite. If you want to get fancy, a squeeze of lime or pickled jalapeños on top adds wonderful zing.
Side Dishes
These chimichangas are pretty hearty, but I like pairing them with a light side like a crisp Mexican slaw or a simple mixed green salad with citrus dressing to cut through the richness. Mexican rice or a warm corn salad also works beautifully if you want something more filling.
Creative Ways to Present
For special occasions, I’ve rolled these chimichangas a bit smaller, popped them upright in a baking dish, topped them with enchilada sauce and cheese, and baked until bubbly—giving a fun twist on traditional enchiladas. They also make excellent finger foods for parties when sliced into bite-sized pieces with toothpicks.
Make Ahead and Storage
Storing Leftovers
I usually store leftover chimichangas wrapped individually in plastic wrap or foil in the fridge. They keep well for 2-3 days and stay pretty crispy if you reheat them correctly (more on reheating next!).
Freezing
I’ve frozen assembled but un-fried chimichangas successfully by wrapping each tightly in plastic wrap and then foil, placing them in a freezer bag. When ready to eat, I thaw overnight in the fridge and pan-fry fresh for that perfect crunch.
Reheating
To keep them crispy and delicious, I reheat leftover chimichangas in a skillet over medium heat or in a toaster oven rather than the microwave. This helps restore that crunch without making the tortilla soggy.
FAQs
-
Can I bake chimichangas instead of frying?
Yes! Baking is a healthier alternative. Brush the rolled chimichangas with oil, place seam side down on a baking sheet, and bake at 400°F (200°C) for 15-20 minutes, flipping halfway through until golden and crispy. Keep in mind, frying gives a more authentic crispy texture, but baking works well too.
-
What cheese can I substitute if I can’t find Oaxaca cheese?
If Oaxaca cheese isn’t available, mozzarella is a great substitute as it similarly melts and stretches. Pepper jack or a mild cheddar can add a different twist, but mozzarella stays closest to the classic creaminess.
-
Can I make these ahead for a party?
Absolutely! Assemble them ahead, store in the fridge wrapped tightly, and fry just before serving for maximum freshness and crispiness. Alternatively, you can freeze pre-assembled chimichangas and fry after thawing when guests arrive.
-
What’s the best way to avoid a soggy chimichanga?
Be careful not to overfill and ensure the tortilla is tightly wrapped and sealed. Also, frying seam-side down first helps seal the edges, preventing leaks. Using enough oil to crisp the shell evenly is key too.
Final Thoughts
This recipe holds a special place in my kitchen because it brings together simple, flavorful ingredients in a way that feels both comforting and festive. The Best Chicken Chimichangas Recipe is my go-to when I want to impress without fuss and please a crowd. I encourage you to try it for your next meal—you’ll love the satisfying crunch and cheesy, zesty filling as much as I do. Once you nail this one, I promise chimichangas will become a regular in your recipe rotation!
Print
The Best Chicken Chimichangas Recipe
- Prep Time: 5 minutes
- Cook Time: 20 minutes
- Total Time: 25 minutes
- Yield: 4 servings
- Category: Main Dish
- Method: Frying
- Cuisine: Mexican
Description
These Chicken Chimichangas are crispy, cheesy, and packed with flavorful shredded chicken seasoned with chili powder, cumin, and paprika, combined with salsa verde and melted cheeses. Wrapped in large flour tortillas and pan-fried to golden perfection, they make a satisfying Mexican-inspired meal served with fresh guacamole, sour cream, salsa, and cilantro.
Ingredients
For the Filling:
- 2 cups shredded chicken (rotisserie or homemade)
- 1 small sweet onion, diced
- 1 tbsp avocado oil, plus more for frying
- 1 tsp chili powder
- ½ tsp ground cumin
- ½ tsp paprika
- Salt and pepper to taste
- ¼ cup salsa verde
- 1 cup Monterey Jack cheese, shredded
- ½ cup Oaxaca cheese, shredded
- 1 tbsp fresh lime juice
For Assembly:
- 4 large flour tortillas (burrito size)
- 1 cup refried beans
For Garnish:
- Guacamole
- Sour cream
- Salsa
- Fresh cilantro, chopped
Instructions
- Cook the Filling: Heat 1 tablespoon avocado oil in a skillet over medium heat. Add the diced onion and sauté until softened and translucent, about 3-4 minutes. Then add the shredded chicken along with chili powder, ground cumin, paprika, salt, and pepper. Stir to combine and cook for another 3-4 minutes until the spices are well integrated and the mixture is heated through.
- Mix in Salsa and Cheese: Transfer the chicken mixture to a bowl. Add ¼ cup salsa verde, 1 cup shredded Monterey Jack cheese, and ½ cup shredded Oaxaca cheese. Stir quickly so the residual heat helps the cheese start to melt into the mixture. Finally, add 1 tablespoon fresh lime juice and mix well to brighten the flavors.
- Assemble the Chimichangas: Lay one large flour tortilla flat on a clean surface. Spread ¼ cup of refried beans in the center, then add about one-quarter of the chicken and cheese filling on top of the beans. Fold the sides of the tortilla inward, then roll up tightly from the bottom to encase the filling completely, forming a neat burrito shape. Repeat for the remaining tortillas and filling.
- Pan Fry the Chimichangas: Pour a thin layer of avocado oil into a large skillet and heat over medium heat until shimmering. Place each chimichanga seam-side down carefully into the hot skillet. Fry for about 2 to 3 minutes per side, turning gently to ensure all sides turn golden brown and crispy. Add more oil between batches if necessary to maintain frying crispness. Drain on paper towels after frying.
- Serve: Serve the chimichangas hot topped or accompanied by guacamole, sour cream, salsa, and a sprinkle of fresh chopped cilantro for a fresh herbal note.
Notes
- Use freshly shredded chicken for the best texture and flavor; rotisserie chicken is a great shortcut.
- If you prefer, you can bake the chimichangas at 400°F for 15-20 minutes instead of frying for a lighter version.
- Make sure to seal the chimichangas tightly to prevent filling from leaking during frying.
- You can substitute Monterey Jack and Oaxaca cheeses with other melty cheeses like mozzarella or cheddar if needed.
- Adjust the spice level by adding more or less chili powder to taste.
Nutrition
- Serving Size: 1 chimichanga
- Calories: 500 kcal
- Sugar: 3 g
- Sodium: 750 mg
- Fat: 28 g
- Saturated Fat: 10 g
- Unsaturated Fat: 15 g
- Trans Fat: 0 g
- Carbohydrates: 40 g
- Fiber: 5 g
- Protein: 28 g
- Cholesterol: 85 mg
